

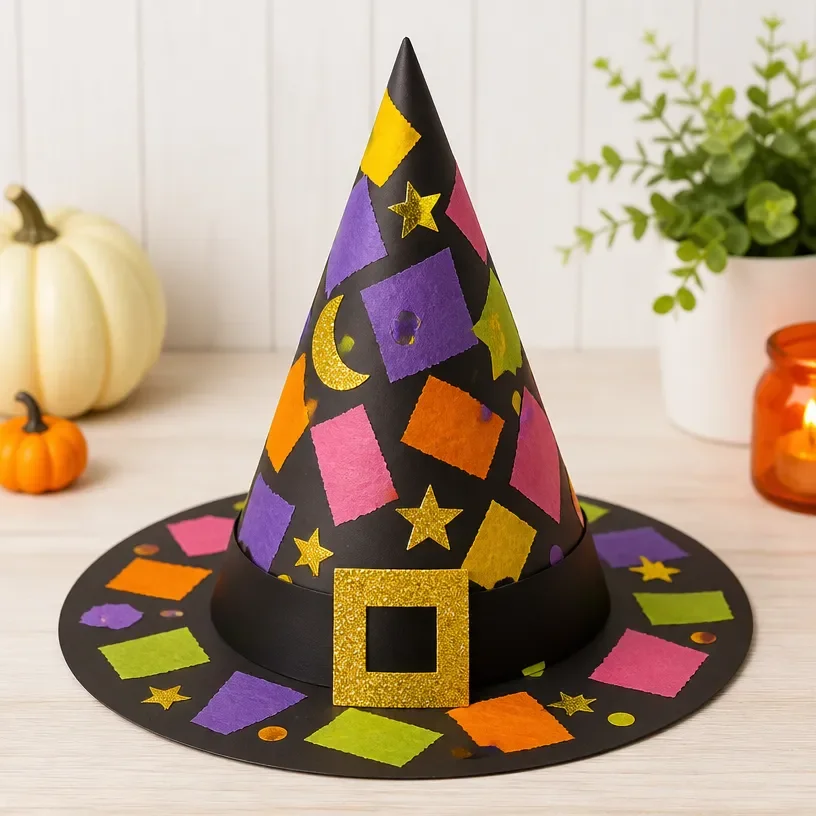
Halloween Witch Hat Collage Craft for Kids is a delightful seasonal project that allows children to engage in creativity while making something fun to display for the holiday. This craft involves creating whimsical hats that can be showcased as part of your Halloween decor. It’s approachable for crafters of all ages, providing a wonderful opportunity to spend quality time together at the crafting table. You may also find Diy Sensory Bottles Fireworks Kids Playtime useful.
What makes this project even more enticing is the ability to personalize each witch hat using various colors, patterns, and materials. It’s a great way to get into the Halloween spirit, making it perfect for kids’ parties, classroom activities, or simply a fun afternoon at home. By incorporating different textures and elements, your little ones can create their unique masterpieces that showcase their character and style.
Why You’ll Love This Halloween Witch Hat Collage Craft for Kids
There are several reasons why the Halloween Witch Hat Collage Craft for Kids captures the hearts of both parents and children alike. First and foremost, it allows kids to explore their creative side. Using various art supplies, they can let their imaginations flow freely while putting together colorful and festive hats decorated with their favorite materials.
Moreover, this project is budget-friendly, as it primarily utilizes inexpensive, often-reusable materials such as paper, stickers, and craft glue. These hats not only serve as a fun decoration but also make meaningful keepsakes for years to come. The collage element adds a personal touch that showcases children’s blooming artistry, making it an ideal addition to your seasonal decor.
Before You Start
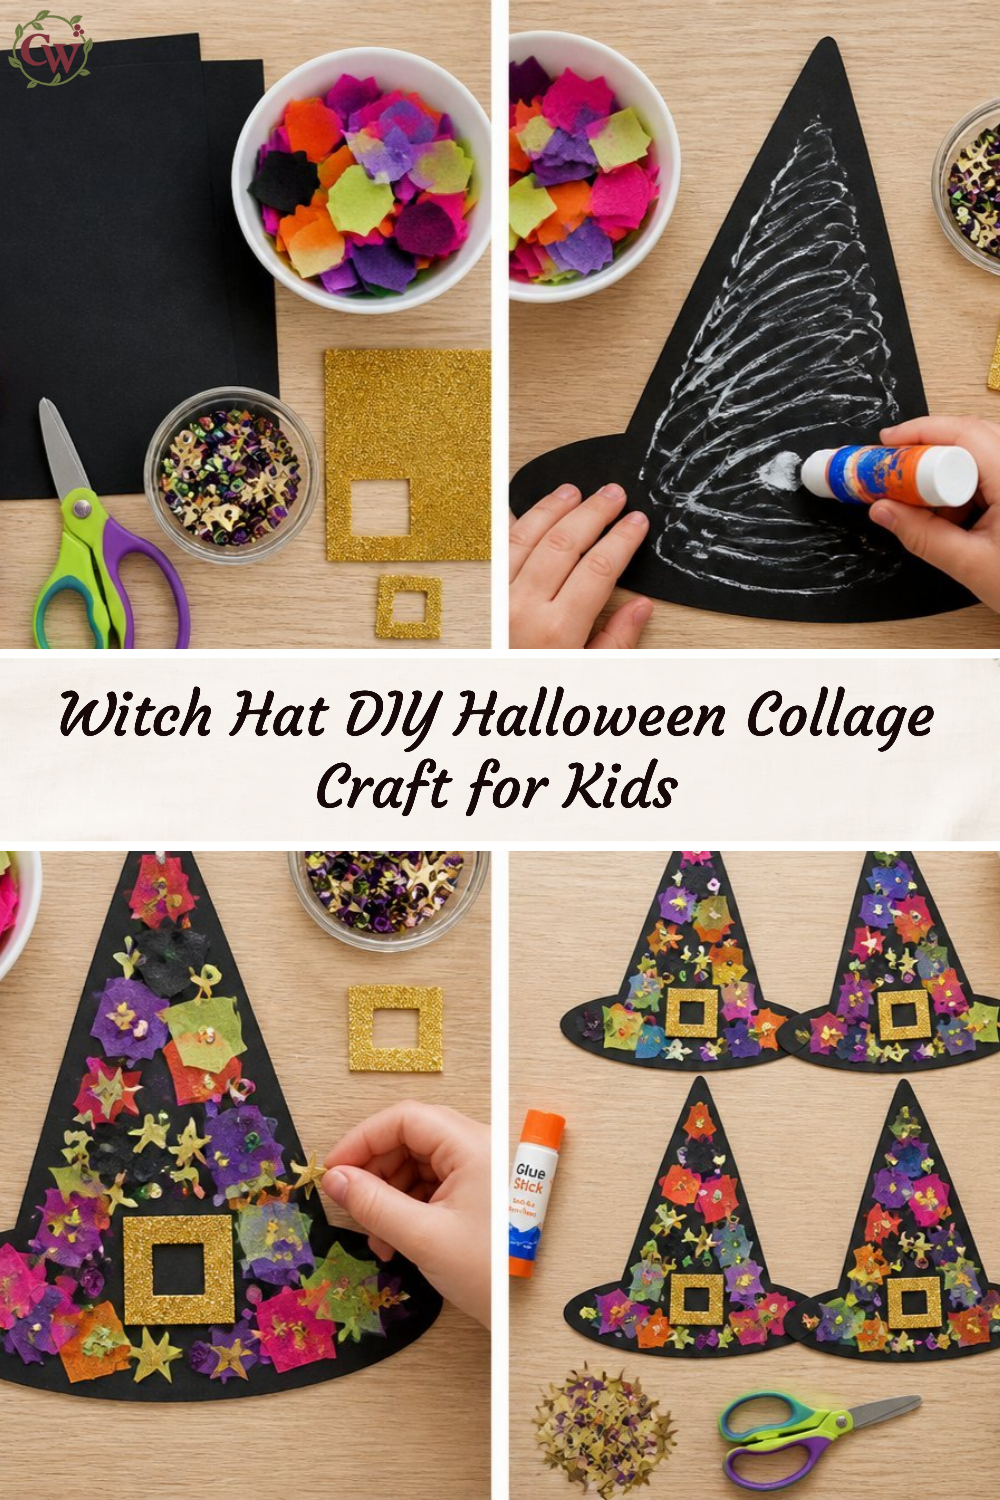
Before beginning the Halloween Witch Hat Collage Craft for Kids, take a moment to envision the finished pieces. You’ll want to prepare a workspace that allows for plenty of creativity and room to spread out materials like paper, glue, and decorations. I recommend gathering everything you might need before you start to keep the crafting process smooth and enjoyable.
While assembling the hats, arranging each piece in a way that feels balanced and attractive is essential. Pay careful attention to layering, which adds depth to the collage. This project is not only about crafting but also about sharing a fun experience, so don’t forget to let the kids take charge of their creations.
“A handmade touch makes every home feel warmer.”
Materials and Supplies
Materials and Supplies
Here’s a list of materials needed for making your Halloween Witch Hat Collage Craft for Kids:
- Construction paper (black, purple, orange)
- Craft glue or glue sticks
- Scissors
- Stickers (such as stars, ghosts, or sparkles)
- Decorative ribbon
- Markers or crayons
- Glitter (optional)
- Cardboard for a sturdy base
When selecting your materials, consider the colors that resonate with your child and the aesthetics of Halloween. Cardboard is a great option for the base as it provides enough sturdiness for the hats, while construction paper offers vibrant colors that pop when displayed.
How to Make Halloween Witch Hat Collage Craft for Kids
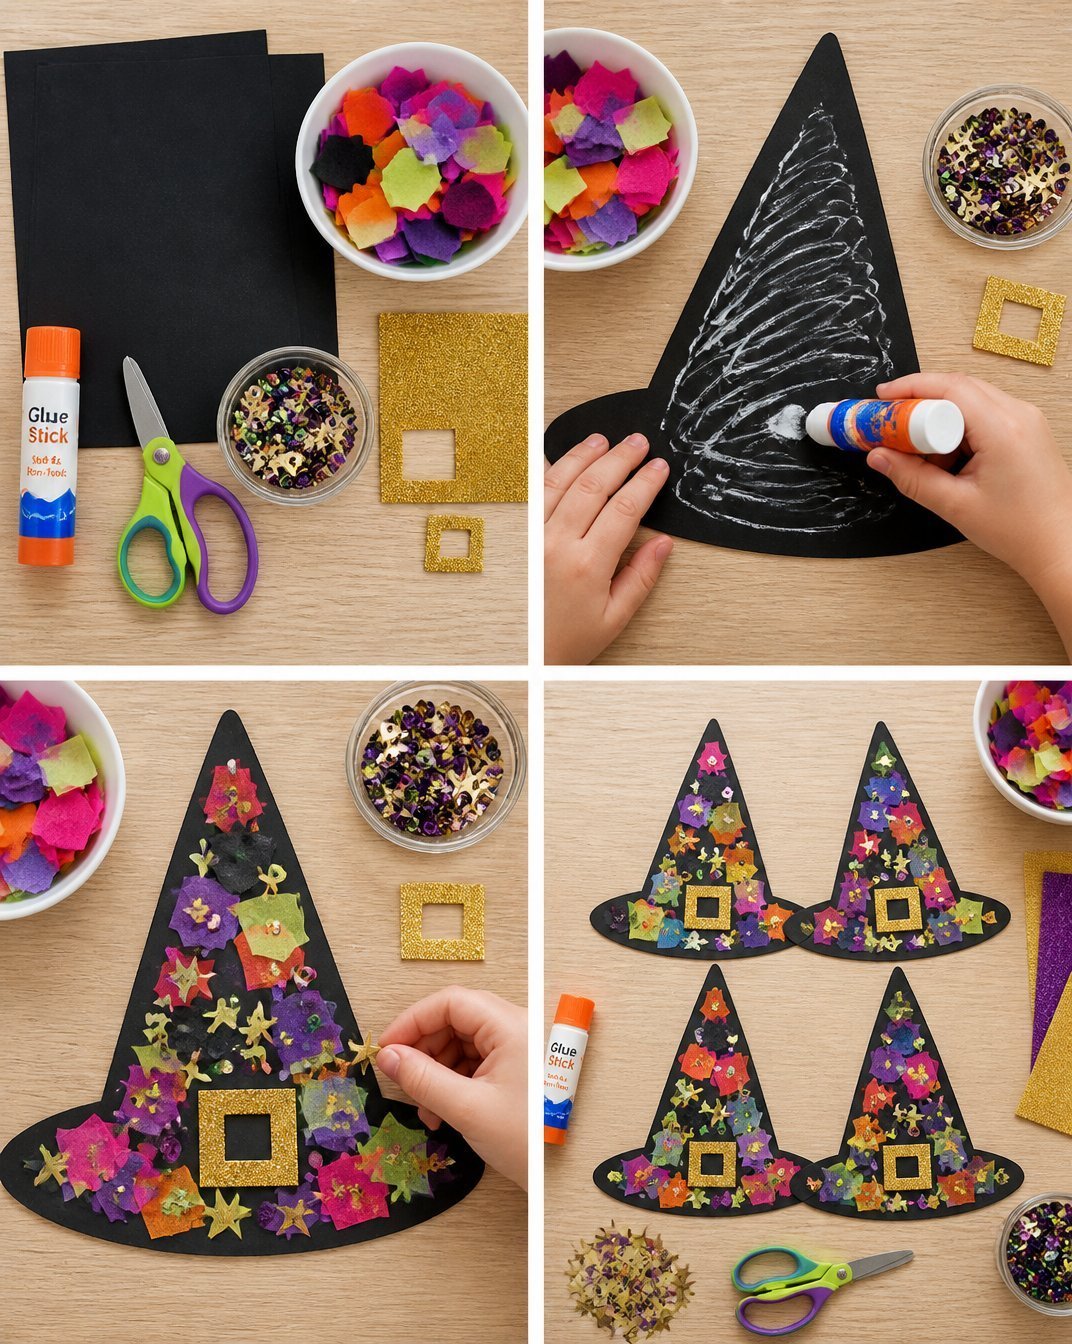
Prepare the Base: Start by cutting out a triangle from the cardboard, which will serve as the main body of the witch hat. Keep in mind that the larger the triangle, the larger the hat will be.
Cut the Brim: Once you have your triangle, cut out a circular piece from the cardboard that is about 2 inches wider than your triangle’s base. This will be the brim of the hat that sits on the head.
Assemble the Hat: Glue the top of the triangle to the center of the circular brim. Hold it in place until the glue sets. This step may take a moment to ensure a secure bond.
Decorate the Hat: Allow your little ones to dive into the fun! Use construction paper, markers, and stickers to create their designs on the hat. Encourage them to layer different colors and textures for a more dynamic effect.
Add Ribbon: Once the decoration is complete, attach a beautiful ribbon around the base of the triangle to give it a delightful finishing touch. You can let the ribbon tails hang for a whimsical look.
Optional Glitter: If your child loves glitter, sprinkle some over the glue before it dries to create a magical shimmer. Just be aware that glitter can spread easily, so pick a place to work that’s easy to clean.
Display Your Creation: Once everything is dry, find a special spot in your home, like the mantel or a table, to show off these charming witch hats.
How to Style Your Finished Halloween Witch Hat Collage Craft for Kids
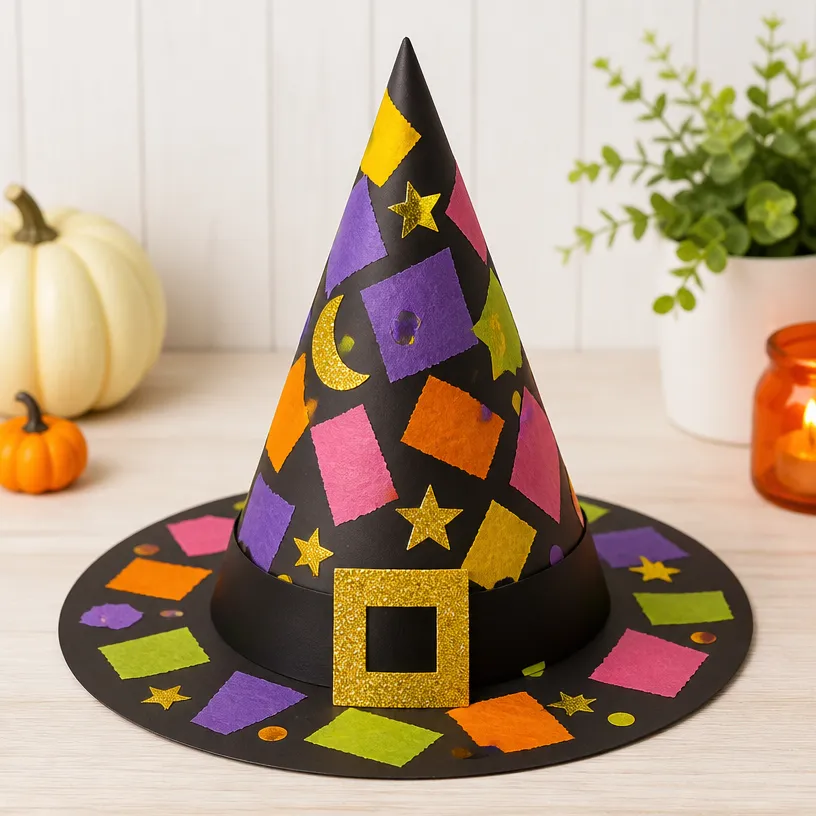
Finding the perfect place to display your Halloween Witch Hat Collage Craft can elevate your seasonal decor dramatically. Consider placing the hats on a console table or as part of your front door decor to welcome guests. They can also brighten up a dining table when grouped together with other Halloween-themed crafts.
For added charm, pair the hats with pumpkins or other autumnal decor items, enhancing the festive atmosphere of your home. Just remember, the goal is to create a cozy, welcoming space filled with the spirit of Halloween.
Maggie’s Tips for the Best Results
- Dry-Fitting Pieces: Before gluing, lay out the components to see how they’ll fit together.
- Layer for Depth: Use different heights and angles when decorating to give a more dynamic look.
- Limit Glue Use: A little glue goes a long way. Avoid excess, which can create messy finishes.
- Cleanup Easily: Set up a craft mat or newspaper to make cleanup faster and easier.
- Personalize Each Craft: Encourage kids to add their personal touches, making each hat unique.
Easy Ways to Customize This Project
Feel free to change up the colors and materials used in your Halloween Witch Hat Collage Craft for Kids. If your little ones enjoy a particular color scheme, consider using ribbon and stickers that match. Additionally, you can alter the base shape into something different like a pointed roof for a different style hat.
For extra fun, use seasonal accents like faux spider webs or small plastic bats to make the decoration even spookier. These small tweaks can personalize your witch hats while keeping the project fresh and exciting.
How to Pack This Project Away for Next Season
At the end of the Halloween season, you may want to store your completed witch hats. Keep them in a well-ventilated area where they won’t be crushed. If using fragile materials, it’s best to keep each piece in a separate box or bag to avoid damage. Dust can accumulate over time, so consider gently wiping your decorations before storing them away to keep them looking crisp and fresh next season.
FAQs About Halloween Witch Hat Collage Craft for Kids
Can we use different types of glue?
Absolutely! Just ensure that whatever glue you choose is appropriate for the materials you’re using.
How long will the hats take to dry?
Depending on the glue, your hats could take anywhere from 30 minutes to a few hours to dry fully.
Are these hats suitable for outdoor display?
Yes, as long as you select materials that will withstand any weather conditions outdoors.
What if I don’t have construction paper?
You can substitute with any paper you have on hand, such as wrapping paper or old magazines, to create unique textures and colors.
A Handmade Touch for the Season
Engaging in a DIY project like the Halloween Witch Hat Collage Craft for Kids brings warmth into your home and creates lasting memories. It’s about the joy of crafting and the chance to celebrate the season with colorful, handmade decorations. Remember, your creations do not need to be perfect; what matters is the time spent together and the unique charm they bring to your space.
To explore more creative ideas for Halloween, check out this fantastic resource: 20 Witch Crafts for Kids: Easy & Fun Halloween Craft Ideas.
Print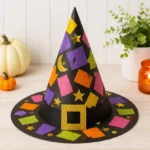
Halloween Witch Hat Collage Craft for Kids
- Total Time: 45 minutes
- Makes: Varies
Description
A fun and creative craft project for kids to make whimsical witch hats for Halloween decoration.
Materials
- Construction paper (black, purple, orange)
- Craft glue or glue sticks
- Scissors
- Stickers (stars, ghosts, sparkles)
- Decorative ribbon
- Markers or crayons
- Glitter (optional)
- Cardboard for a sturdy base
Instructions
- Prepare the base by cutting out a triangle from the cardboard.
- Cut a circular piece from the cardboard for the brim, 2 inches wider than the triangle’s base.
- Assemble the hat by gluing the triangle to the center of the brim; hold until set.
- Decorate the hat using construction paper, markers, and stickers as desired.
- Add a decorative ribbon around the base for a finishing touch.
- Optional: Sprinkle glitter over wet glue for a magical effect.
- Display your creation in a special spot at home once dry.
Notes
Encourage children to personalize their hats with different colors and materials, making each piece unique.