

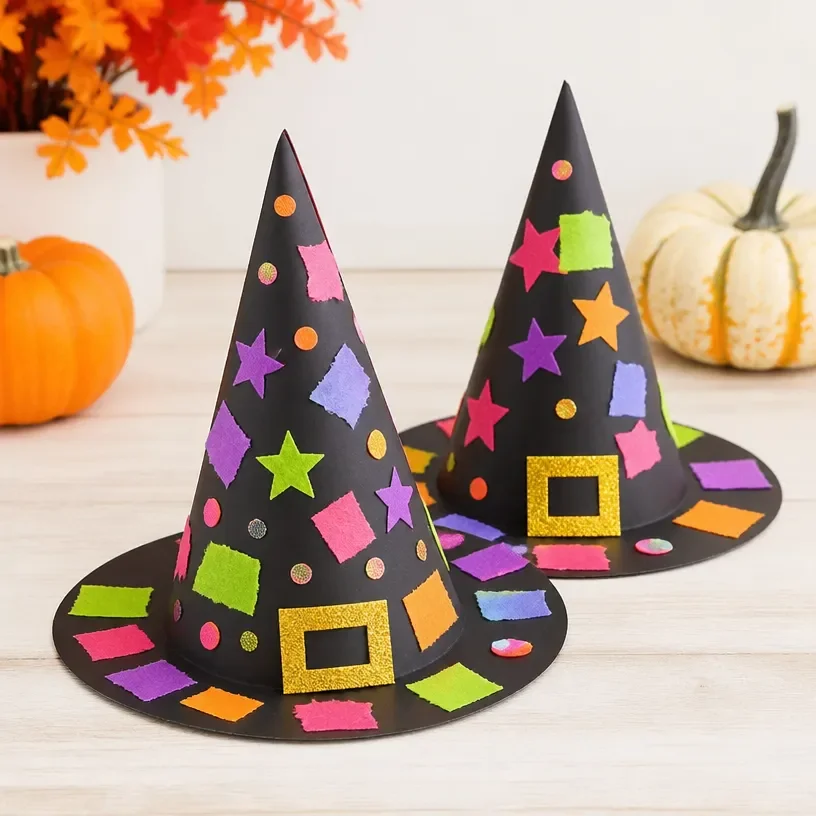
Witch Hat Collage Craft for Kids: Fun Halloween Activity You may also find Witch Hat Diy Halloween Collage Craft For Kids useful.
Creating enchanting crafts with children is a wonderful way to celebrate Halloween together. The Witch Hat Collage Craft is an exciting activity that not only encourages creativity but also allows kids to express themselves artistically. This fun DIY project results in adorable decorations that can be proudly displayed throughout your home during the spooky season. You may also find Diy Haunted Village Mason Jar Lanterns Halloween Decor useful.
This collage craft is especially appealing to families looking for an approachable yet enjoyable way to prepare for Halloween. Not only does it utilize inexpensive materials, but it also offers ample opportunities for customization, ensuring that each little witch hat is one-of-a-kind. Place these whimsical hats on the mantel, hang them as garlands, or decorate your windows to bring a cheerful atmosphere to your Halloween festivities. You may also find Diy Panda Ghost Cupcake Liner Garland Halloween useful.
Why You’ll Love This Project
The Witch Hat Collage Craft is brimming with delightful qualities that make it enjoyable for both kids and adults alike. First, it promotes creativity as children design their own hats with various colors, textures, and patterns. This project is also perfect for a gathering, letting children work together while sharing ideas and crafting tips.
Additionally, many of the materials used can be found around your home, making this an inexpensive project. The witch hats can bring character to your seasonal decor, whether adorning the porch, dining table, or entryway. And since the craft is versatile, you can adapt it to fit your personal style or seasonal theme, making it a unique addition to your decorations.
Before You Start
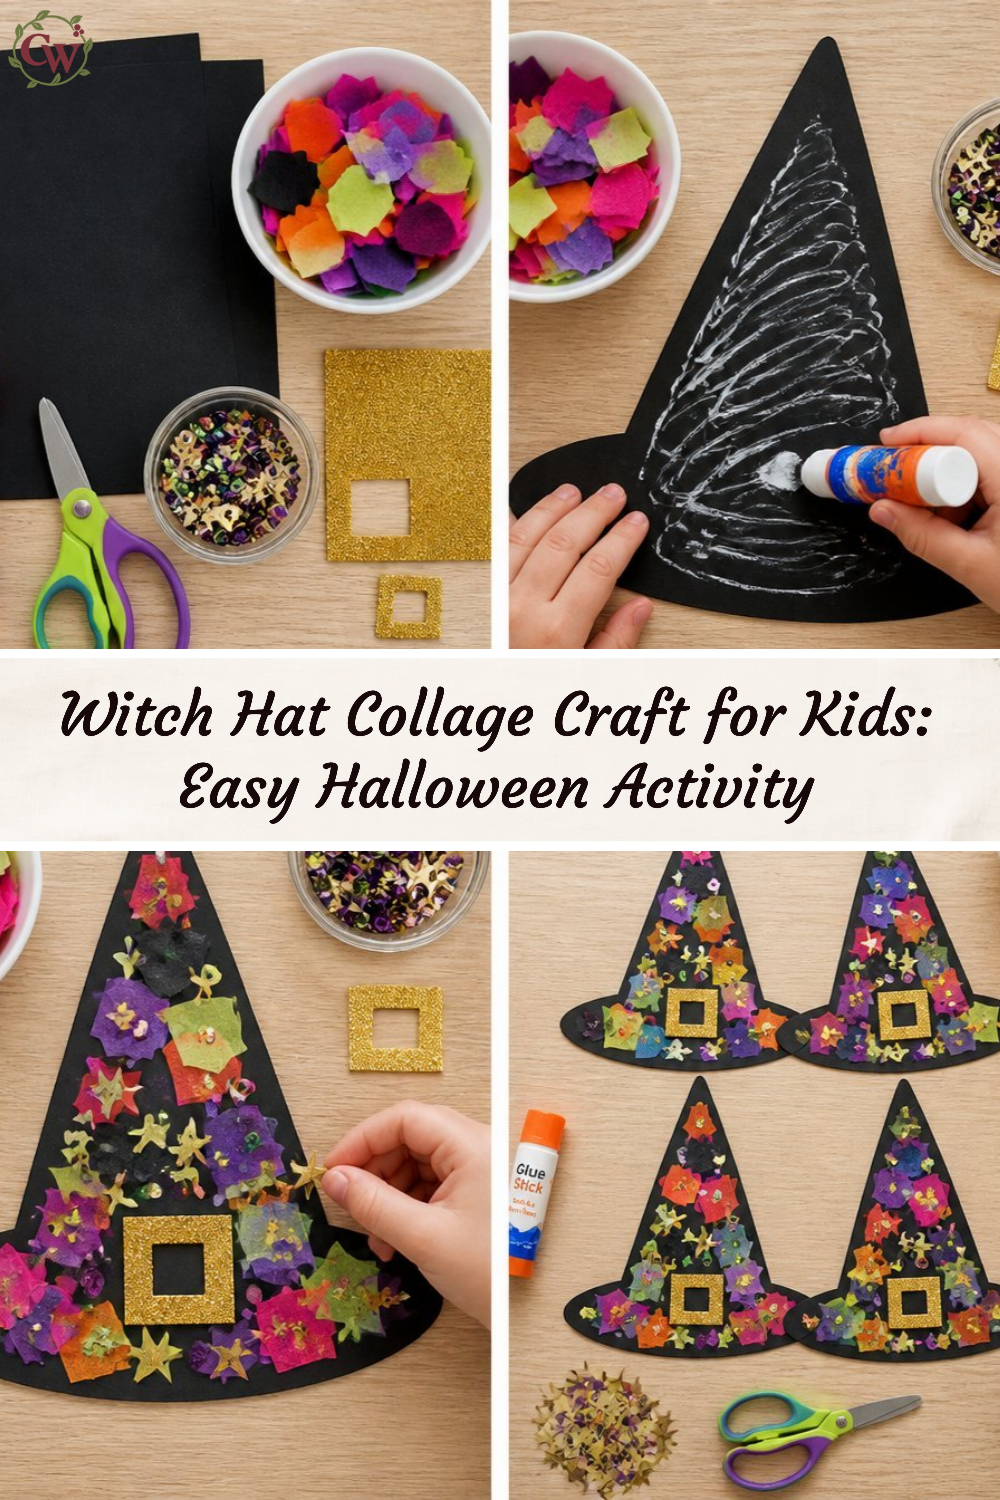
Before diving into this fun project, it’s helpful to keep a few things in mind. The finished witch hats should be vibrant, fun, and ready to celebrate Halloween. Pay special attention to how the materials fit together to establish a cohesive look.
To streamline the crafting process, gather all your supplies in advance and set up a comfortable workspace, allowing plenty of room for creativity. This will aid in keeping the project organized, enjoyable, and productive.
“A handmade touch makes every home feel warmer.”
Materials and Supplies
Materials and Supplies
- Colored construction paper (black, orange, purple)
- Scissors
- Glue stick or hot glue gun
- Glitter (optional)
- Stickers or embellishments (e.g., sequins, markers)
- Ribbon or string for hanging
- A template for the witch hat shape
Make sure to use sturdy construction paper, which will hold its shape when assembled. You might also consider adding some sparkle or shiny elements to make the hats stand out even more!
How to Make Witch Hat Collage Craft for Kids: Fun Halloween Activity
Step 1: Prepare the Template
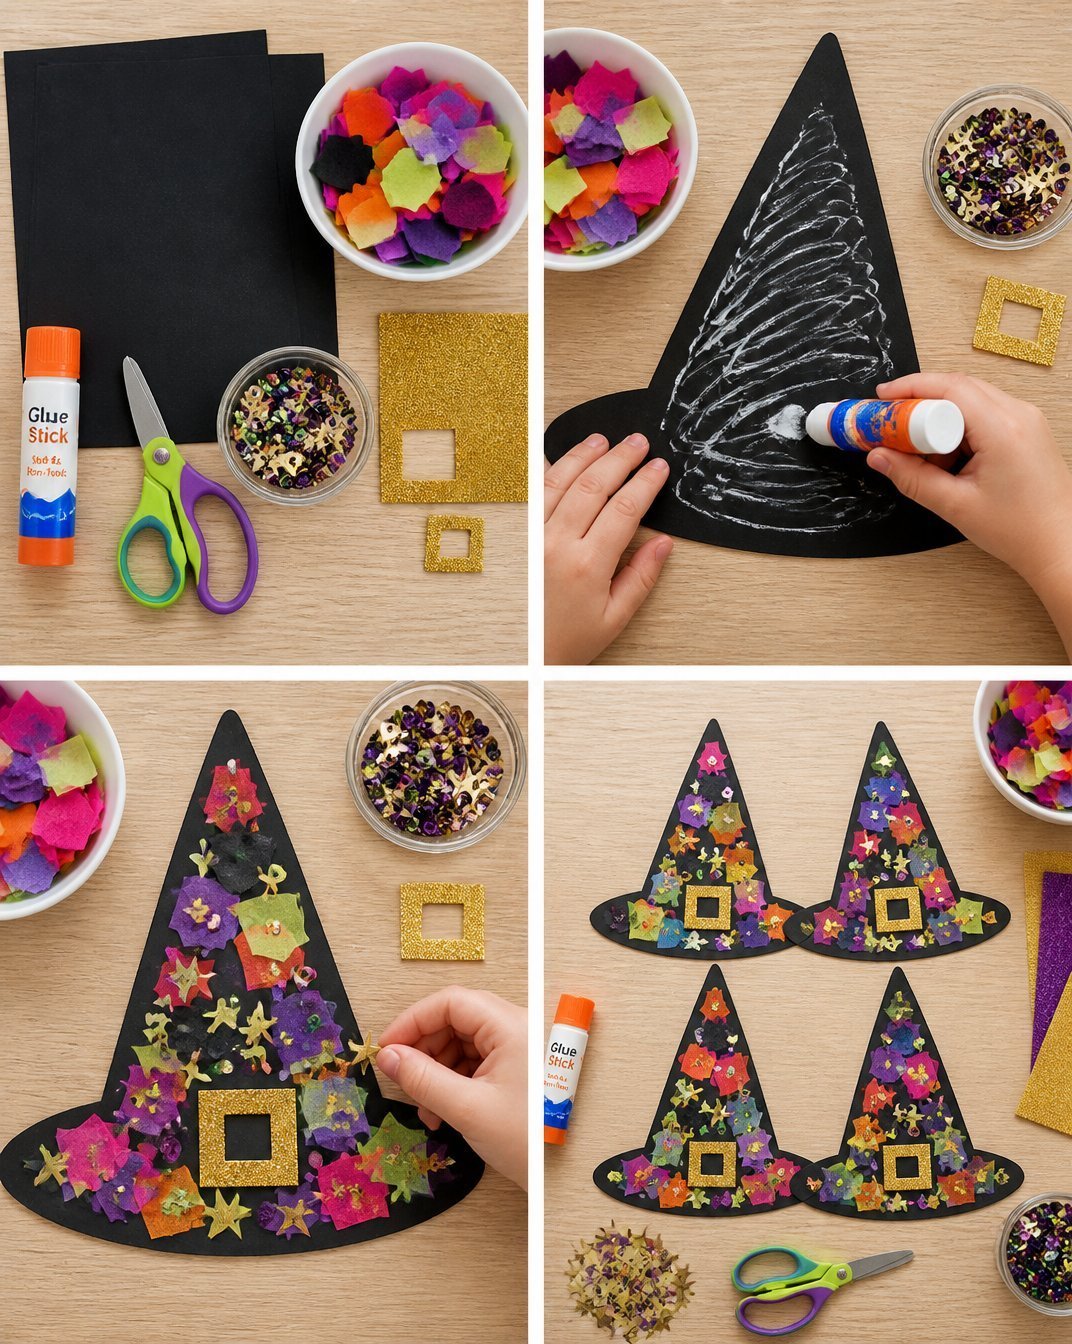
Begin by creating or printing out a witch hat template. You can find various designs online or borrow from a book. Alternatively, draw your own. Once done, cut out the template and place it on your chosen colored construction paper.
Step 2: Cut Out the Hat Shapes
Using your template, trace the witch hat shape onto the construction paper and cut out several hats. Feel free to mix and match colors to create a unique collection.
Step 3: Decorate the Hats
Encourage the kids to use their creativity by adding fun decorations to the hats. They can use glitter to add sparkle or stickers to give each hat a character. This is where each child can truly express their unique style.
Step 4: Assemble the Hats
Once the decorations are complete, use glue to attach the decorated paper pieces, creating a 3D effect with the hats. Make sure everything is secured well and let them dry completely.
Step 5: Add String or Ribbon
To display the hats, use a glue stick or hot glue to attach string or ribbon for hanging. These can be great for creating a delightful garland or display.
How to Style Your Finished Witch Hat Collage Craft for Kids: Fun Halloween Activity
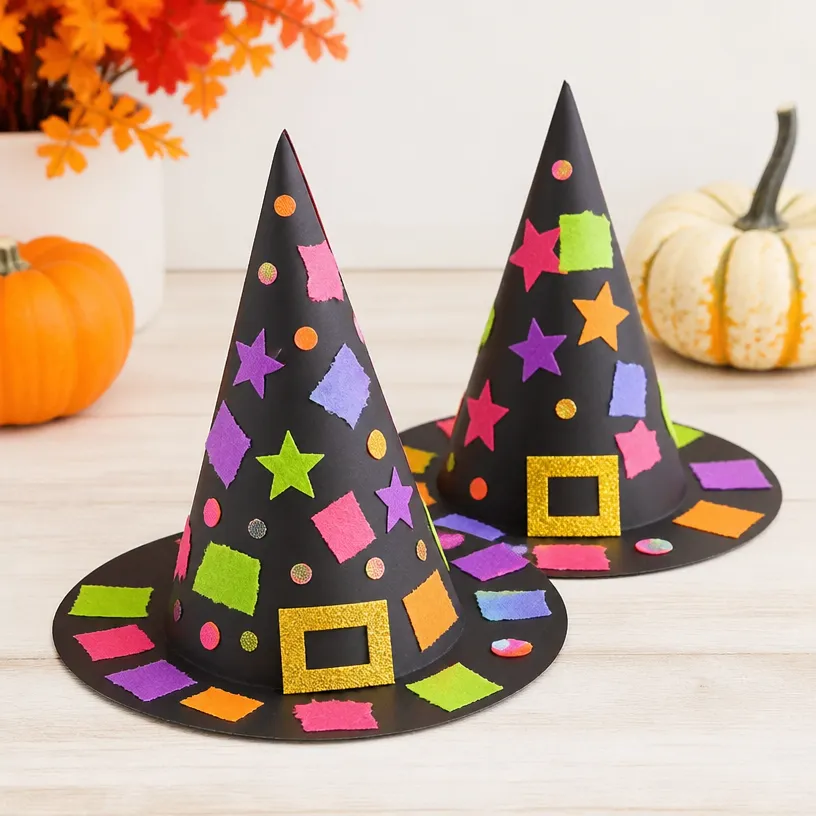
Once your witch hats are complete, it’s time to show them off! These delightful creations can enhance the festive spirit of your home hang them from the ceiling, drape them around your porch, or simply place them on the mantel as lively Halloween decor.
To add more charm, consider pairing your witch hats with other handmade decorations. For instance, displaying a DIY haunted village alongside your collaged hats can create a cohesive holiday scene.
Maggie’s Tips for the Best Results
- Dry-fit the pieces before gluing to ensure the best arrangement.
- Work in layers, building your decorations gradually.
- Allow any glue or paint to dry before moving on to avoid messes.
- Balance your decorations by mixing larger and smaller elements for visual interest.
- Keep the ribbon tails proportional to the size of your hats to maintain a polished look.
Easy Ways to Customize This Project
Encourage creativity by suggesting different themes or colors for the witch hats. For instance, use pastel colors for a more whimsical feel or earth tones for a rustic look. You could also add seasonal flowers or natural elements to enhance the charm. Glitter and metallic accents can be incorporated as well to give the hats a magical touch.
How to Pack This Project Away for Next Season
At the end of the season, carefully store your witch hats to keep them looking fresh for next Halloween. Place them in a sturdy box lined with tissue paper to protect them from crushing or damage. Avoid moisture and direct sunlight which could fade the colors.
FAQs About Witch Hat Collage Craft for Kids: Fun Halloween Activity
Can I substitute materials for this project?
Absolutely! If you don’t have construction paper, consider using magazine cutouts or scrapbook paper for a unique look.
How do I make the hats sturdy?
Using double layers of construction paper or cardstock can provide extra support for your hats.
What if I want to make them larger or smaller?
Simply adjust the size of your template accordingly.
Can these hats be used outdoors?
Yes, but be cautious of moisture which may damage them. Use waterproof materials or clear spray to protect them.
A Handmade Touch for the Season
Creating the Witch Hat Collage Craft is not just an entertaining activity; it is a way to instill joy, creativity, and togetherness as you celebrate Halloween. Remember, a home decorated with handmade crafts radiates warmth and personality. The beauty of handmade decorations lies not in their perfection, but in the special memories made while crafting them.
Join in the spirit of the season, and let your home reflect the warmth and creativity of those who live in it.
Conclusion
If you're looking for more ideas to inspire your Halloween crafts, check out this incredible list of
25+ Cute Halloween Crafts for Kids & Easy Activitiesthat are sure to delight your family and friends!
Print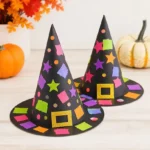
Witch Hat Collage Craft for Kids
- Total Time: 15 minutes
- Makes: Multiple hats
Description
A fun DIY project that allows kids to create their own witch hats for Halloween using colorful materials and decorations.
Materials
- Colored construction paper (black, orange, purple)
- Scissors
- Glue stick or hot glue gun
- Glitter (optional)
- Stickers or embellishments (e.g., sequins, markers)
- Ribbon or string for hanging
- A template for the witch hat shape
Instructions
- Prepare the template
- Cut out the hat shapes
- Decorate the hats
- Assemble the hats
- Add string or ribbon
Notes
Store your witch hats in a sturdy box lined with tissue paper to keep them looking fresh for next Halloween.