

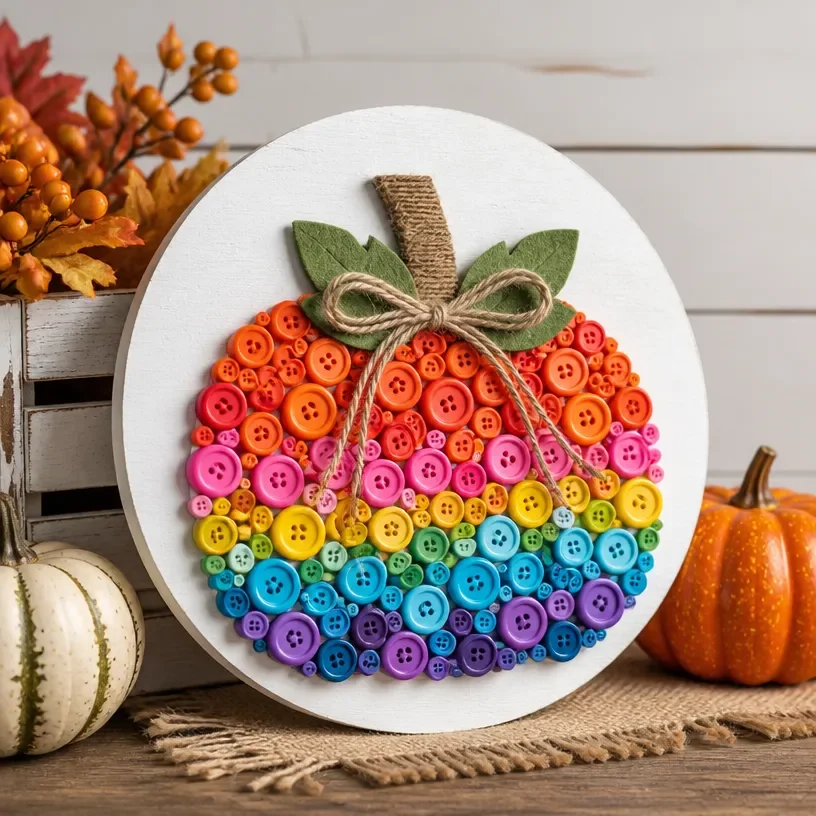
Creating a DIY Rainbow Button Pumpkin Farmhouse Sign is a heartfelt way to bring the vibrant colors of autumn into your home while adding a touch of rustic charm. This beautiful piece not only celebrates the season but also serves as an approachable craft that even beginners can enjoy. Imagine displaying it on your mantel or front door, welcoming guests with its cheerful hues and handmade quality. The wonderful thing about this project is that it encourages creativity and warmth, allowing you to express your personal style with simple materials and thoughtful design. You may also find Vibrant Autumn Pumpkin Suncatchers Diy Fall Decor useful.
By making your own Rainbow Button Pumpkin Farmhouse Sign, you can create unique decor that feels special to your home. This project uses easily accessible materials, making it both budget-friendly and an opportunity for reusability. Plus, as you customize your sign, you can reflect the charm of farmhouse decor with a personal touch that resonates with the season’s spirit. It’s a perfect addition to your front door decor or any space that could use a hint of autumn flair.
Why You’ll Love This Project
This Rainbow Button Pumpkin Farmhouse Sign stands out for several reasons. First, it offers an approachable construction that invites crafters of all skill levels to join in. You’ll find the materials are simple and inexpensive, making it perfect for a fun weekend project. The seasonal versatility of this design makes it not only an autumn centerpiece but also a lovely addition to Thanksgiving festivities.
Moreover, this craft holds strong farmhouse character. The buttons in vibrant colors can be easily customized, allowing you to express your personality through your decor choices. Whether you hang it in your entryway, on your porch, or display it on your dining table, it will surely spark joy and conversation. If you’re interested in more colorful projects, consider creating sparkly rainbow pumpkins as an additional seasonal decor idea.
Before You Start
When you begin creating your Rainbow Button Pumpkin Farmhouse Sign, picture a cheerful handmade piece that embodies the spirit of autumn. The focal point should be the vibrant buttons carefully positioned to create a lovely pumpkin design. The final sign should feel warm and inviting, accompanied by the natural textures of wood and twine.
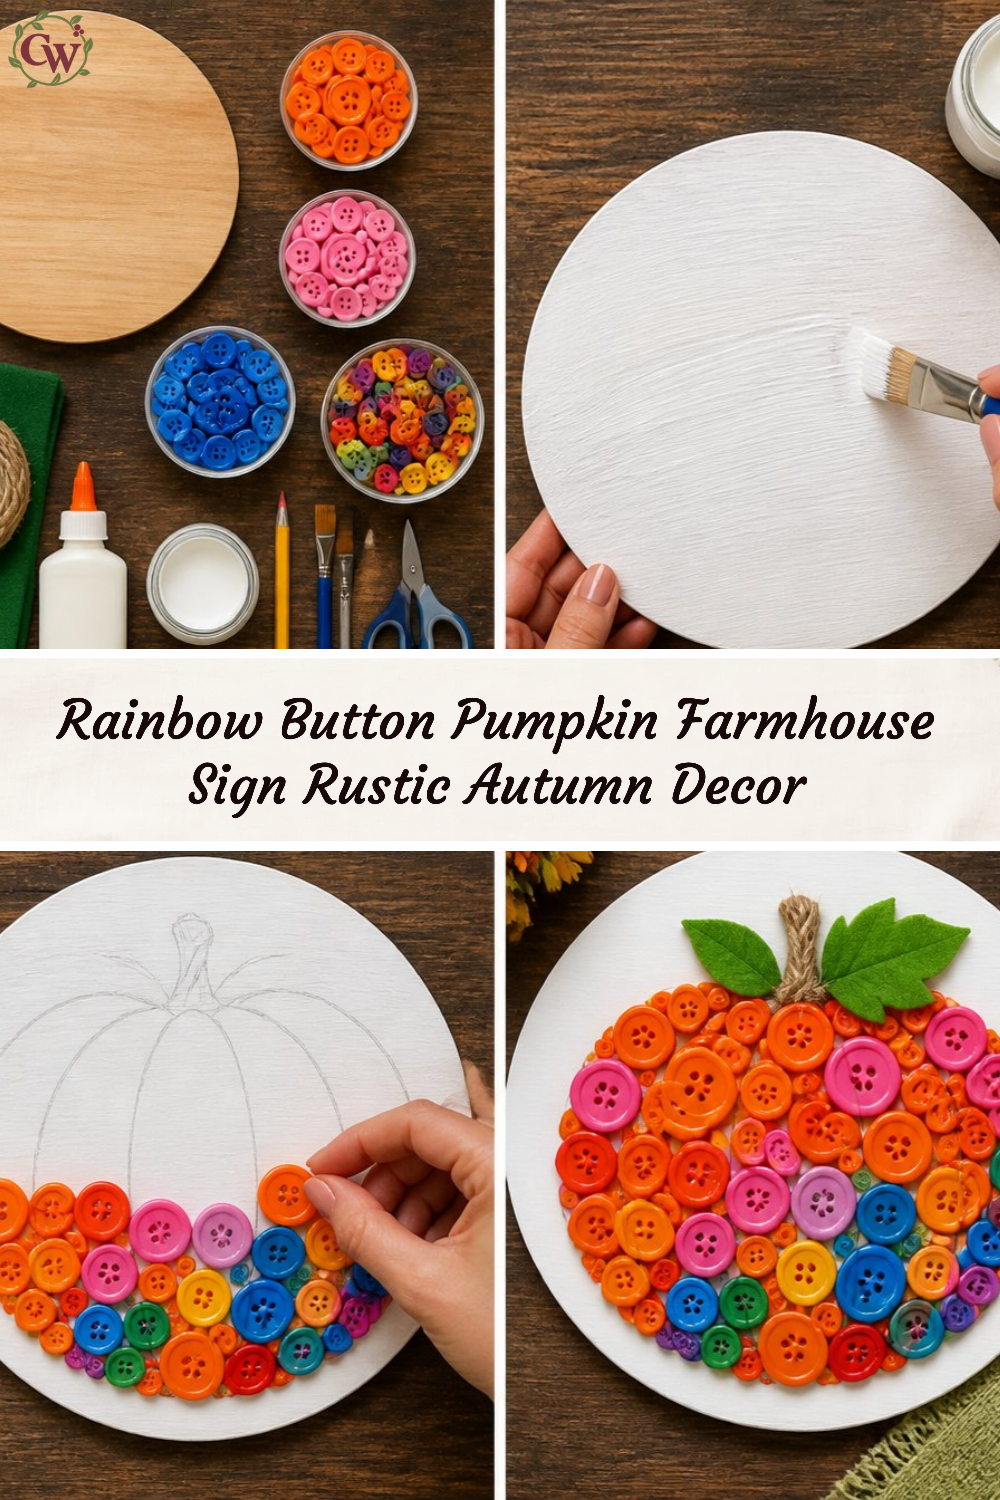
Before diving into crafting, I’ll recommend preparing your workspace. Lay down some newspapers or a protective cloth to keep your area clean, and gather all the materials listed below. This pre-setup will make the crafting process smoother and more enjoyable.
“A handmade touch makes every home feel warmer.”
Materials and Supplies
Materials and Supplies
- A wooden plank (about 18 x 24 inches)
- Variety of colorful buttons (reds, oranges, yellows, greens, and browns)
- Twine or jute for hanging
- Hot glue gun and glue sticks
- Paint (optional for the wooden base)
- Paintbrush or sponge for application
- Scissors
- Ruler for measuring
While choosing your buttons, consider their sizes and shapes. Using a mix of flat, round, and assorted textures will add visual interest to your pumpkin design. If you’re feeling adventurous, you might also want to explore the world of rainbow butterfly mobiles for another delightful fall decoration.
How to Make Rainbow Button Pumpkin Farmhouse Sign – Rustic Autumn Decor
Step 1: Prepare the Wooden Base
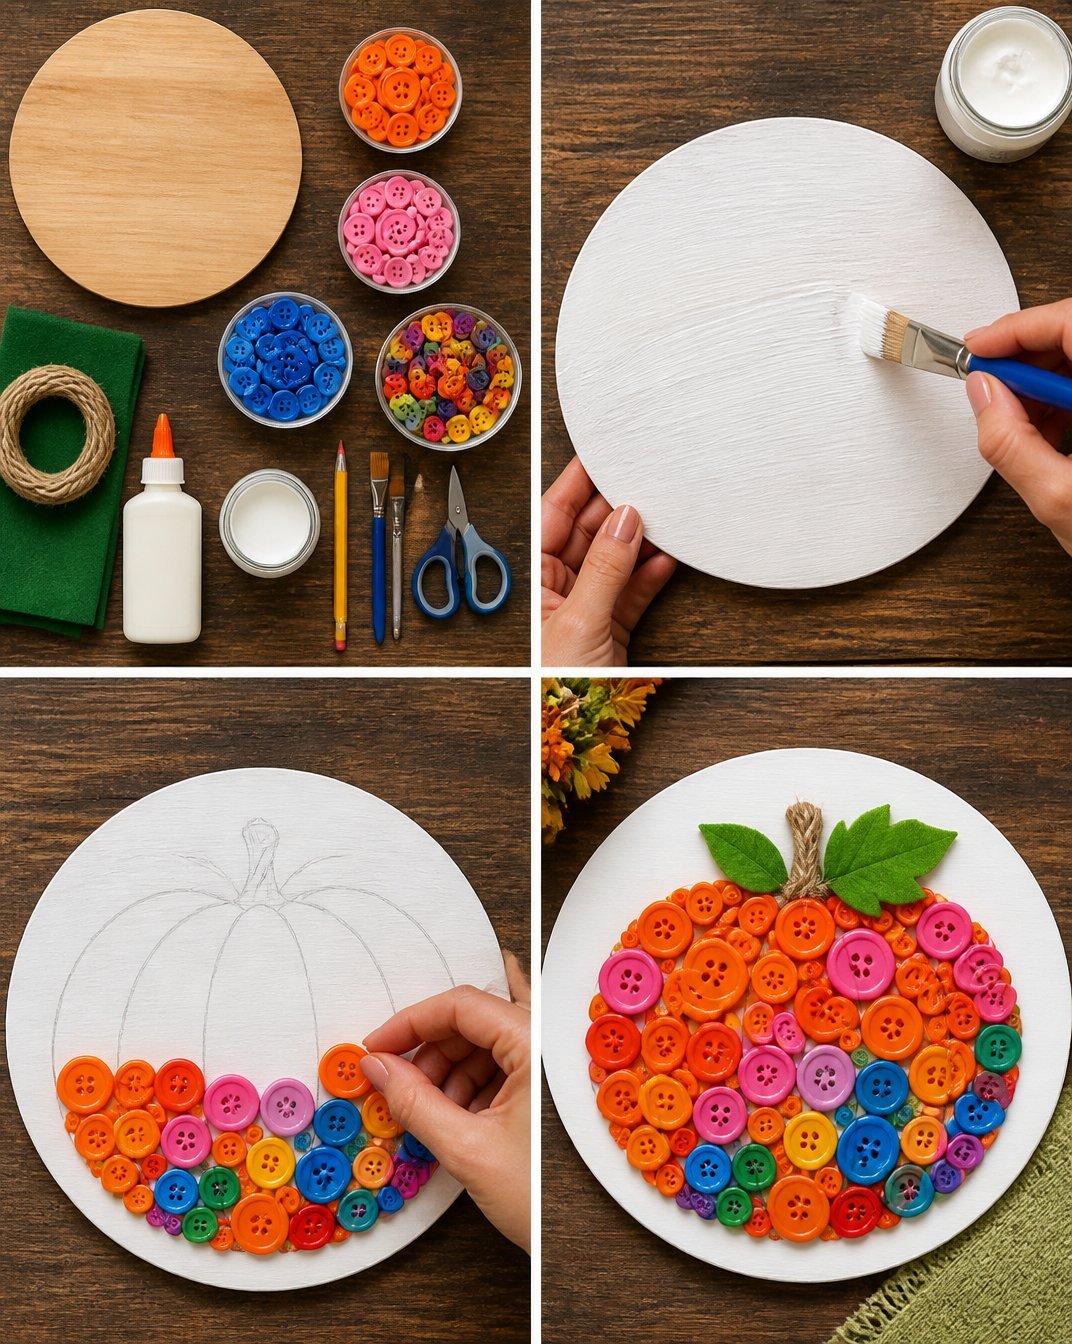
Begin by ensuring your wooden plank is clean and dry. If you decide to paint it, use a paintbrush to apply an even coat. Choose a warm color that complements the buttons, such as a soft creamy white or light brown. Let the paint dry completely before proceeding, which might take about an hour.
Step 2: Plan Your Button Layout
Arrange the buttons on the plank before gluing. Start from the bottom and work your way up, creating a pumpkin shape. This dry-fitting will help you visualize how the colors work together and ensure you have enough buttons to fill the design.
Step 3: Glue the Buttons
Once you are satisfied with the layout, begin gluing the buttons on the wooden plank using your hot glue gun. Apply a small amount of glue to the back of each button and press it firmly onto the wood. Continue this process until you have attached all the buttons in your desired pattern.
Step 4: Add Twine for Hanging
With the buttons securely in place, cut a length of twine or jute about 24 inches long. Fold it in half and glue the ends to the top back of the wooden sign, creating a loop for hanging. Ensure the glue is dry and strong enough for the weight of the sign.
Step 5: Final Touches
Take a moment to inspect your creation. Make sure all buttons are securely attached, and add any additional embellishments or details if desired. Allow the glue to cure completely before displaying your new farmhouse sign.
How to Style Your Finished Rainbow Button Pumpkin Farmhouse Sign
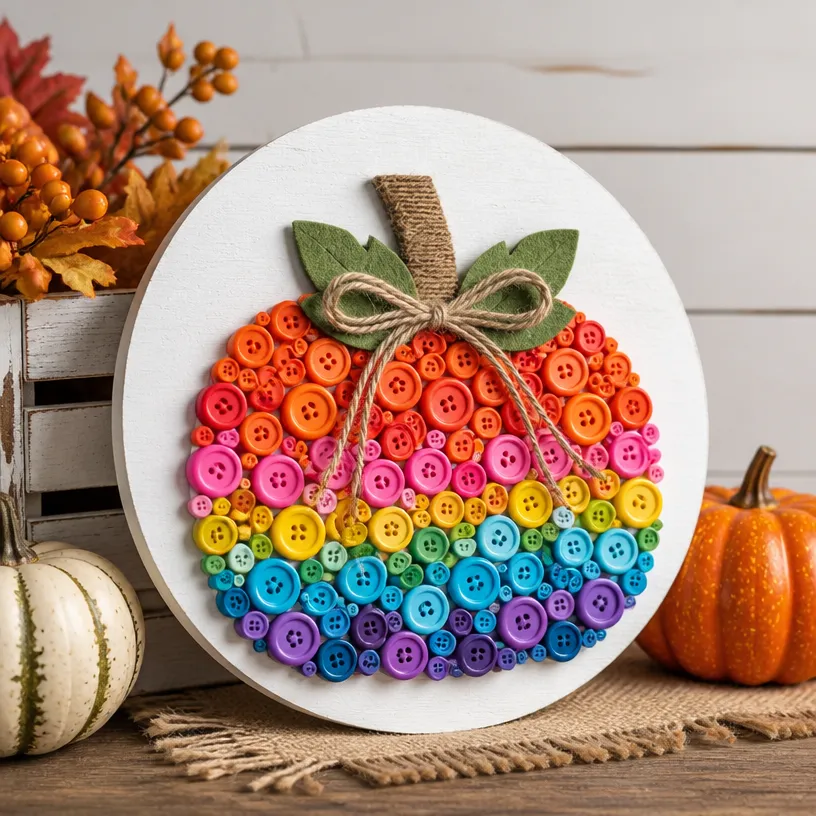
After completing your Rainbow Button Pumpkin Farmhouse Sign, think about how to incorporate it into your home decor. A perfect spot is above the mantel, where it can serve as a focal point during fall gatherings. You can also hang it on your front door to greet guests or place it on a shelf where it can bring a bit of autumn charm. Surround it with small candles, faux pumpkins, or even freshly dried flowers to enhance the seasonal ambiance.
Consider using complementary decorations that echo the natural, rustic theme. Soft fabric pumpkins or cozy knit throws can create a welcoming atmosphere. Remember Maggie’s philosophy: a home should feel lived-in and personal.
Maggie’s Tips for the Best Results
- Always dry-fit your pieces before gluing them to ensure you like the arrangement.
- When working with hot glue, be careful to avoid excess; a little goes a long way and looks cleaner.
- Allow your paint to dry thoroughly before moving on to avoid smudging.
- Keep larger elements balanced as you continue to layer smaller pieces, ensuring the overall design feels cohesive.
- Use a straightedge to measure and center your buttons for a more polished look.
Easy Ways to Customize This Project
Customization is a fun part of the DIY process. You can adjust the colors of the buttons to match specific seasons or holidays. Think about using burgundy and gold for Thanksgiving or even pastels for a springtime look. You can also try out different ribbon colors or natural elements like small pinecones or berries to further enhance the rustic farmhouse feel.
Caring for Your Handmade Decor
To keep your Rainbow Button Pumpkin Farmhouse Sign looking its best, avoid placing it in direct sunlight, as this can cause the colors to fade over time. Dust it gently with a soft cloth and store it in a cool, dry place during off-season months. If the twine gets frayed, consider replacing it to maintain the project’s charming appearance.
FAQs About Rainbow Button Pumpkin Farmhouse Sign – Rustic Autumn Decor
1. What materials can I use instead of buttons?
You can use small fabric scraps, craft foam cut into shapes, or even beads for a different texture and look.
2. Can I use real pumpkins instead of wood?
Yes, you can adapt this project to use small, real pumpkins as your base. Just be mindful that they are not reusable as a sign.
3. How do I ensure my glue holds?
Make sure to use a quality hot glue and let it bond properly before moving the sign.
4. Can this decoration go outdoors?
While it can temporarily be placed outside, it is best suited for indoor use to preserve the longevity of the materials.
5. Is this project suitable for kids?
Yes! With some supervision, a Rainbow Button Pumpkin Sign can be a delightful project for children under the guidance of an adult.
A Handmade Touch for the Season
Crafting the Rainbow Button Pumpkin Farmhouse Sign allows you to express yourself while creating a beautiful piece of decor. Remember, every handmade sign tells a story, and yours will reflect your unique style and warmth. The beauty of handmade projects lies not in perfection but in the joy they spark and the memories they help create in your home. Enjoy your crafting journey, and cherish the handmade treasures that bring your space to life!
For more thoughtful and welcoming decor ideas, check out this charming wooden sign that celebrates the spirit of inclusivity in your home.
Print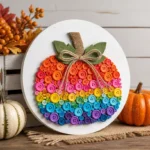
DIY Rainbow Button Pumpkin Farmhouse Sign
- Total Time: 60 minutes
- Makes: 1 sign
Description
Create a vibrant and rustic Rainbow Button Pumpkin Farmhouse Sign to celebrate autumn with a personal touch.
Materials
- 1 wooden plank (about 18 x 24 inches)
- Variety of colorful buttons (reds, oranges, yellows, greens, and browns)
- Twine or jute for hanging
- Hot glue gun and glue sticks
- Paint (optional for the wooden base)
- Paintbrush or sponge for application
- Scissors
- Ruler for measuring
Instructions
- Prepare the Wooden Base by ensuring your wooden plank is clean and dry.
- Plan Your Button Layout by arranging the buttons before gluing.
- Glue the Buttons onto the wooden plank using your hot glue gun.
- Add Twine for Hanging by cutting a length of twine about 24 inches long.
- Final Touches: Inspect your creation and let the glue cure completely.
Notes
Customization options include changing button colors for different seasons and using various materials like fabric scraps.