

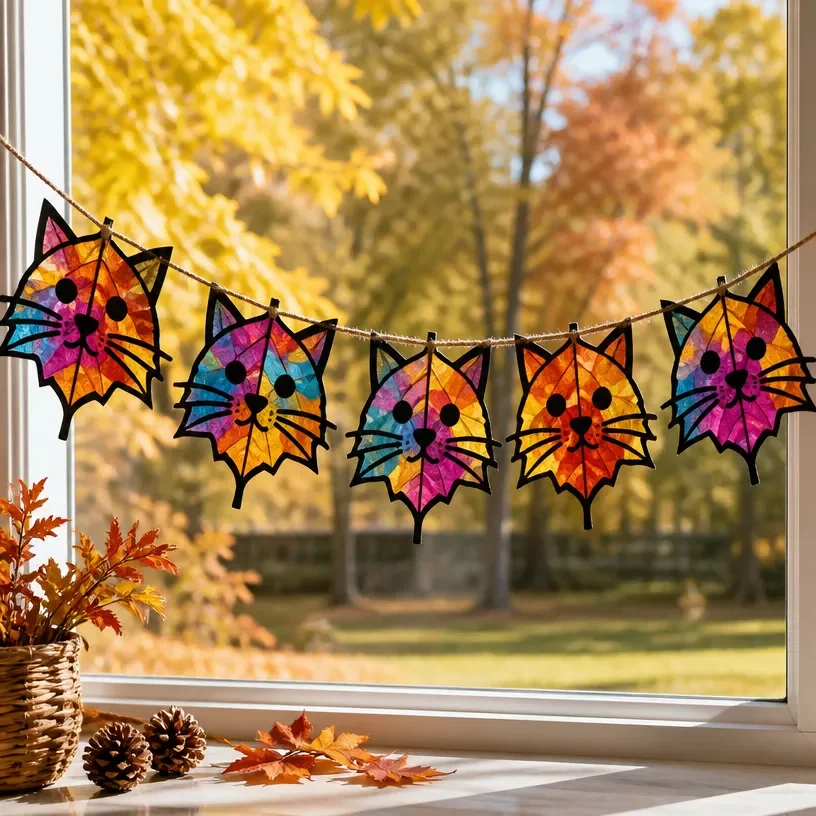
Creating a Fall Leaf Suncatcher Garland Craft for Kids is a wonderful way to bring the vibrant colors of autumn indoors. This project pairs the beauty of the season with the joy of crafting, making it a delightful experience for kids and adults alike. As sunlight filters through the colorful leaves, you’ll create a dazzling display that can adorn windows, porches, or any space that could use a touch of seasonal flair. You may also find Diy Blue Unicorn Suncatcher Fall Leaf Design useful.
The great thing about this craft is its simplicity and accessibility, allowing even the youngest crafters to engage in the fun. With just a few materials and imaginative design, your home will be filled with warm hues that celebrate the fall season. For a similar creative project, consider exploring the Autumn Rainbow Leaf Suncatcher Garland.
Why You’ll Love This Project
Why This Fall Leaf Suncatcher Garland Craft Sparks Joy
This project captures the essence of the fall season while being easy to adapt and personalize. Children can express their creativity by choosing leaf shapes and colors, ensuring that each garland feels unique and special. Plus, the materials are often easy to find and budget-friendly, making it an approachable craft for families. You may also find Diy Crayon Leaf Garland Fall Decor useful.
The garland itself can be displayed in many ways, whether draped across a window, hung from a mantel, or used to decorate an entryway. Its cheerful colors bring warmth and brightness to any space, enhancing the home’s overall autumn decor. Projects like this not only make your home feel inviting, but also encourage family bonding and creativity.

Before You Start
Understanding the Project
Before diving into the crafting process, it’s beneficial to envision what your finished garland will look like. Picture a string of beautifully colored leaves, glistening in the sunlight, creating a lively atmosphere. Assembling your garland will involve focusing on both the design and durability; you’ll want to make sure your leaves are securely attached to withstand a playful touch.
Make sure to prepare your workspace by laying down a protective covering. This will keep surfaces clean and organized, allowing you to focus on the creative aspects of the project.
“A handmade touch makes every home feel warmer.”
Materials and Supplies
Materials and Supplies
- Fall-themed colored cardstock or transparent plastic sheets
- Scissors
- Thin string or twine
- Glue or tape
- Hole punch
- A variety of leaf templates or images
It’s best to use sturdy cardstock or plastic for the leaves, as these materials will help them hold up well in sunlight. If you’re opting for colorful paper, seek out shades that reflect the rich, warm tones of autumn, ranging from golden yellows to deep reds. The string or twine can be chosen based on personal preference; natural fibers often add a rustic charm that complements the fall theme beautifully.
How to Make Fall Leaf Suncatcher Garland Craft for Kids
Step 1: Prepare Your Leaf Templates
Start by selecting your leaf templates or images. You can either print them out or draw your own directly onto the cardstock. Cut out the leaves carefully, ensuring that each shape is distinct and recognizable.
Step 2: Punch Holes in Your Leaves
Using a hole punch, create a hole near the stem of each leaf. This step is essential as it allows you to thread the string through each leaf, creating your garland.
Step 3: Cut Your Twine
Determine your desired garland length based on where you plan to hang it. Cut a length of string or twine accordingly, leaving some extra for tying.
Step 4: Assemble the Garland
Begin by threading the leaves onto the string, ensuring they are spaced evenly. If using glue, consider applying it to the back of the leaves for added support. Continue adding leaves until you reach your desired fullness and length.
Step 5: Secure the Ends
Once your garland is complete, tie knots at both ends of the string to prevent the leaves from sliding off. If you prefer, add a few extra decorative items like beads or flowers to enhance its appearance.

How to Style Your Finished Fall Leaf Suncatcher Garland Craft for Kids
Adding Warmth and Color to Your Home
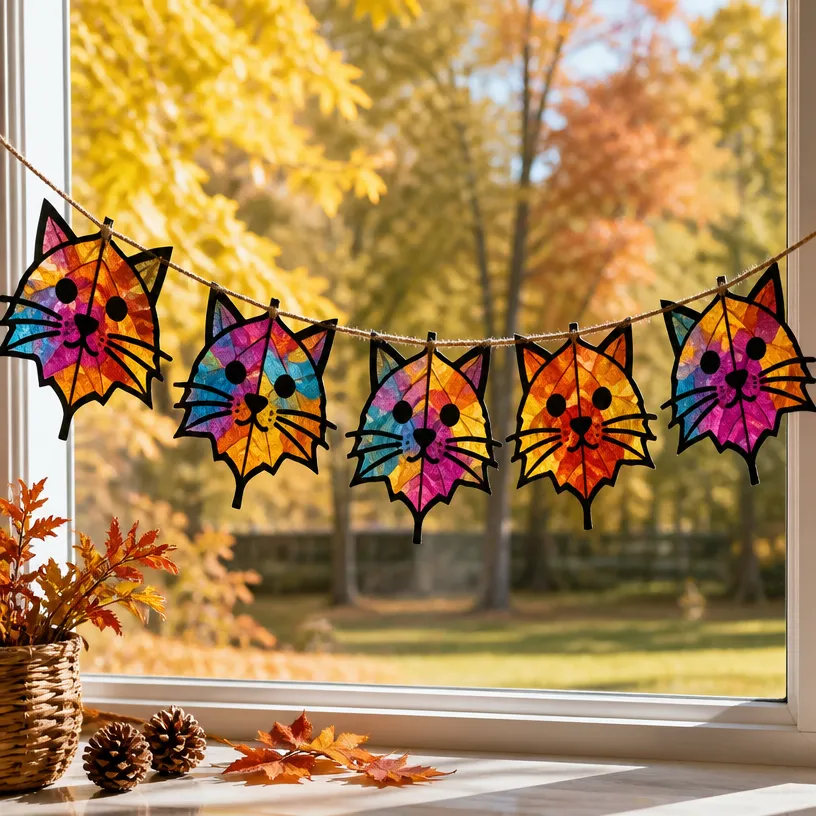
To truly showcase your Fall Leaf Suncatcher Garland, consider hanging it in an area where it will catch the light, like in front of a window or across a doorway. This will allow the colors to shine through, bringing warmth and a touch of nature into your living space.
For added decoration, consider pairing the garland with some simple white pumpkins or rustic candles on a mantelpiece. This approach creates a cozy, inviting atmosphere that reflects the charm of fall.
Maggie’s Tips for the Best Results
- Choose vibrant colors that resonate with autumn this will help your garland pop against the backdrop of fall decor.
- Prepare a few extra leaves in case some break or don’t attach as expected.
- Engage kids in the glueing process; it helps them learn through hands-on experience.
- Allow glue to dry properly before moving the garland to ensure everything stays in place.
- Experiment with layering leaves to create a more dimensional look.
Easy Ways to Customize This Project
Making It Truly Yours
To personalize your suncatcher garland, consider using different materials for the leaves, such as fabric or felt, for a softer touch. You could also play around with adding embellishments, like glitter or metallic paint, to give each leaf a unique flair.
If you want to adapt this project for other seasons, simply change the colors and shapes of the leaves. For example, using pastel shades for spring or snowy white for winter can effortlessly transform the theme.
Caring for Your Handmade Decor
Keeping Your Garland Looking Great
To keep your garland in pristine condition, store it in a dry place away from direct sunlight when not in use. If using paper leaves, be cautious of moisture, as it can damage them. If you want to reuse this garland each year, consider using plastic leaves that can withstand changes in weather and can be easily cleaned.
FAQs About Fall Leaf Suncatcher Garland Craft for Kids
Common Questions Answered
Can I use real leaves?
While real leaves can be beautiful, they may not hold up as well over time. Consider using faux leaves or sturdy paper as alternatives.
How long will this project take?
Expect to spend about 1 to 2 hours on the entire process, depending on the number of leaves and the involvement of kids.
Can I hang the garland outdoors?
If using paper, it’s best suited for indoor displays. However, if made with weather-resistant materials, you can use it outdoors.
What should I do if the glue doesn’t hold?
If some parts don’t stick, try reinforcing them with a bit more glue, or consider using tape for a quicker fix.
Can I change the colors for other holidays?
Absolutely! Just choose colors and shapes that fit the new theme, making it a versatile decoration year-round.
A Handmade Touch for the Season
Creating a Fall Leaf Suncatcher Garland is not just an enjoyable project; it’s a way to welcome the beauty of autumn into your home. As you work through this craft with your loved ones, remember that the joy of making something by hand will linger well beyond the season.
Your home should feel warm and inviting, filled with pieces that reflect your creativity and care. Embrace the imperfections; they add a personal touch to each creation. For additional inspiration on autumn crafts, check out Last of the Autumn Leaves – Artful Kids.
Print
Fall Leaf Suncatcher Garland Craft for Kids
- Total Time: 45 minutes
- Makes: 1 garland
Description
A delightful craft project for kids that brings the vibrant colors of autumn indoors through a joyful and creative garland.
Materials
- Fall-themed colored cardstock or transparent plastic sheets
- Scissors
- Thin string or twine
- Glue or tape
- Hole punch
- A variety of leaf templates or images
Instructions
- Prepare your leaf templates by selecting and cutting them out.
- Punch holes in your leaves near the stem.
- Cut your string or twine to the desired length.
- Assemble the garland by threading the leaves onto the string.
- Secure the ends with knots and add decorative items if desired.
Notes
For best results, engage kids in the gluing process and allow glue to dry completely.