

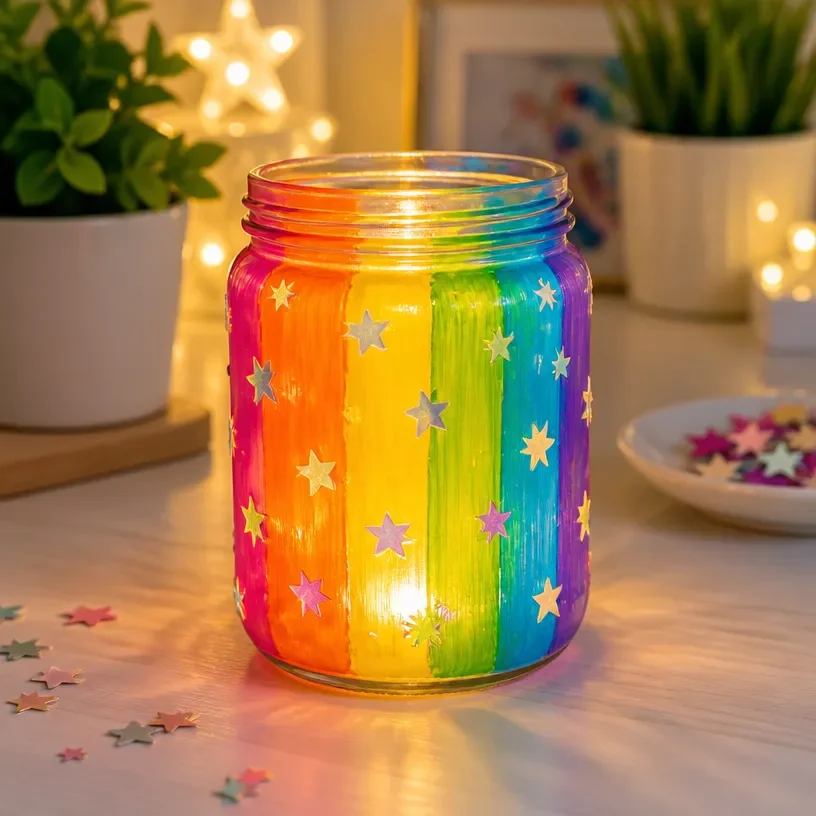
The Rainbow Fairy Lantern is a delightful glow-in-the-dark night light and decor piece that adds a touch of whimsy to any space. Crafted from a simple mason jar, this project brings together vibrant colors and a magical glow that can enhance your child’s room, brighten up a porch, or add charm to a cozy nook in your home. Not only does it serve as a practical night light, but its enchanting design makes it a lovely decorative item for any season. You may also find Diy Rainbow Fall Leaf Garland Rustic Porch Decor useful.
Creating your very own Rainbow Fairy Lantern is an approachable project for home crafters of all skill levels. With easily accessible materials and a straightforward construction process, this DIY project can become a cherished family activity or a fantastic addition to your home decor. The best part is the personal touch that handmade decor brings, making your home feel warmer and more inviting. This project is a lovely complement to other seasonal decor ideas, such as a colorful acorn garland or a glow-in-the-dark ghost lantern, bringing the infinite charm of handmade crafts to your living space.
Why You’ll Love This Rainbow Fairy Lantern
This Rainbow Fairy Lantern is not just a glow-in-the-dark light; it’s a project that resonates with creativity and seasonal joy. You’ll appreciate how it transforms an ordinary jar into an extraordinary piece of art with minimal expense and effort. The vibrant colors and soft glow make it perfect for both children and adults alike, offering a sense of calm and cheerfulness in various settings.
One of the major benefits of this DIY project is its seasonal versatility. You can create these lanterns for different holidays or occasions by simply changing the colors and embellishments. Whether it’s cheerful summer hues or cozy autumn tones, the options are endless. Plus, the ability to customize each lantern means it can reflect your unique style or serve as a thoughtful handmade gift.

Before You Start
Before diving into this fun craft, it’s essential to visualize what your finished Rainbow Fairy Lantern will look like. The goal is to create a vibrant, colorful lantern that glows softly in the dark. Be sure to pay extra attention to how you apply the paint, as the blending of colors can significantly impact the final effect. Preparing a clean, organized workspace will also help streamline the process and keep your crafting enjoyable.
“A handmade touch makes every home feel warmer.”
Materials and Supplies
Materials and Supplies
To create your Rainbow Fairy Lantern, you will need the following materials:
- A clean, empty mason jar
- Glow-in-the-dark paint in various colors (such as green, blue, pink, and yellow)
- Paintbrushes (various sizes)
- A small flickering LED tealight (optional but recommended for safety)
- Twine or ribbon for embellishment
- Optional decorative items (such as faux flowers or gems)
When selecting your glow-in-the-dark paint, look for high-quality options that will provide vibrant colors and an effective glow. The size of the mason jar can vary, but a standard pint-sized jar works wonderfully for this project. The choice of twine or ribbon can add a rustic touch, enhancing the overall look.
How to Make Rainbow Fairy Lantern: Glow-in-the-Dark Night Light and Decor
Step 1: Prepare the Mason Jar
Start by thoroughly cleaning your mason jar to remove any residue or labels. This step ensures that the paint adheres properly for an even finish.
Step 2: Apply the Glow-in-the-Dark Paint
Using your paintbrush, begin applying your first color of glow-in-the-dark paint to the inside of the jar. You can use a sponge or brush to create patterns, swirls, or stripes, depending on the design you like.
Step 3: Layer Colors
Once the first coat has dried, add additional colors on top. Feel free to experiment with different color combinations and blending techniques to create your desired rainbow effect. Allow each layer to dry before applying the next.
Step 4: Seal the Paint (Optional)
If you wish to protect the paint, consider applying a clear sealant once everything has dried completely. This step can help preserve the vibrancy of your colors and extend the lifespan of your lantern.
Step 5: Add Finishing Touches
After your paint is dry, you can embellish the jar by wrapping twine or ribbon around the neck. Secure it with a knot or a bow for a charming touch. If you’re using decorative items, now is the time to attach them as well.
Step 6: Insert the Tea Light
Finally, place the flickering LED tealight inside the jar to create a beautiful glow. Turn off the lights, and watch your Rainbow Fairy Lantern come to life!

How to Style Your Finished Rainbow Fairy Lantern: Glow-in-the-Dark Night Light and Decor
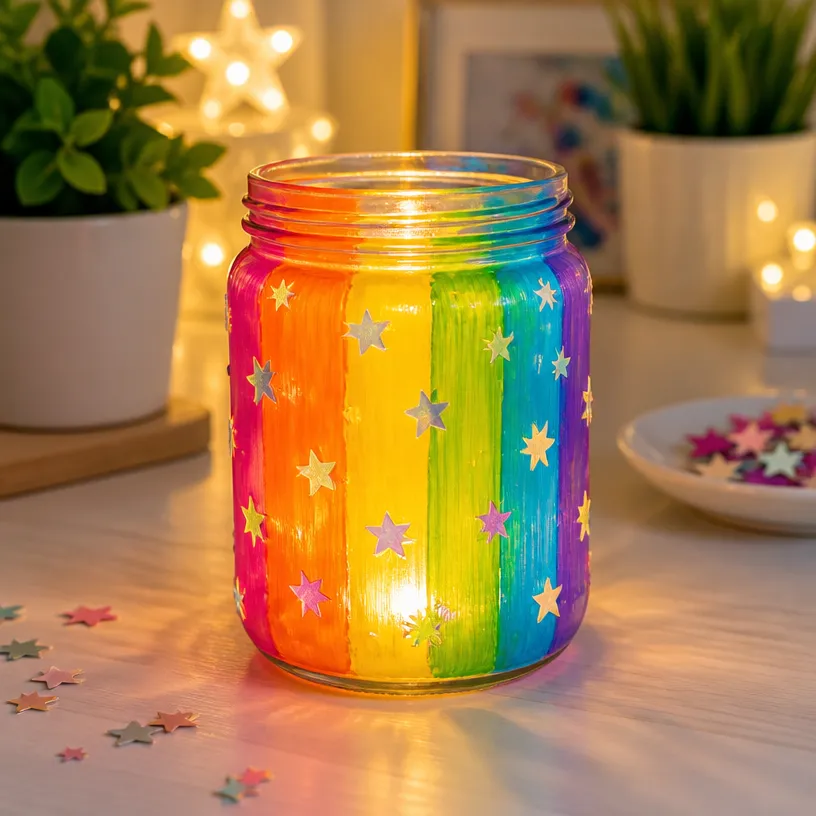
Incorporating your finished Rainbow Fairy Lantern into your home is a delightful way to showcase your handiwork. Consider placing it on a mantel, dining table, or coffee table as a centerpiece. It also makes a lovely addition to a child’s bedroom or a cozy corner where soft lighting is appreciated.
To enhance the shimmering effect, pair your lantern with other seasonal decor pieces, such as twinkling fairy lights or rustic floral arrangements. The cozy ambiance created by your lantern can turn any space into a charming retreat.
Maggie’s Tips for the Best Results
- Dry-fit your decor: Before securing any embellishments, arrange them to see how they look together.
- Work from largest to smallest: Start with larger paint designs and layer smaller details.
- Allow the paint to dry completely: This step is crucial for achieving a smooth finish without smudges.
- Test LED lights: Before finalizing your lantern, check that the LED lights fit well and create the desired glow.
- Balance colors and decor: Ensure your color distribution is even for a harmonious look.
Easy Ways to Customize This Project
You can easily personalize your Rainbow Fairy Lantern with different colors that reflect seasonal changes or personal preferences. Consider using hues like pastel for spring, warm earth tones for fall, or bright colors for summer celebrations. You might even add a name or a special date using stickers or paint to make it more personal.
How to Care for Your Rainbow Fairy Lantern
To keep your Rainbow Fairy Lantern looking its best, dust it lightly with a soft cloth to remove any buildup. Avoid using harsh chemicals that might damage the paint. When storing, place it in a safe area to prevent breakage, as the glass jar can be fragile.
FAQs About Rainbow Fairy Lantern: Glow-in-the-Dark Night Light and Decor
Can I use real plants with the lantern?
While it’s best to stick with faux options to avoid moisture damage, small dried flowers can work if handled carefully.
How do I ensure the color glows brightly?
A well-applied layer of paint will allow for effective glowing, so be sure to apply enough without overloading.
What types of light can I use?
An LED tealight is ideal for safety and creating a flickering effect. Avoid actual candles to prevent fire hazards.
How long does the glow last?
The glow intensity will depend on the paint used. High-quality glow paints can shine for several hours when properly charged by light.
Can I make a larger lantern?
Yes, just scale up the size to a quart jar or larger and adjust the paint quantities accordingly.
A Handmade Touch for the Season
Creating your Rainbow Fairy Lantern: Glow-in-the-Dark Night Light and Decor is not only a fun crafting experience but also a way to fill your home with warmth and charm. The joy of making something with your hands is immeasurable, and displaying it in your home adds a personal essence that store-bought items often lack. Every handmade piece carries its unique story, and it invites warmth and familiarity into your space.
As you bask in the glow of your lantern, remember that such small, thoughtful touches turn a house into a welcoming home.
Conclusion
As you embark on your crafting journey with the Rainbow Fairy Lantern, consider exploring other glow-in-the-dark creativity like the Colorful Glow-in-the-Dark Garden Stones Night Guide for added inspiration.
Print
Rainbow Fairy Lantern: Glow-in-the-Dark Night Light and Decor
- Total Time: 10 minutes
- Makes: 1 lantern
Description
Create a whimsical glow-in-the-dark lantern using a mason jar, perfect for adding charm to any space.
Materials
- 1 clean, empty mason jar
- Glow-in-the-dark paint in various colors
- Paintbrushes (various sizes)
- 1 small flickering LED tealight (optional but recommended)
- Twine or ribbon for embellishment
- Optional decorative items (like faux flowers or gems)
Instructions
- Prepare the mason jar by cleaning it thoroughly.
- Apply the glow-in-the-dark paint to the inside using a paintbrush.
- Layer additional colors on top, allowing each to dry.
- Seal the paint with a clear sealant if desired.
- Add twine or ribbon around the neck for embellishment.
- Insert the flickering LED tealight inside the jar.
Notes
Customize colors for different seasons and occasions. Allow paint to dry completely for the best finish.