


Kids DIY Paper Plate Fish Craft: Easy Ocean-Themed Activity You may also find Witch Hat Collages Easy Diy Halloween Craft For Kids useful.
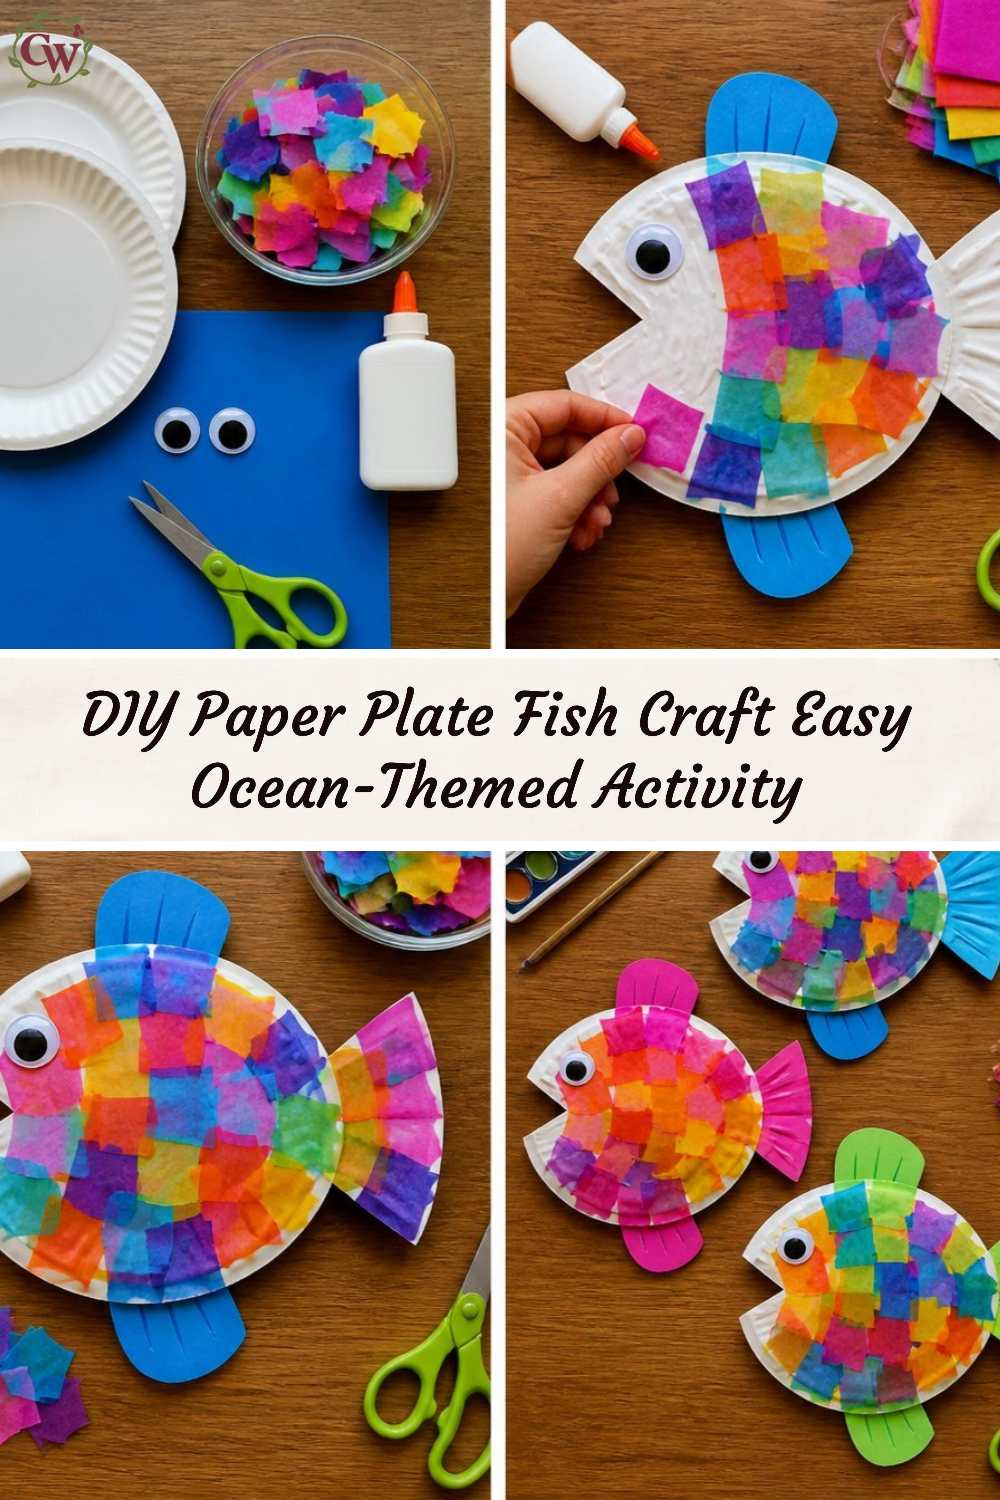
Creating a Kids DIY Paper Plate Fish Craft is a delightful way to engage kids in creative play while exploring ocean themes. This project is not only fun but also educational, as children can learn about marine life and colors while crafting their fish. The charming creations can brighten up a room or serve as colorful decorations for a summer gathering or ocean-themed party. The best part of this craft is that it requires minimal supplies and can be completed in a short amount of time with beautiful results, making it approachable for crafters of all ages. You may also find Witch Hat Craft Collage Kids Easy Halloween Activity useful.
The texture of the paper plates, combined with vibrant colors of paint and decorations, will spark endless imaginations. Furthermore, this craft is perfect for family bonding time, allowing kids and adults to collaborate and share laughs as they create their unique fish. If you’re looking for more kids’ crafts that combine creativity and learning, consider exploring easy DIY activities that can be enjoyed in any season.
Why You’ll Love This Kids DIY Paper Plate Fish Craft
This project is appealing for several reasons. First, it’s simple and straightforward, allowing kids to take the lead and exercise their creativity. Second, it uses inexpensive materials often found around the house, making it budget-friendly. As a simple project, it’s also highly versatile perfect for decorating a child’s room, enhancing a summer-themed party, or even decorating classrooms.
Plus, paper plate fish can be customized in many ways: from color variations to added embellishments, children can personalize their fish to reflect their personalities. The end results are lively additions to any space, capturing the joy of craft time together.
Before You Start
Before diving into the project, envision what the final paper plate fish will look like. Think about different colors and patterns that might appeal to your children. To make assembling easier, prepare your workspace by laying out all materials where they can be easily accessed. Keep in mind that the fins and scales of the fish will be the most attention-grabbing areas, so encourage creativity in those sections.
“A handmade touch makes every home feel warmer.”
Materials and Supplies
Materials and Supplies
- Paper plates (one for each fish)
- Acrylic paint (blue, green, yellow, red, etc.)
- Paintbrushes
- Scissors
- Markers or crayons
- Glue (craft glue or a glue stick)
- Craft embellishments (glitter, sequins, etc.)
- Optional: googly eyes
When selecting paints, consider using washable acrylics for easy cleanup. This will keep the project fun and stress-free. The embellishments can add unique textures to each fish, allowing children to explore various artistic expressions.
How to Make Kids DIY Paper Plate Fish Craft: Easy Ocean-Themed Activity
Step 1: Prepare the Paper Plate
Start by taking a paper plate and cut a triangle out of one side. This cut will become the fish’s tail. The beauty of this craft lies in its flexibility; kids can choose how big or small to make the tail.
Step 2: Paint the Fish
Next, encourage children to paint their paper plates in any colors they choose. They might opt for vibrant blues reminiscent of the ocean or bright yellows and greens to create a cheerful fish. After painting, let the plates dry completely.
Step 3: Add Details
Once dry, guide kids in adding details to their fish. They can draw or paint scales using dots, stripes, or shapes. If they like, they can glue on sequins or craft embellishments to represent scales for a sparkly effect.
Step 4: Create the Fins
Using leftover cut pieces from the paper plates or colored paper, cut out fin shapes and glue them onto the fish. Kids can let their imaginations run wild with different fin styles to create unique fish designs.
Step 5: Finish with Eyes
Lastly, if using googly eyes, glue them on now. Alternatively, they can draw eyes with markers or paint. Children can add personal touches like smiles or expressions, injecting their personalities into the craft.

How to Style Your Finished Kids DIY Paper Plate Fish Craft: Easy Ocean-Themed Activity
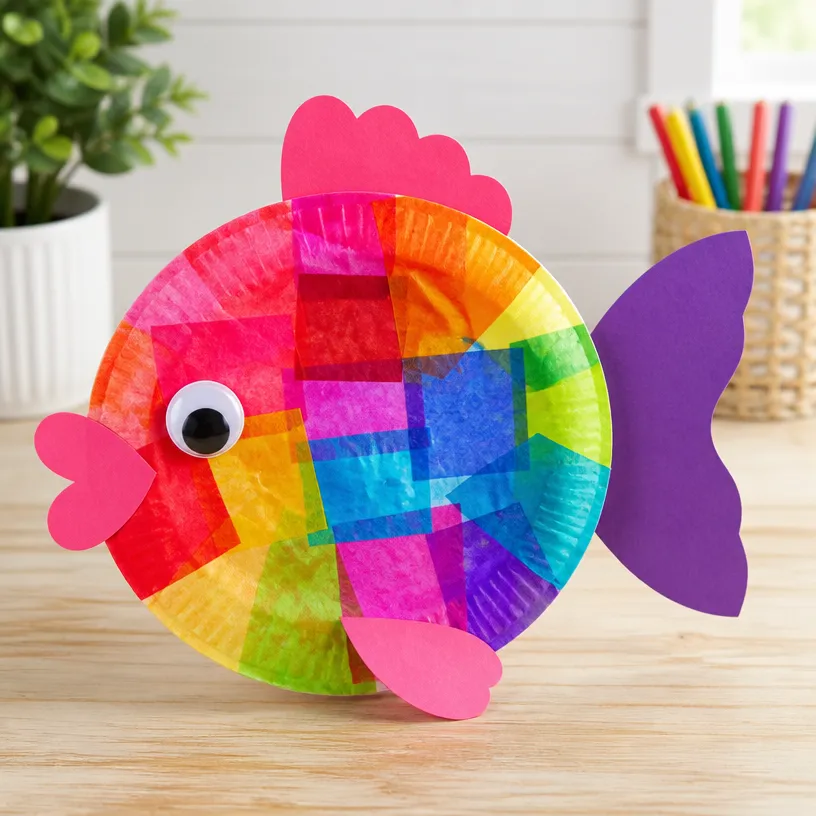
When it comes to displaying these delightful paper plate fish, there are many options. Hang them on the walls of a child’s room or create a vibrant ocean scene on a bulletin board to bring a splash of color to classrooms. Another idea is to use them as unique decorations during a summer outdoor picnic or party. You might also consider placing them on shelves or the dining table as seasonal decor.
The warmth of the colorful crafts will surely make a cheerful environment, perfect for inviting friends and family over to admire the creations.
Maggie’s Tips for the Best Results
- Always dry-fit all pieces before gluing to get an idea of placement and proportions.
- Use a light hand when applying paint for a smoother finish.
- Let each layer of paint dry completely before adding additional colors or details.
- Encourage kids to work from larger elements, like the body, to smaller elements, like eyes, for balance.
- Experiment with various shapes and sizes for fins to create diversity among the fish.
- Use craft glue for embellishments to ensure they stay secure.
Easy Ways to Customize This Project
Encourage kids to experiment with color schemes to make their fish unique. They could use popular sea colors like turquoises and corals or go wild with neon colors for a funky look. Felt or fabric scraps can be fun for decorations, or they could use natural elements like leaves or dried flowers for a more rustic feel. Their paper plate fish can tell a story through their uniqueness, capturing the fun of summer days.
How to Care for Your Handmade Decor
To ensure the longevity of your paper plate fish, store them in a dry, flat place away from direct sunlight to prevent fading. If exposed to moisture, the plates might warp, so keep them in a cool area. However, as a craft project, remember these are best enjoyed displayed rather than tucked away.
FAQs About Kids DIY Paper Plate Fish Craft: Easy Ocean-Themed Activity
Can we use other types of plates?
Absolutely! While paper plates work best for easy handling, plastic or foam plates can also be used to create more sturdy fish.
What should I do if the paints are too thick?
If the paint becomes too thick, adding a small amount of water can help achieve a smoother application.
How can we adapt this craft for different seasons?
Consider using autumn colors for leaf-themed fish or holiday colors for festive decorations, creating a craft that fits any time of year.
Can these be displayed outside?
If displaying outdoors, use waterproof materials where possible or simply hang them inside to keep them preserved and safe from the elements.
A Handmade Touch for the Season
Creating these Kids DIY Paper Plate Fish brings a world of creativity to life in your home. Shaping memories through crafts allows not only for learning but also for connection. These playful fish symbolize the joy of creating something beautiful together. Handmade projects may not need to be perfect to possess value; it’s the shared experience and the warmth they bring to our homes that truly matter.
When looking for additional inspiration, consider this easy paper plate fish craft that taps into the wonder of ocean life. Let every crafted fish swim with your family’s stories and creativity.
Print
Kids DIY Paper Plate Fish Craft
- Total Time: 30 minutes
- Makes: Varies by number of fish made
Description
A delightful and easy craft activity where kids create colorful fish using paper plates, exploring their creativity while learning about marine life.
Materials
- Paper plates (one for each fish)
- Acrylic paint (blue, green, yellow, red, etc.)
- Paintbrushes
- Scissors
- Markers or crayons
- Glue (craft glue or a glue stick)
- Craft embellishments (glitter, sequins, etc.)
- Optional: googly eyes
Instructions
- Prepare the paper plate by cutting a triangle out of one side for the tail.
- Paint the fish in vibrant colors and let it dry completely.
- Add details to your fish, including scales and embellishments.
- Create the fins using cut pieces or colored paper and glue them on.
- Finish the craft by adding eyes and any personal touches.
Notes
Encourage creativity with colors and embellishments. Use washable paints for easy cleanup.