

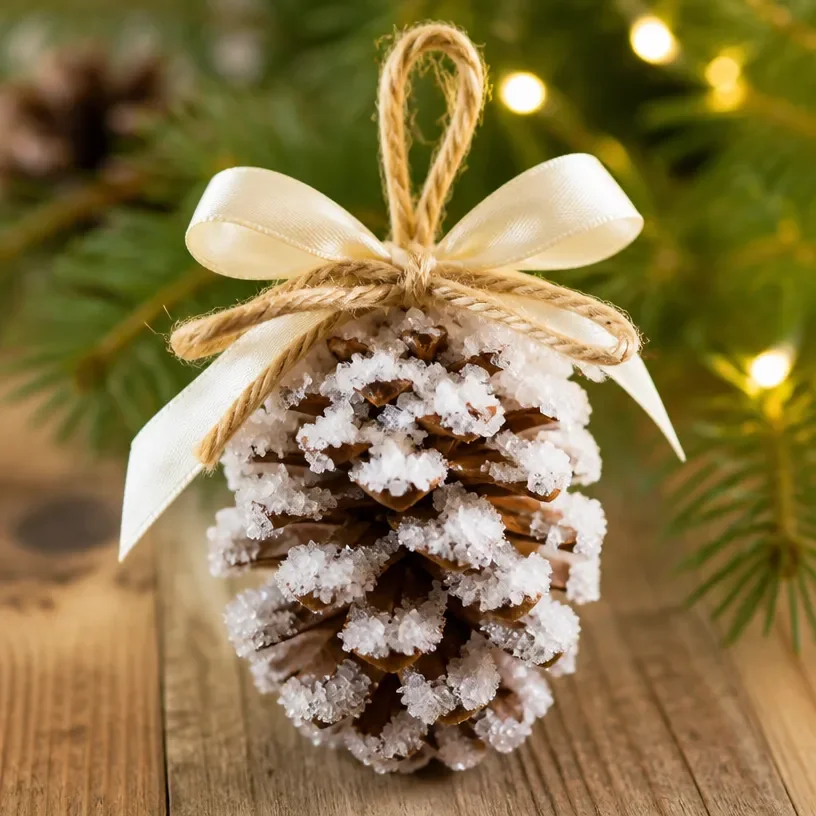
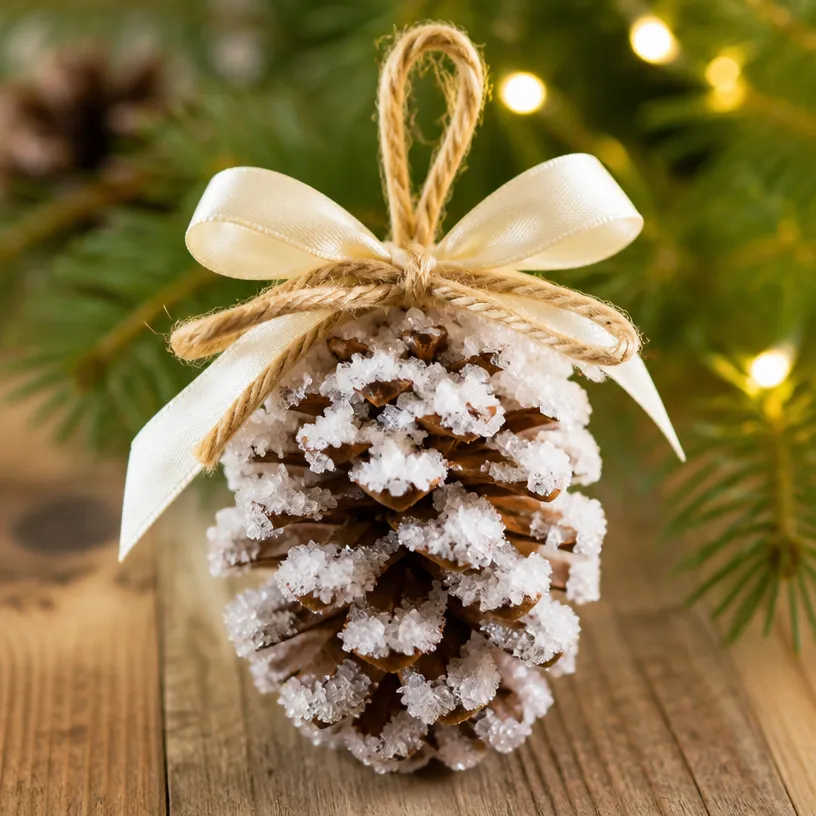
The Crystal Pinecone Ornament is a delightful and charming decoration that embodies the beauty of nature. Crafted from pinecones adorned with stunning crystal effects, this ornament adds a touch of rustic warmth to your home decor. Perfect for the holiday season, it can be displayed on your Christmas tree, hung in your windows, or even placed on a festive mantel. What makes this project especially approachable for home crafters is the use of easily accessible materials and a straightforward assembly process, allowing anyone to achieve beautiful results. You may also find Diy Patriotic Crystal Star Ornament Fourth Of July useful.
Why You’ll Love This Project
Creating your own Crystal Pinecone Ornament is an engaging way to add personality to your seasonal decor. Not only is it an inexpensive project that utilizes natural materials, but it also allows you to personalize the design to fit your style. The ornament can be used to complement various decor styles, especially farmhouse aesthetics, and works beautifully as a centerpiece or hanging decoration. Whether you are seasoned in crafting or just getting started, you will find this holiday craft rewarding and fun to make.

Before You Start
In envisioning your finished Crystal Pinecone Ornament, picture a pinecone glistening with beautiful crystals that catch the light beautifully. The construction focuses a lot on ensuring that the crystals adhere well while preserving the natural charm of the pinecone. Preparing your workspace with ample room and organizing your materials will set you up for success with this project.
“A handmade touch makes every home feel warmer.”
Materials and Supplies
Materials and Supplies
- Pinecones (4-6 depending on your desired number of ornaments)
- Epsom salt or Borax (for the crystal effect)
- Water (for the crystal solution)
- String or twine (for hanging)
- Ribbon (optional, for flair)
- Baking tray (for crystallizing)
- Parchment paper (for easy cleanup)
When selecting pinecones, look for those that are clean and open, as they will attract the crystals more effectively. Your choice of ribbon can also play a significant role in enhancing the final look of the ornament.
How to Make Crystal Pinecone Ornament
Step 1: Prepare the Solution
Begin by creating your crystal solution. In a saucepan, mix three cups of water with one cup of Epsom salt or Borax. Heat the mixture until dissolved, then remove it from the heat and let it cool slightly.
Step 2: Prepare Your Pinecones
While the solution cools, place your pinecones on a baking tray lined with parchment paper. This setup will help catch any extra crystals that fall off.
Step 3: Soak the Pinecones
Carefully pour the warm crystal solution over the pinecones, ensuring that they are fully submerged. You might need to weigh them down with something like a clean rock to keep them submerged.
Step 4: Allow to Crystalize
Let the pinecones soak for 24 hours. As they sit, the crystals will form and adhere to the surfaces.
Step 5: Dry and Finish
After 24 hours, remove the pinecones from the solution and carefully rinse them in cool water to remove any excess salt. Allow them to dry completely before moving to the next step.
Step 6: Add String or Ribbon
Once your pinecones are dry, attach a piece of string or twine through the top. If you’d like, you can add a decorative ribbon around the top for extra charm.

How to Style Your Finished Crystal Pinecone Ornament
The finished Crystal Pinecone Ornament looks wonderful when hung from a fireplace mantel or as a focal point on your Christmas tree. You can also cluster several ornaments together to create an eye-catching centerpiece for your dining table. Adding complementary decor such as greenery or warm candles enhances its rustic appeal, creating a cozy atmosphere.
Maggie’s Tips for the Best Results
- Remember to dry-fit your string or twine before securing it to ensure the ornament hangs nicely.
- Consider working with smaller pinecones for a delicate look.
- Allow your crystals to dry thoroughly to prevent any dripping or mess.
- Balance your ornaments by using varying sizes of pinecones for an interesting display.
Easy Ways to Customize This Project
You can easily customize your Crystal Pinecone Ornament by changing the colors of the ribbons or even adding painted accents to the pinecones. For a seasonal twist, consider using red and green for Christmas or soft pastels for Easter. Another option is to add small embellishments like dried flowers or glitters for a completely unique look.
Caring for Your Handmade Decor
To keep your Crystal Pinecone Ornament looking fresh and sparkly, store it in a cool, dry place away from direct sunlight. If dust collects, gently dust it off with a soft cloth. Proper care will extend the life of your beautiful handmade decor.
FAQs About Crystal Pinecone Ornament
Can I use real pinecones that I find outside?
Yes! Just ensure they are clean, dry, and free of pests.
How long do the crystals last?
The crystals should remain intact; however, humidity can sometimes affect their longevity.
Can I paint the pinecones before crystallizing?
Yes, you can paint the pinecones if you prefer a colored look before adding the crystals.
Is this project suitable for outdoor use?
While they can initially go outside, it’s best to keep them indoors as moisture may dissolve the crystals.
Can I use other materials to make crystals?
Feel free to experiment with different materials like sugar for a different crystal texture.
A Handmade Touch for the Season
Crafting your own Crystal Pinecone Ornament is a wonderful way to bring a personal touch to your seasonal decor. It’s a project that embodies the warmth of handmade creations, allowing you to create lasting memories as you decorate your home. Feel the joy of crafting something special that will enhance the beauty of your living space.
For an in-depth look at creating other beautiful seasonal crafts, consider exploring options like Crystal Star Ornaments or DIY Butterfly Crystal Window Decor.
Conclusion
In making the Crystal Pinecone Ornament, you not only forge a connection with nature but also with the creation process itself. This project exemplifies the charm of handmade decorations, which make our homes feel warm and inviting. For more crafting inspiration, including fun uses of crystals, check out Borax Crystal Nature Ornaments. Enjoy the process of creating and infusing your space with handcrafted beauty!
Print
Crystal Pinecone Ornament
- Total Time: 1440 minutes
- Makes: 4-6 ornaments
Description
Create a beautiful Crystal Pinecone Ornament with natural materials for your holiday decor.
Materials
- Pinecones (4-6)
- Epsom salt or Borax
- Water
- String or twine
- Ribbon (optional)
- Baking tray
- Parchment paper
Instructions
- Prepare the solution by mixing three cups of water with one cup of Epsom salt or Borax and heating until dissolved.
- Place pinecones on a baking tray lined with parchment paper.
- Soak the pinecones by pouring the warm solution over them until submerged.
- Allow the pinecones to soak for 24 hours.
- Remove the pinecones from the solution and rinse in cool water.
- Attach string or twine through the top for hanging.
Notes
Customize by using different colored ribbons or adding embellishments to the pinecones.