

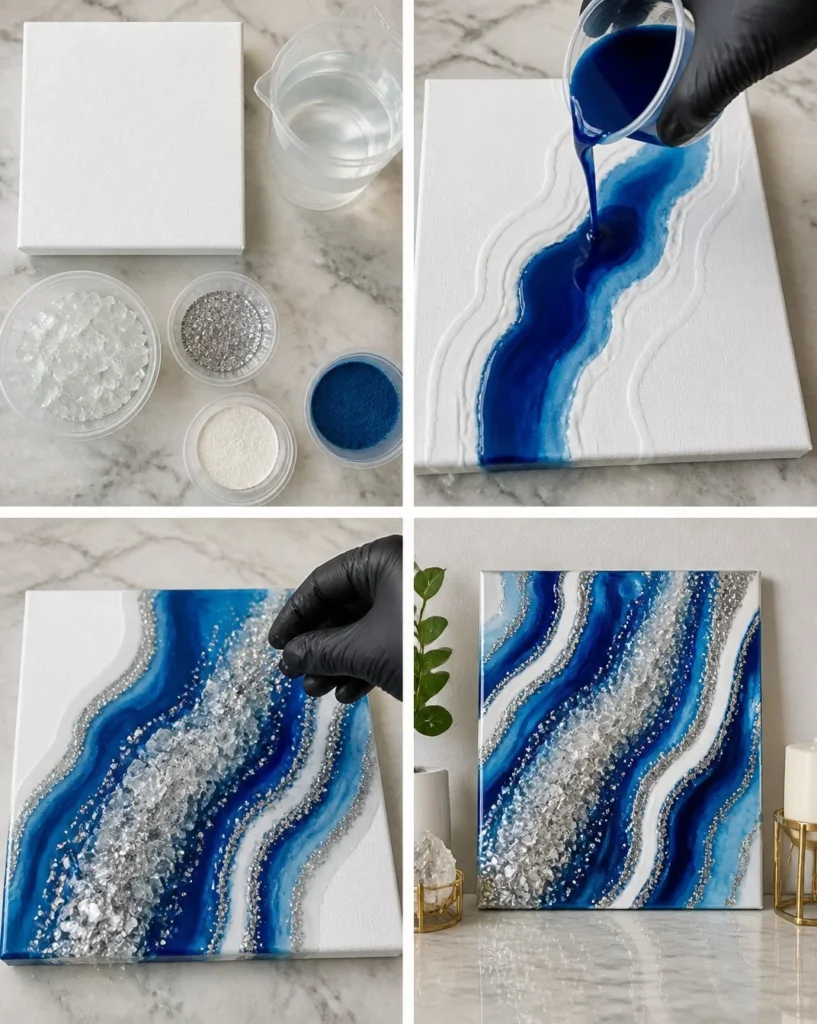
Creating your own DIY Faux Crystal Geode Wall Art with Resin can bring a unique touch to your home décor. This project allows you to blend creativity with a tactile experience, resulting in stunning art that mimics the beauty of natural geodes. The shimmering details and rich colors can enhance any room, making it an eye-catching piece.
You might hang this art above your mantel, in a hallway, or as a centerpiece for your dining area. It’s not just a seasonal project this versatile piece can complement various decor styles year-round. Plus, working with resin is surprisingly approachable, even for beginners, as it allows for both creativity and experimentation.
Why You’ll Love This Project
Making DIY Faux Crystal Geode Wall Art is an exciting journey for any craft lover. First and foremost, this project is incredibly approachable. The materials needed are quite easy to source, and the step-by-step process helps ensure good results. You can also adjust colors and styles to fit your personal taste, making it a fantastic canvas for self-expression.
The geode-inspired art offers a natural beauty that’s perfect for farmhouse decor or any contemporary space. Plus, it’s an inexpensive way to create a piece that feels high-end without breaking the bank. Imagine displaying this stunning artwork during gatherings or simply enjoying it on quiet evenings at home. If you like the crystal look, a crystal butterfly window decor cascade carries it over to the window.
Before You Start
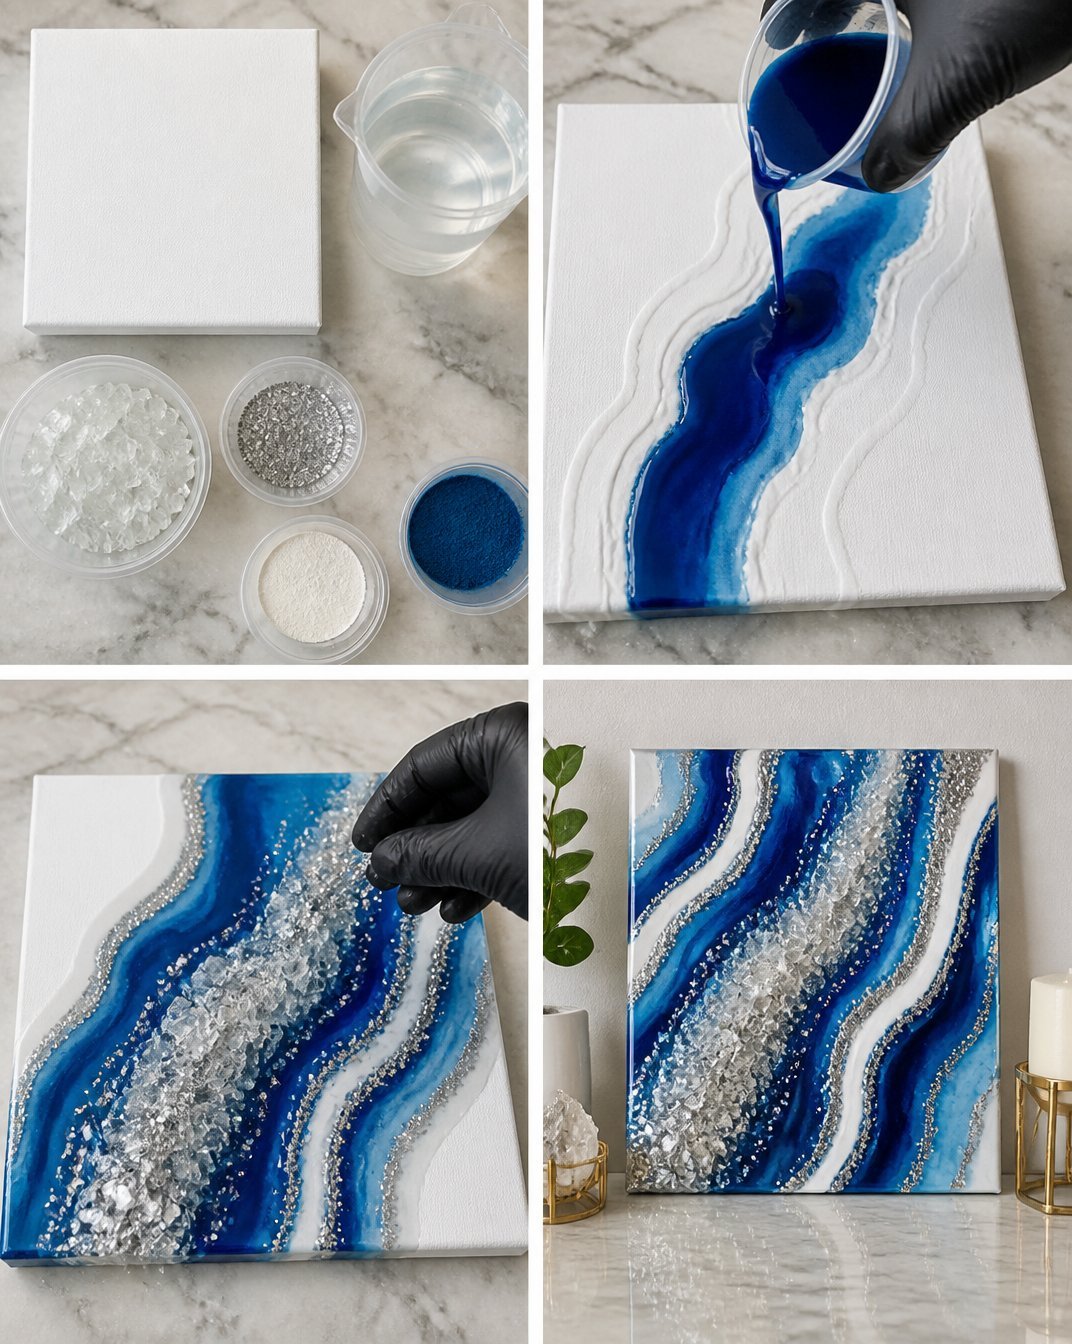
Before diving into this project, it’s essential to envision your finished piece. Ideally, you’ll want hues of white and blue flowing smoothly, resembling the natural patterns of a geode. Pay special attention to the application of the resin; it deserves your focus for the best outcome.
It’s vital to choose a well-ventilated workspace, especially since you’ll be mixing resin. Make sure you have all your materials ready before starting. You’ll find it helpful to lay everything out in advance and perhaps do a dry fit of your materials.
“A handmade touch makes every home feel warmer.”
Materials and Supplies
- 10 x 10 in canvas
- 10 oz epoxy resin
- ½ cup crushed glass
- 2 tbsp silver glitter
- White mica powder
- Blue mica powder
When choosing your materials, the quality and type of epoxy resin will influence your results, so look for one designed for art and craft use. The crushed glass adds texture, while the mica powders provide a gorgeous sheen it’s all about creating depth in your geode.
How to Make DIY Faux Crystal Geode Wall Art with Resin
Step 1: Paint the Geode Outline
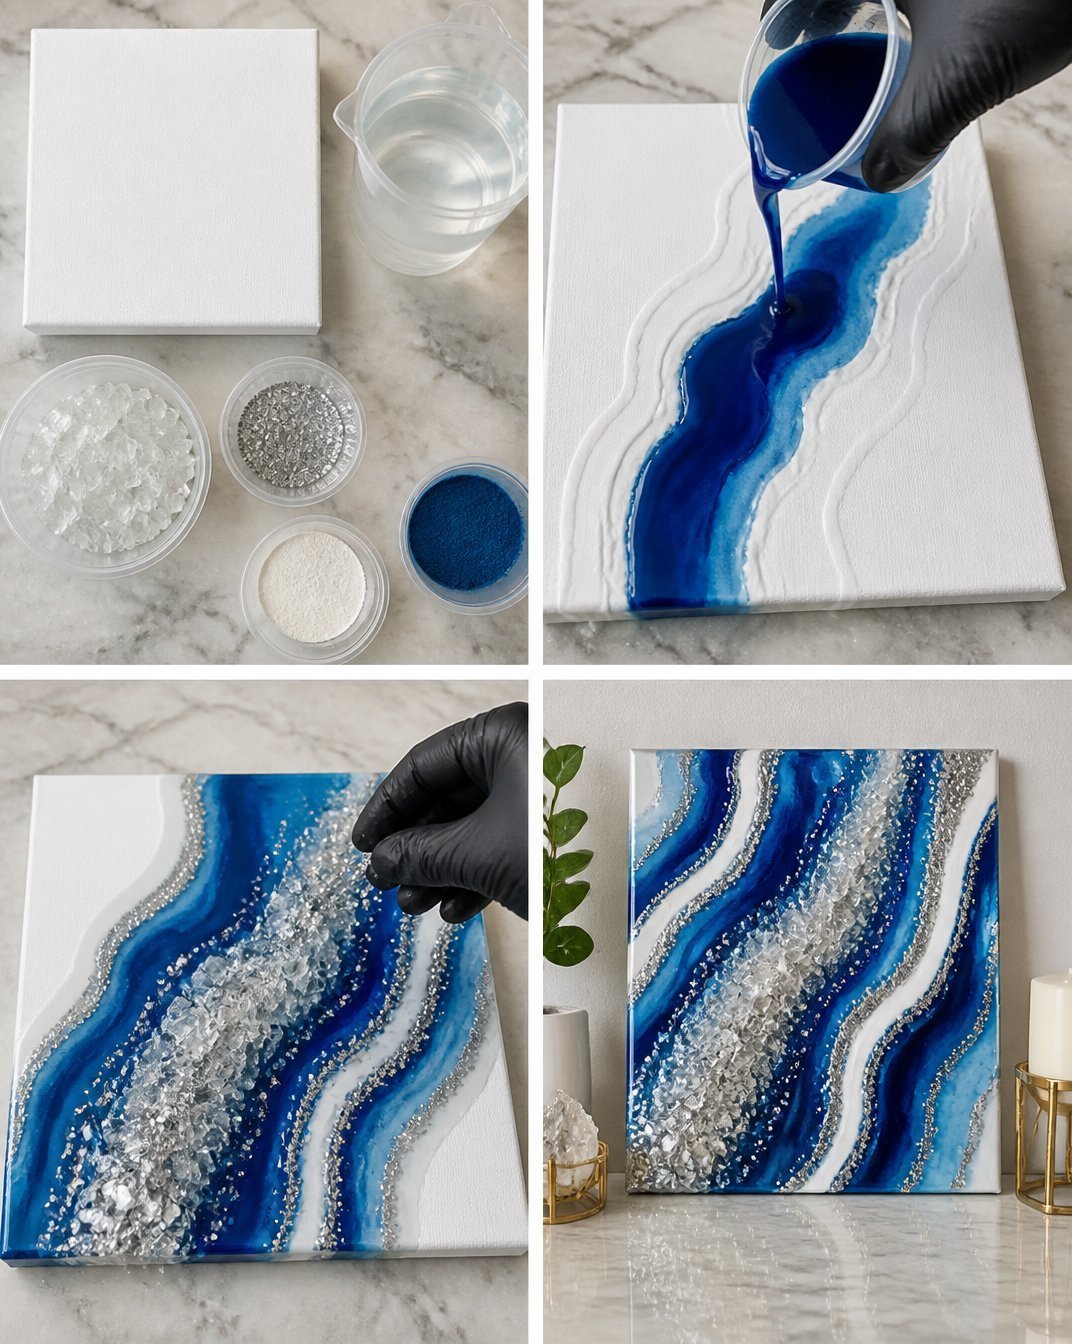
Begin by painting a geode outline on your canvas. Use gentle curves to mimic the organic shapes found in nature. Take your time with this step, as the more natural your outline, the better your art will look.
Step 2: Mix the Resin
In a well-ventilated area, mix your epoxy resin according to the manufacturer’s instructions. Combine white and blue mica powders until fully blended. This mixture will create an attractive color and texture that mimics real crystals.
Step 3: Pour the Resin
Carefully pour the resin mixture into the sections of your painted outline. Allow it to flow freely within these boundaries, aiming for organic shapes while filling each section evenly.
Step 4: Add Sparkle
While the resin is still wet, generously sprinkle the crushed glass and silver glitter over your design. This adds depth and sparkle! You can experiment with different placements to see how best to achieve the effect you’re after.
Step 5: Cure the Art
Now, let your art piece cure for 24 hours in a dust-free space. It’s important not to disturb the piece during this time, so find a good spot where it can set undisturbed.
How to Style Your Finished DIY Faux Crystal Geode Wall Art with Resin
Once you’ve completed your DIY Faux Crystal Geode Wall Art, it’s time to find it a home! This piece works wonderfully above a mantel or displayed prominently on a console table. It can stand alone or be paired with complementary pieces, such as simple frames or natural décor like wood or plants.
Consider using neutral tones around it to let the geode artwork shine. You might also switch up the display seasonally with various decorative accents that complement the colors in your artwork.
Maggie’s Tips for the Best Results
- Dry-fit your materials before pouring the resin to see how they flow together.
- Work in layers if you want different depths; allow each resin layer to set a bit before adding more.
- Be patient with the mixing process to avoid bubbles ensure everything is blended thoroughly.
- Use a torch or heat gun to remove any bubbles on the surface of the resin before it cures.
- Keep a damp cloth nearby for quick clean-ups, as resin can be sticky.
Easy Ways to Customize This Project
To reflect your personal style, consider customizing the colors. You could utilize earthy tones for a more rustic feel or vibrant colors for a modern twist. Adding embellishments like metallic gold leaf or using different types of glitter can also elevate the art.
Incorporating fresh seasonal flowers or greenery can help in aligning the art with your current home décor theme as well. Pressed blooms work here too, much as they do in this pressed flower heart.
How to Care for Your Handmade Decor
To ensure the longevity of your DIY artwork, gently dust the surface with a soft cloth as needed. Avoid placing it in direct sunlight, as intense light may affect the resin over time. If displayed outdoors, be mindful of moisture exposure. Store it in a cool, dry place during off-seasons to keep the colors vibrant. The same handling suits a layered rainbow glue suncatcher, which is equally sensitive to heat and damp.
FAQs About DIY Faux Crystal Geode Wall Art with Resin
Can I use different colors?
Absolutely! Experimenting with different mica powders can yield unique results.
How long does the resin take to cure?
Most resin takes about 24 hours to cure fully, but check the manufacturer’s guidelines for specifics.
Can I use this piece outdoors?
While it can be placed outdoors, it’s best to avoid extreme temperatures and direct sun to preserve the colors.
What if I don’t have crushed glass?
You can substitute with any decorative stones or beads that fit your vision.
A Handmade Touch for the Season
Creating your own DIY Faux Crystal Geode Wall Art is not just about crafting; it’s about bringing a personal touch into your home. Each piece you create holds a story, a memory, and a sense of accomplishment. You don’t need perfection; you need creativity and the joy of making something beautiful.
If you’re interested in exploring more resin projects, I recommend checking out the ideas in this DIY Faux Geode Slice with Envirotex Lite Pour-On Epoxy resource. Happy crafting!
Print
DIY Faux Crystal Geode Wall Art with Resin
- Total Time: 1450 minutes
- Makes: 1 artwork
Description
Create stunning DIY Faux Crystal Geode Wall Art with resin using simple materials for a unique home décor piece.
Materials
- 10 x 10 in canvas
- 10 oz epoxy resin
- ½ cup crushed glass
- 2 tbsp silver glitter
- White mica powder
- Blue mica powder
Instructions
- Begin by painting a geode outline on your canvas.
- In a well-ventilated area, mix your epoxy resin according to the manufacturer’s instructions.
- Carefully pour the resin mixture into the sections of your painted outline.
- While the resin is still wet, sprinkle the crushed glass and silver glitter over your design.
- Now, let your art piece cure for 24 hours in a dust-free space.
Notes
Dry-fit your materials before pouring the resin and use a torch to remove bubbles.