

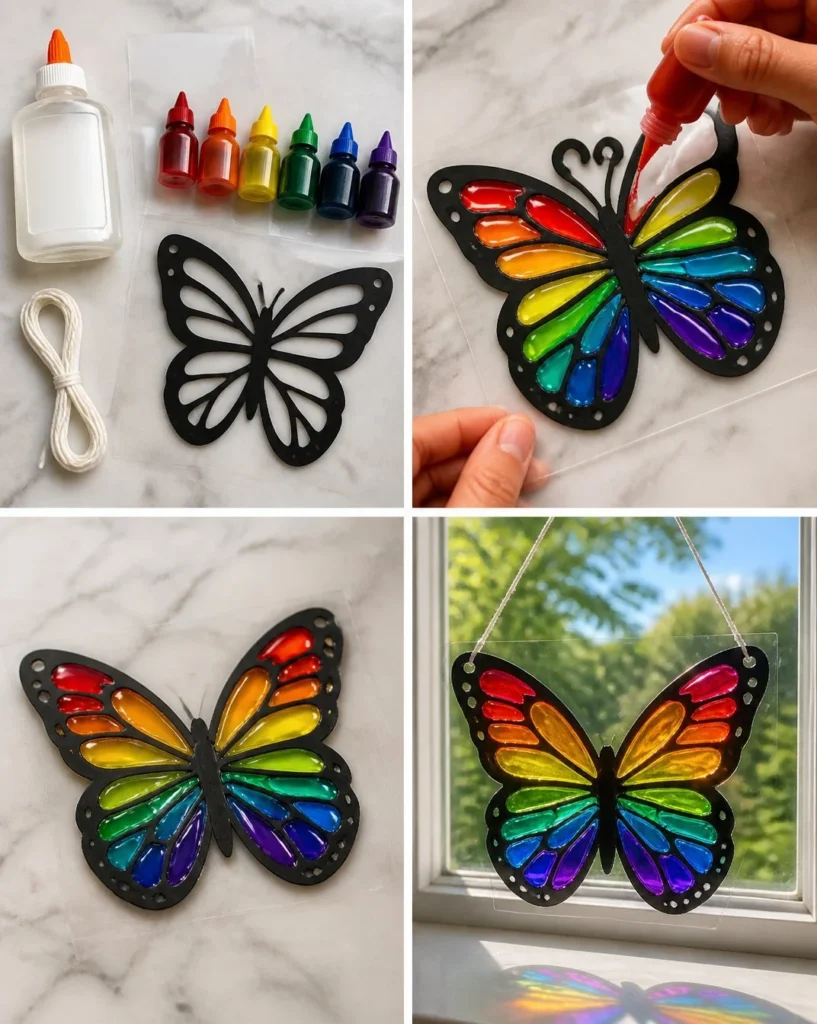
Layered Rainbow Glue Butterfly Suncatcher is a vibrant and enchanting project that combines creativity with the beauty of nature. This suncatcher not only adds a splash of color to your home but also serves as a delightful craft for children and adults alike. Whether you hang it in a sunny window or use it as a centerpiece for your porch decor, it’s an approachable and enjoyable way to brighten your space.
The best part about this project is its simplicity. With materials you likely already have around your home, you can create something stunning without breaking the bank. The bright colors of the butterfly will dance with the sunlight, casting beautiful reflections in your room. Perfect for spring and summer, this whimsical suncatcher is a lovely addition to any room, especially where natural light shines through.
Why You’ll Love This Layered Rainbow Glue Butterfly Suncatcher
Creating a layered rainbow glue butterfly suncatcher is a craft that resonates with anyone who enjoys DIY projects. The appeal lies not just in its colorful outcome, but also in the creative process. You’ll enjoy watching the glue transform with food coloring into vibrant hues that reflect your personal style.
This project uses inexpensive materials that can often be found in your home or easily purchased. Clear school glue and food coloring pair beautifully with a simple black cardstock base to create that eye-catching butterfly shape. Its versatility allows it to fit into any seasonal decor, embracing the essence of farmhouse charm while permitting personal adaptations. The same butterfly shape turns up in this yarn wrapped butterfly mobile if you would rather work with texture than color.
Before You Start
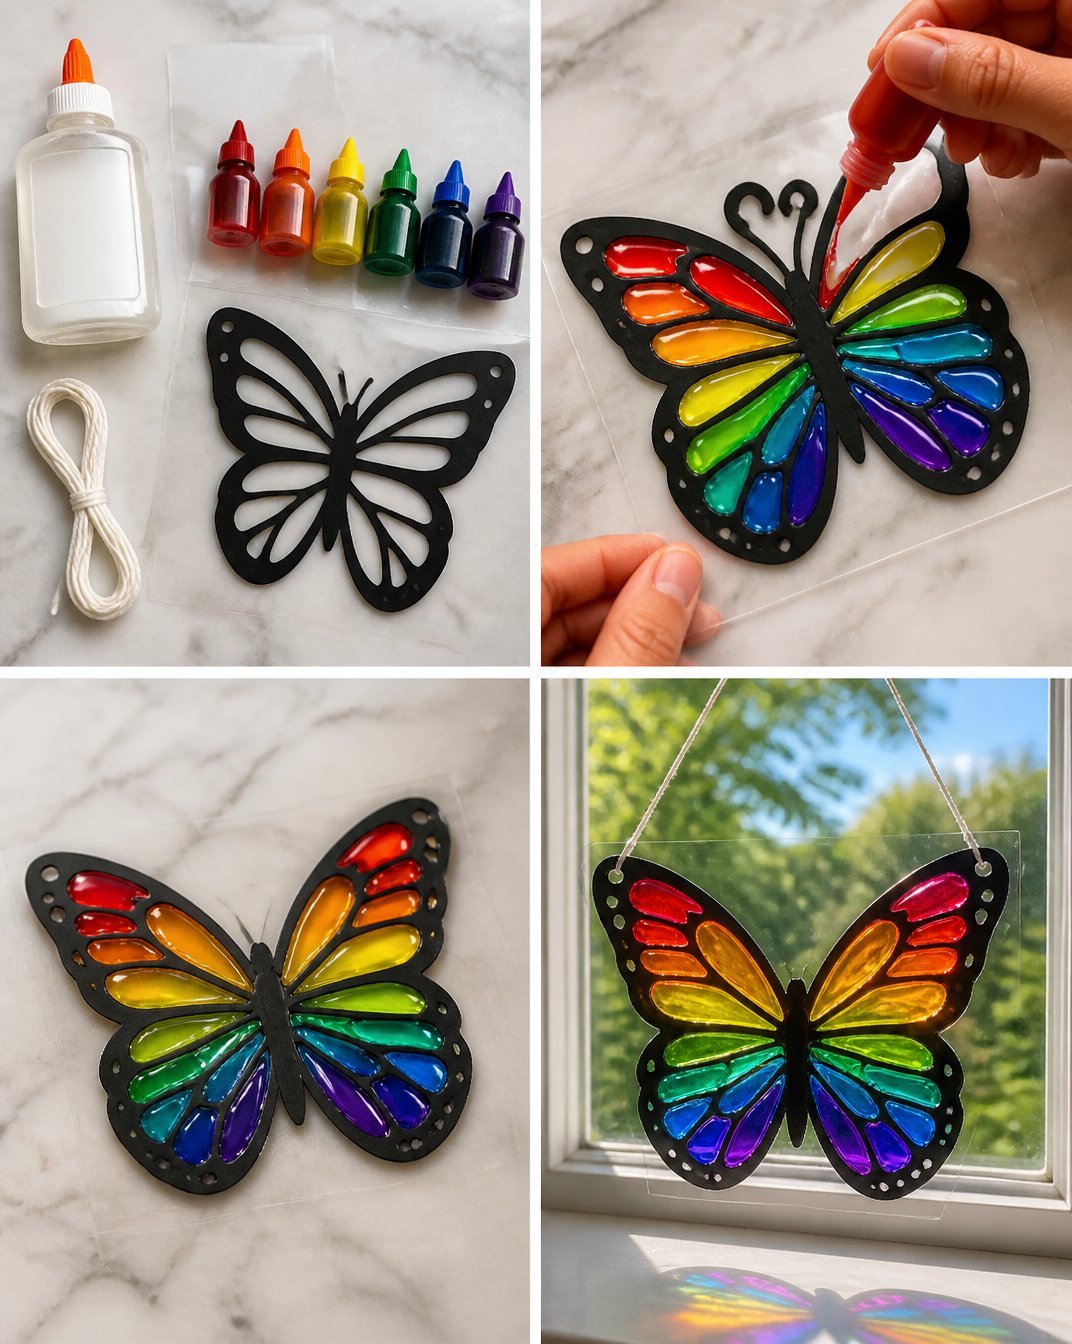
When tackling the Layered Rainbow Glue Butterfly Suncatcher, envision a colorful butterfly with radiant wings. The most crucial detail to focus on is how you layer the glue and colors in the wings; this step will create the depth and vibrancy of your final piece. Prepare your workspace with plenty of light and a flat surface, so you can easily apply your glue and colors.
“A handmade touch makes every home feel warmer.”
Materials and Supplies
Materials and Supplies
- Clear school glue
- Food coloring
- Clear plastic sheet
- Black cardstock
- String
Each of these materials plays an essential role in the overall look of your suncatcher. The clear plastic sheet will act as a base for your glue art, ensuring that you can peel the butterfly off once it’s completed. Choose vibrant food coloring shades that complement each other, adding to the visual appeal of your handcrafted creation.
How to Make Layered Rainbow Glue Butterfly Suncatcher
Step 1: Outline the Butterfly Wings
Begin by carefully outlining butterfly wings on the black cardstock. Use a pencil or a fine-tipped marker to sketch your desired shape, making sure that the wings are balanced and visually appealing.
Step 2: Prepare the Colored Glue
In a mixing bowl or cup, combine the clear school glue with food coloring to create beautiful, vibrant colors. You can create multiple cups with different colors for a more layered effect or stick to a couple of your favorites!
Step 3: Fill in the Wings
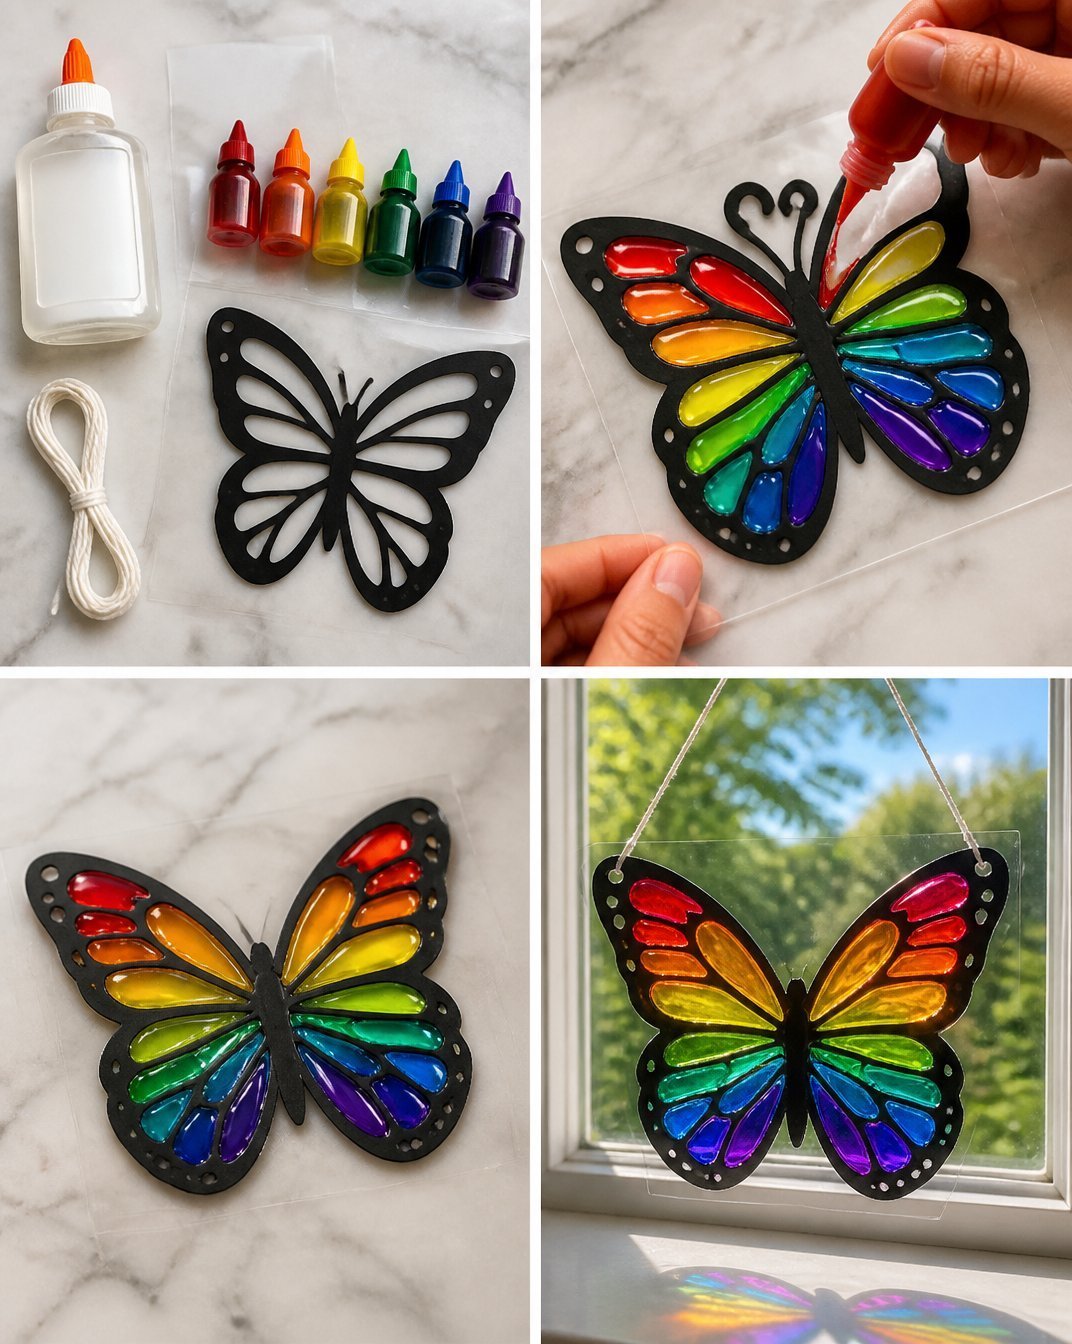
Using a small paintbrush or stick, carefully fill in the outlined sections of the wings with your rainbow-colored glue. Don’t be afraid to let the colors mix a little as you apply them; this can create more depth and interesting patterns.
Step 4: Allow to Dry
Once your butterfly wings are completely filled in, let the glue dry. This might take a few hours, so be patient! Ensure it’s in a safe, flat area where it won’t be disturbed.
Step 5: Peel Off the Butterfly
Once dried, gently peel your butterfly from the clear plastic sheet. Use care in this step to keep the wings intact and avoid damaging the beautiful glue colors.
Step 6: Hang Your Creation
To finalize your project, use a piece of string to hang your stunning butterfly in a sunny window. Enjoy watching it come to life with the sunlight streaming through, casting beautiful shadows and creating a joyful atmosphere.
How to Style Your Finished Layered Rainbow Glue Butterfly Suncatcher
Incorporating your completed layered rainbow glue butterfly suncatcher into your home is simple and delightful. Hang it in a sunny window for maximum effect, allowing the light to illuminate its vibrant colors. This piece also works wonderfully in a child’s room, adding a joyful touch that enhances the space. Pair it with a butterfly crystal window decor cascade to fill a larger pane.
Consider pairing it with other natural elements, like potted plants or wooden shelves, to enhance your rustic farmhouse decor. Display it as part of a seasonal arrangement on your mantel or dining table, tying the colors of your suncatcher into the rest of your setup.
Maggie’s Tips for the Best Results
Test Before You Fill: Before applying the colored glue, dry-fit the butterfly wings to see how they look together. This will help you visualize your final product.
Work in Layers: If you want to create more depth, apply several layers of glue to your design, letting each layer dry before adding another.
Choose High-Quality Materials: The type of clear school glue can affect the opacity and overall look, so choose one that dries clear and gives a good shine.
Safety First: Be sure to work in an area that’s easy to clean, as glue can sometimes get messy!
Easy Ways to Customize This Project
Seasonal Colors: Adjust the food coloring based on the season. Pastel colors for spring or warm tones for fall can change the entire mood of your decor.
Add Glitter: For a little extra sparkle, sprinkle some fine glitter into your glue before it dries.
Different Shapes: Try creating other shapes like flowers or stars in a similar style, expanding your craft creativity!
Caring for Your Handmade Decor
To keep your suncatcher looking fresh and vibrant, simply dust it lightly with a soft cloth every now and then. Avoid exposing it to excessive moisture, as it can compromise the glue and colors. If you want to change it up for the seasons, consider storing it in a safe place until you are ready to display it again. A pressed flower rainbow heart stores the same way and makes a natural companion piece in the same window.
FAQs About Layered Rainbow Glue Butterfly Suncatcher
Can I use other types of glue?
While clear school glue is recommended, you can experiment with other types, but be mindful of drying times.
What if my colors mix too much?
Sometimes, blending colors can create beautiful effects. If you prefer distinct colors, apply them carefully and let each set of colors dry before adding additional layers.
How long does it take for the glue to dry?
While drying time can vary based on the thickness of the glue, typically a few hours will suffice. Be patient to retain the integrity of your design.
Can I hang this outside?
While it’s mainly meant for indoor use, if you want to hang it outside, ensure it’s in a sheltered spot to protect it from rain and direct sunlight.
A Handmade Touch for the Season
Creating your own Layered Rainbow Glue Butterfly Suncatcher offers a unique and joyful experience that rounds out your seasonal decor. There’s something truly special about crafting with your own hands a feeling of warmth and accomplishment that elevates any space. Remember, the beauty of handmade decor lies in its imperfections, making every piece genuinely one of a kind.
If you’re looking for more ideas and inspiration, check out Repurposed Butterfly Suncatchers to explore a variety of creative adaptations!
Print
Layered Rainbow Glue Butterfly Suncatcher
- Total Time: 180 minutes
- Makes: 1 suncatcher
Description
Create a vibrant and enchanting butterfly suncatcher using clear glue and food coloring, perfect for brightening your home.
Materials
- Clear school glue
- Food coloring
- Clear plastic sheet
- Black cardstock
- String
Instructions
- Outline the butterfly wings on the black cardstock.
- Prepare the colored glue by mixing clear school glue with food coloring.
- Fill in the wings with the rainbow-colored glue using a small paintbrush.
- Allow the glue to dry completely for a few hours.
- Peel off the butterfly from the clear plastic sheet.
- Hang your butterfly in a sunny window using a piece of string.
Notes
For best results, work in layers and use high-quality glue that dries clear. Avoid excessive moisture.