


The Rainbow Suncatcher Craft Using Clear Glue is an enjoyable and simple project that brings bursts of color and light into your home. By using clear glue, you’ll create stunning, translucent patterns that beautifully catch the sunlight, creating a warm and inviting atmosphere. This craft can be displayed in windows, on porches, or even as part of your seasonal decor, making it versatile for any time of year. You may also find Clear Blue Rainbow Bat Suncatcher Wreath useful.
Crafting this suncatcher is approachable for anyone, whether you’re a seasoned DIY enthusiast or just starting your crafting journey. The materials are easy to find, and the process involves simple steps that are perfect for beginners. Plus, it allows for great creativity and personalization, as you can choose your colors and design freely. You may also find Layered Rainbow Glue Butterfly Suncatcher useful.
If you’re looking for another fun implementation of glue in crafts, check out our Clear Rainbow Ghost Suncatcher Craft for Kids for a delightful twist!
Why You’ll Love This Project
Creating your own rainbow suncatcher has numerous benefits that are sure to inspire you. For one, the construction process is straightforward and doesn’t require advanced crafting skills. You’ll also find that the materials are inexpensive and readily available at your local craft store, making it accessible for families or anyone on a budget.
The seasonal versatility of this project makes it appealing as well. You can adapt the colors to fit any season or holiday, allowing you to refresh your decor regularly. The suncatcher adds a unique farmhouse character to your space, and the ability to customize it with shades that match your home will make it a cherished piece.

Before You Start
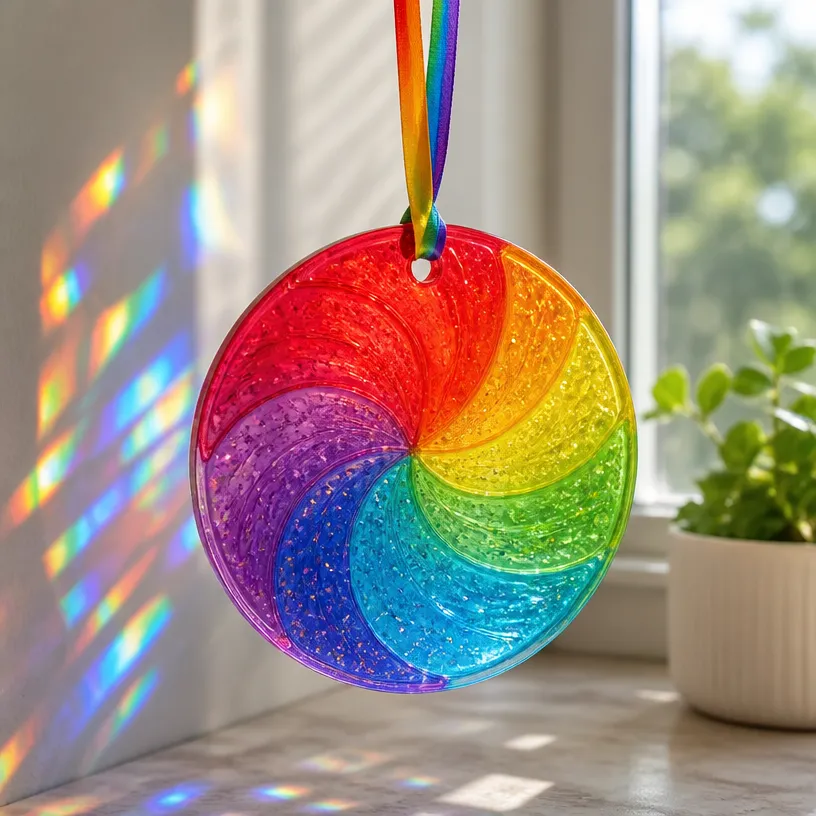
Before diving into the materials, it’s essential to understand what your finished rainbow suncatcher will look like. Ideally, it should feature vibrant colors arranged in a pleasing pattern that allows light to shine through, creating a mesmerizing effect. Take some time to plan your design on paper before starting; this can help streamline the assembly process.
Since the glue will be the main component, focus on achieving smooth, even layers for the best results. Preparing your workspace by covering the table with newspaper or a craft mat will help catch any drips and make clean-up easier.
“A handmade touch makes every home feel warmer.”
Materials and Supplies
Materials and Supplies
- Clear school glue
- Food coloring (various colors)
- Wax paper or a non-stick mat
- Paintbrush or sponge (for spreading glue)
- Scissors (if cutting shapes)
- A small container (for mixing glue and color)
- Optional: Glitter, beads, or other embellishments
When selecting your clear glue, make sure it’s not too watery, as you want it to hold the color without being transparent. Choose vibrant food coloring for bright results, and consider adding a touch of glitter for an extra sparkle.
How to Make Rainbow Suncatcher Craft Using Clear Glue
Step 1: Prepare Your Workspace
Start by laying out your wax paper or non-stick mat on a flat surface. This will serve as your base for the project and prevent any mess from adhering to your work surface.
Step 2: Mix Your Colored Glue
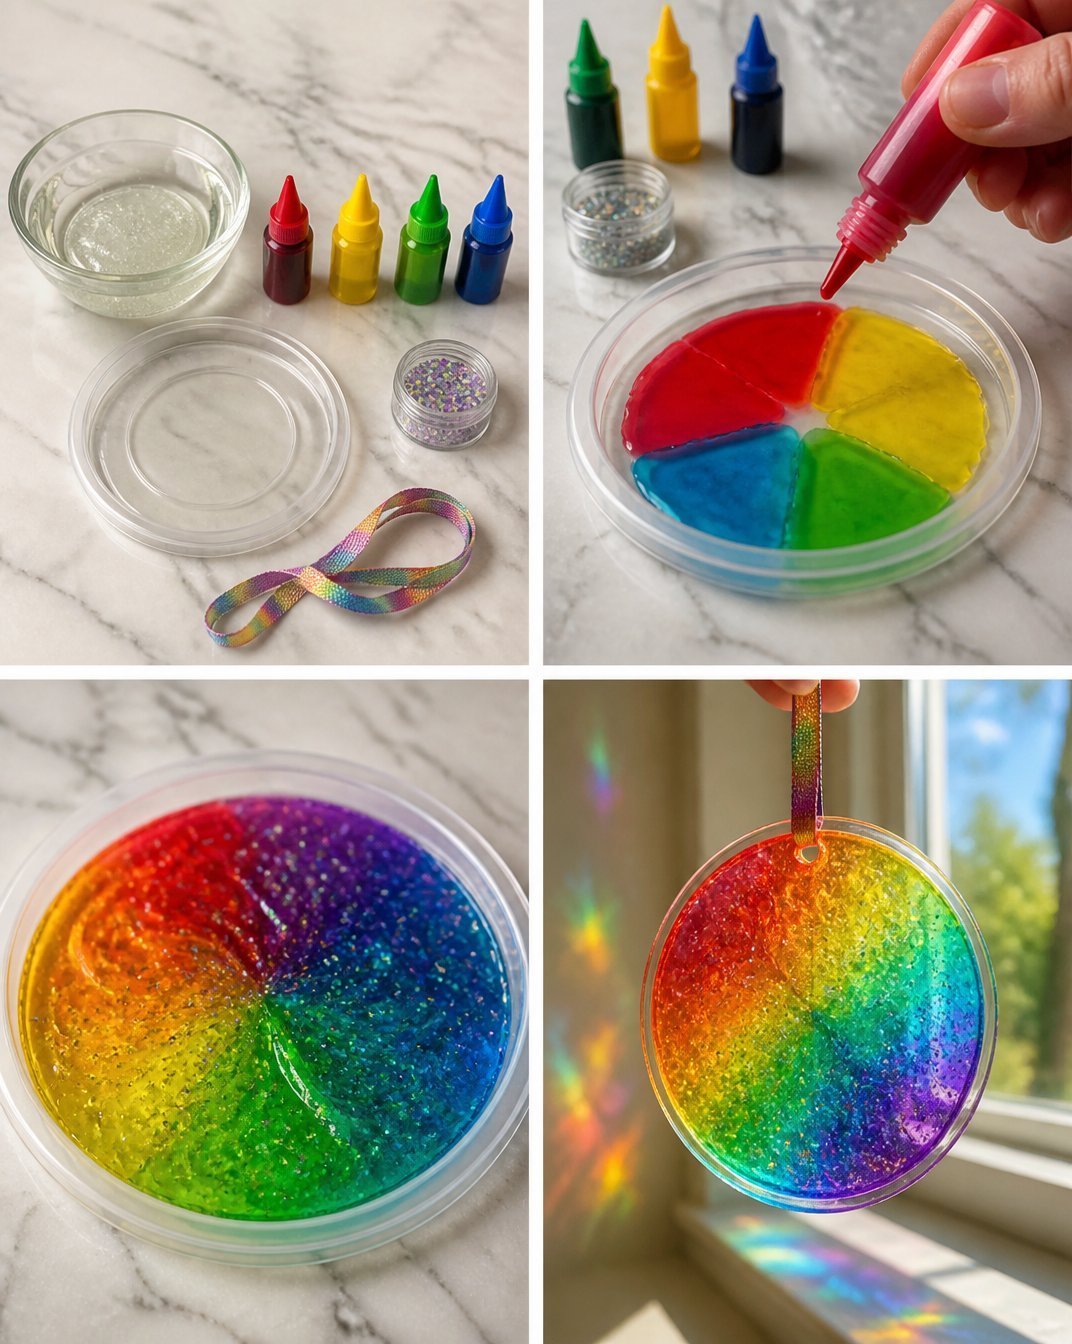
In the small container, mix a few tablespoons of clear glue with several drops of food coloring. Stir until you achieve your desired color. Repeat this process for each color you wish to include, creating a beautiful palette for your suncatcher.
Step 3: Create the Base Layer
Using your paintbrush or sponge, apply a thin layer of your first colored glue onto the wax paper. You can create different shapes or patterns with it, as this will be the base of your suncatcher.
Step 4: Layer Additional Colors
Once the first layer has begun to set but is still tacky, apply more colored glue on top, either blending with the previous color or creating distinct sections. This layering technique will enhance the suncatcher’s effect as the light shines through.
Step 5: Allow to Dry
Let your suncatcher dry completely, which may take a few hours depending on humidity and how thick the layers are. Once it’s dry, gently peel it off the wax paper.
Step 6: Finishing Touches
If you want to add embellishments like glitter or beads, now is the time! Use a dab of clear glue to secure them onto your suncatcher. This is optional, but adds a charming touch.
How to Style Your Finished Rainbow Suncatcher Craft Using Clear Glue
Bring your new rainbow suncatcher into your home by displaying it prominently in a window where sunlight can illuminate it. This craft works wonderfully as a decoration for entryways, on a mantel, or even as festive decor on a porch. Consider pairing it with some simple complementary decor, like potted plants or seasonal wreaths.
Remember, the beauty of this suncatcher lies in its handmade charm, so don’t worry about achieving perfection. Each suncatcher will be unique, reflecting your personal style beautifully.
Maggie’s Tips for the Best Results
- Dry-fit the pieces: Before gluing, place your colored sections on the wax paper to see how they look together.
- Work in layers: Building depth by layering colors will enhance the visual impact.
- Avoid excess glue: Too much glue can take longer to dry and might make the colors muddy, so use sparingly.
- Let colors dry between layers: This avoids unwanted mixing and maintains the integrity of each color.
Easy Ways to Customize This Project
You can personalize your rainbow suncatcher in several ways. Experiment with different color combinations consider seasonal themes like pastels for spring or warm tones for autumn. Adding elements like patterned washi tape or natural textures like twine can provide a rustic twist that fits your home decor.
How to Care for Your Handmade Decor
To ensure your suncatcher remains vibrant and is well-preserved, store it away from direct sunlight when not displayed. If it’s installed in a window, counter dust with a soft cloth occasionally to keep those colors bright and clear. Remember to handle it gently, as the glue might be slightly fragile, especially if it’s in thinner layers.
FAQs About Rainbow Suncatcher Craft Using Clear Glue
Can I use different types of glue?
Yes, while clear school glue works best, you can experiment with other transparent adhesives as long as they dry clear.
What if I want to use it outdoors?
While it can be displayed outdoors, ensure it’s covered from direct exposure to rain or harsh sunlight to prolong its life.
How long does it take for the glue to dry completely?
Depending on the thickness of each layer, allow at least several hours for full drying; overnight is ideal for thicker pieces.
Can I reuse materials or change colors later?
If you stored your suncatcher safely, you can certainly change the colors by applying a new layer of glue with different food coloring over the original.
Conclusion
Creating a Rainbow Suncatcher Craft Using Clear Glue is not just about making a colorful decoration; it’s also about the joy of crafting something by hand. This project invites creativity and offers a beautiful way to brighten up any space in your home. If you’re interested in exploring more fun suncatcher ideas, consider looking at this Colorful DIY Glue Suncatcher Craft that adds a delightful twist to your crafting adventures!
Print
Rainbow Suncatcher Craft Using Clear Glue
- Total Time: 240 minutes
- Makes: 1 suncatcher
Description
Create a vibrant rainbow suncatcher that beautifully catches sunlight using clear glue and food coloring. A fun and simple craft for all ages.
Materials
- Clear school glue
- Food coloring (various colors)
- Wax paper or a non-stick mat
- Paintbrush or sponge (for spreading glue)
- Scissors (if cutting shapes)
- A small container (for mixing glue and color)
- Optional: Glitter, beads, or other embellishments
Instructions
- Prepare your workspace by laying out wax paper or a non-stick mat on a flat surface.
- Mix a few tablespoons of clear glue with several drops of food coloring in a small container.
- Apply a thin layer of your first colored glue onto the wax paper to create the base layer.
- Layer additional colored glue on top of the first layer once it is tacky.
- Let your suncatcher dry completely, which may take a few hours.
- Add finishing touches like glitter or beads, if desired.
Notes
Customize your suncatcher with different color combinations and embellishments to match your decor.