

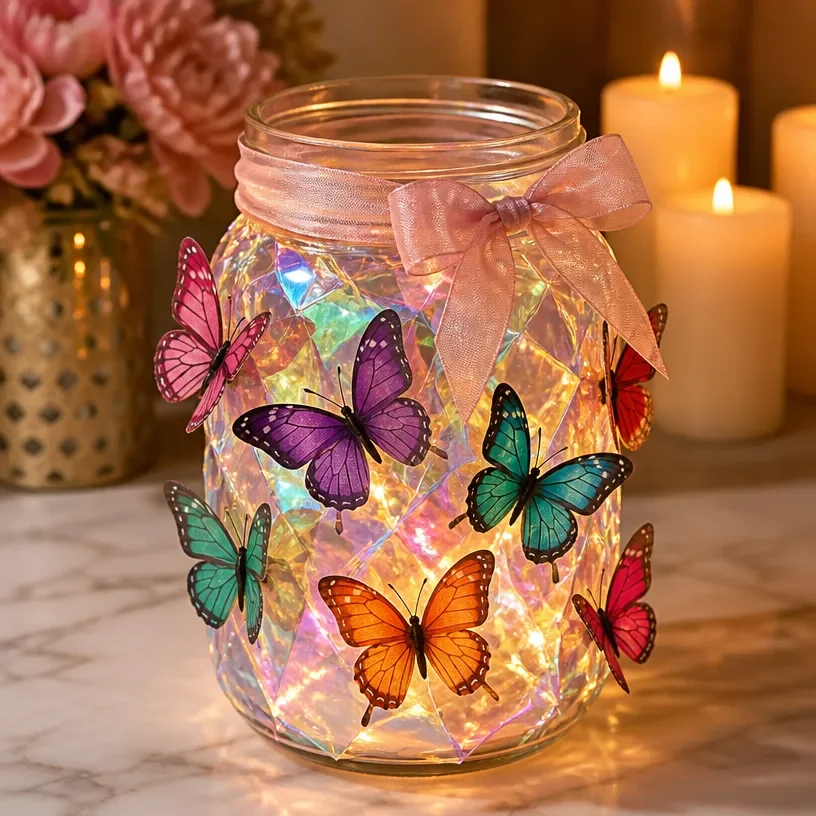
The DIY Color-Changing Butterfly Jar is a delightful project that combines playful artistry with functional home decor. This craft takes advantage of a mason jar and the enchanting colors of iridescent paint to create a beautiful butterfly display that can brighten up any room. It’s particularly charming as a centerpiece on your dining table or as a whimsical accent on a shelf. Additionally, this project is approachable for beginners, making it a wonderful way for anyone to dive into the world of DIY home decor. You may also find Diy Autumn Rainbow Leaf Mason Jar Luminary Decor useful.
By experimenting with iridescent colors, you’ll bring a unique touch to your home, allowing the jar to change hues with the lighting throughout the day. It can be displayed year-round but especially shines during spring and summer, reflecting nature’s vibrant palettes. If you enjoy outdoor crafts, this project can also be a fun way to welcome the season on your porch or patio. For another fun project, consider creating a butterfly crystal window decor to complement your new jar!
Why You’ll Love This Project
One of the greatest appeals of the DIY Color-Changing Butterfly Jar is its approachable construction. Utilizing a few inexpensive materials, this project provides room for creativity, allowing you to customize the colors and designs to reflect your personal style. The versatility of this craft makes it suitable for various decorating needs, whether you want a cheerful addition to your spring decor or a soft glow for evening gatherings. You may also find Diy Haunted Village Mason Jar Lanterns Halloween Decor useful.
The jar can serve as a lovely centerpiece or a simple accent piece on any surface within your home. Its farmhouse charm enhances the cozy atmosphere, making it a perfect fit for rustic or eclectic interiors. Once completed, this piece can be reused for different seasonal displays, offering a delightful way to keep your home decor fresh and exciting.

Before You Start
Before diving into the project, take a moment to visualize the finished Color-Changing Butterfly Jar. You want it to have a vibrant, shimmering quality that captures the light beautifully. Pay extra attention to the painting techniques you will use, as the layering of color is what makes the final product so captivating.
Preparing your workspace will make the crafting experience more enjoyable. Ensure you have all your supplies within reach, and consider laying down some newspaper or a drop cloth to catch any drips during the painting process.
“A handmade touch makes every home feel warmer.”
Materials and Supplies
Materials and Supplies
- One mason jar
- Iridescent paint (preferably color-shifting)
- Paintbrushes (various sizes)
- Stencil or rubber stamp with butterfly designs
- Clear sealant
- Optional: candle or LED light for illumination
When selecting iridescent paint, look for a high-quality product that offers a color-changing effect to enhance your jar’s appeal. A wider brush will help cover larger areas, while smaller brushes can aid in detail work like creating butterfly designs.
How to Make DIY Color-Changing Butterfly Jar for Home Decor
Step 1: Prepare the Mason Jar
Start by cleaning the mason jar thoroughly. Wipe it down with rubbing alcohol to remove any dust or oils, ensuring that the paint adheres well. Once it’s dry, decide whether you want to create an elegant design or a whimsical one.
Step 2: Paint the Base Layer
Apply the first coat of iridescent paint to the inside of the jar using a medium brush. This base will give your butterflies a lovely backdrop. Allow the paint to dry completely, following the instructions on the paint for drying times.
Step 3: Create Your Butterfly Design
Using either a stencil or rubber stamp, apply more iridescent paint to form butterfly silhouettes on the jar. Consider layering different colors within the butterflies to make them pop. Let these layers dry as you go, ensuring that the details are crisp.
Step 4: Seal the Design
Once your butterflies are dry, apply a clear sealant to protect your design. This step is crucial for ensuring the paint remains vibrant and does not chip.
Step 5: Illuminate Your Creation
If desired, place a candle or LED tea light inside the jar before displaying it. This will enhance the color-changing effect and create a warm glow in any space.

How to Style Your Finished DIY Color-Changing Butterfly Jar for Home Decor
Bringing your DIY Color-Changing Butterfly Jar into your home adds a charming touch. Consider placing it on a mantel, dining table, or porch to provide an inviting glow. It pairs beautifully with greenery or other seasonal accents.
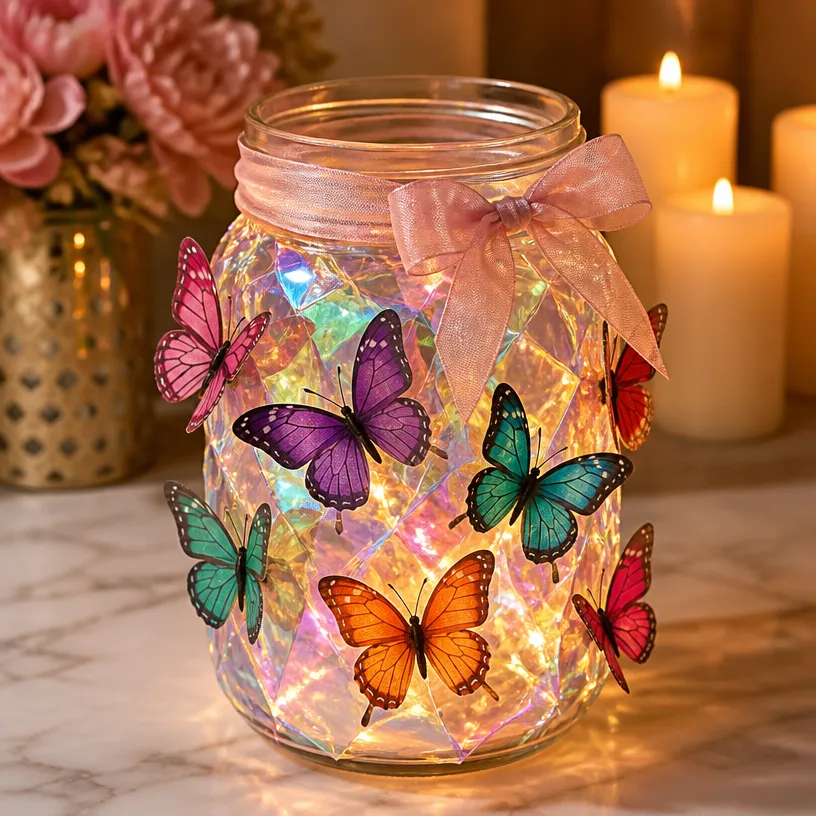
For a lovely display, surround the jar with faux blooms or fresh flowers. The natural textures and colors will highlight the butterflies within the jar, creating a cohesive, inviting vignette. Remember, the goal is to make your space feel lived in and warm, not cluttered or overly styled.
Maggie’s Tips for the Best Results
- Dry-fit your butterfly stencils before applying paint to visualize the layout.
- Work in layers, allowing each coat of paint to dry before adding another for better depth.
- Use a gentle hand with the adhesive if you choose to incorporate additional decorations.
- Keep a cloth handy for clean-up, especially when working with paints.
- Test the LED light placement inside the jar before sealing to find the most effective position.
Easy Ways to Customize This Project
To make the DIY Color-Changing Butterfly Jar uniquely yours, consider adding seasonal accents such as fresh blooms in spring or autumn leaves in fall. You could also experiment with different colors of ribbon or twine around the rim for added detail.
Swapping out stencils for other designs, like flowers or seasonal motifs, can also create diverse themes. You may want to incorporate metallic accents or even personalize the jar by painting initials or enchanting words.
How to Store Your Jar
To keep your Color-Changing Butterfly Jar looking fresh, store it in a cool, dry place, away from direct sunlight, which can fade colors over time. If you’re using real flowers or seasonal decorations, remember to refresh them regularly to maintain the beauty of your display.
FAQs About DIY Color-Changing Butterfly Jar for Home Decor
Can I use a different jar size?
Yes, experimenting with various jar sizes can create a unique look. Just adjust your design elements accordingly.
What type of paint works best for this project?
I recommend using high-quality iridescent acrylic paint for its durability and color vibrancy.
How can I change the colors used?
Feel free to swap colors based on the season or your personal style. Choose hues that complement your existing decor.
Can this project be used outdoors?
Consider using weather-resistant paint and sealants if you plan to display it outside.
A Handmade Touch for the Season
This DIY Color-Changing Butterfly Jar creates a warm, welcoming ambiance in your home. As you embark on this crafting journey, remember that it’s not just about the end product but the joy of creating something with your own hands. A handmade piece, even with its imperfections, adds character and warmth, turning any house into a cherished home.
With the addition of iridescent color-shifting effects, your jar will not only beautify your space but provide a wonderful sense of satisfaction every time you admire your work. For a broader variety of painting materials for your crafting projects, explore Fusion Mineral Paint ChromaFlex™ for more ideas.
Print
DIY Color-Changing Butterfly Jar
- Total Time: 15 minutes
- Makes: 1 jar
Description
Create a vibrant and whimsical Color-Changing Butterfly Jar to enhance your home decor. This fun and creative project is perfect for any season, allowing you to express your personal style.
Materials
- 1 mason jar
- Iridescent paint (preferably color-shifting)
- Paintbrushes (various sizes)
- Stencil or rubber stamp with butterfly designs
- Clear sealant
- Optional: candle or LED light for illumination
Instructions
- Prepare the mason jar by cleaning it thoroughly with rubbing alcohol.
- Apply the first coat of iridescent paint to the inside of the jar.
- Create butterfly designs using stencils or rubber stamps with additional paint.
- Seal your design with a clear sealant to protect it.
- Place a candle or LED light inside for illumination before displaying.
Notes
Experiment with colors and designs to make your jar unique. Store in a cool, dry place to maintain vibrancy.