


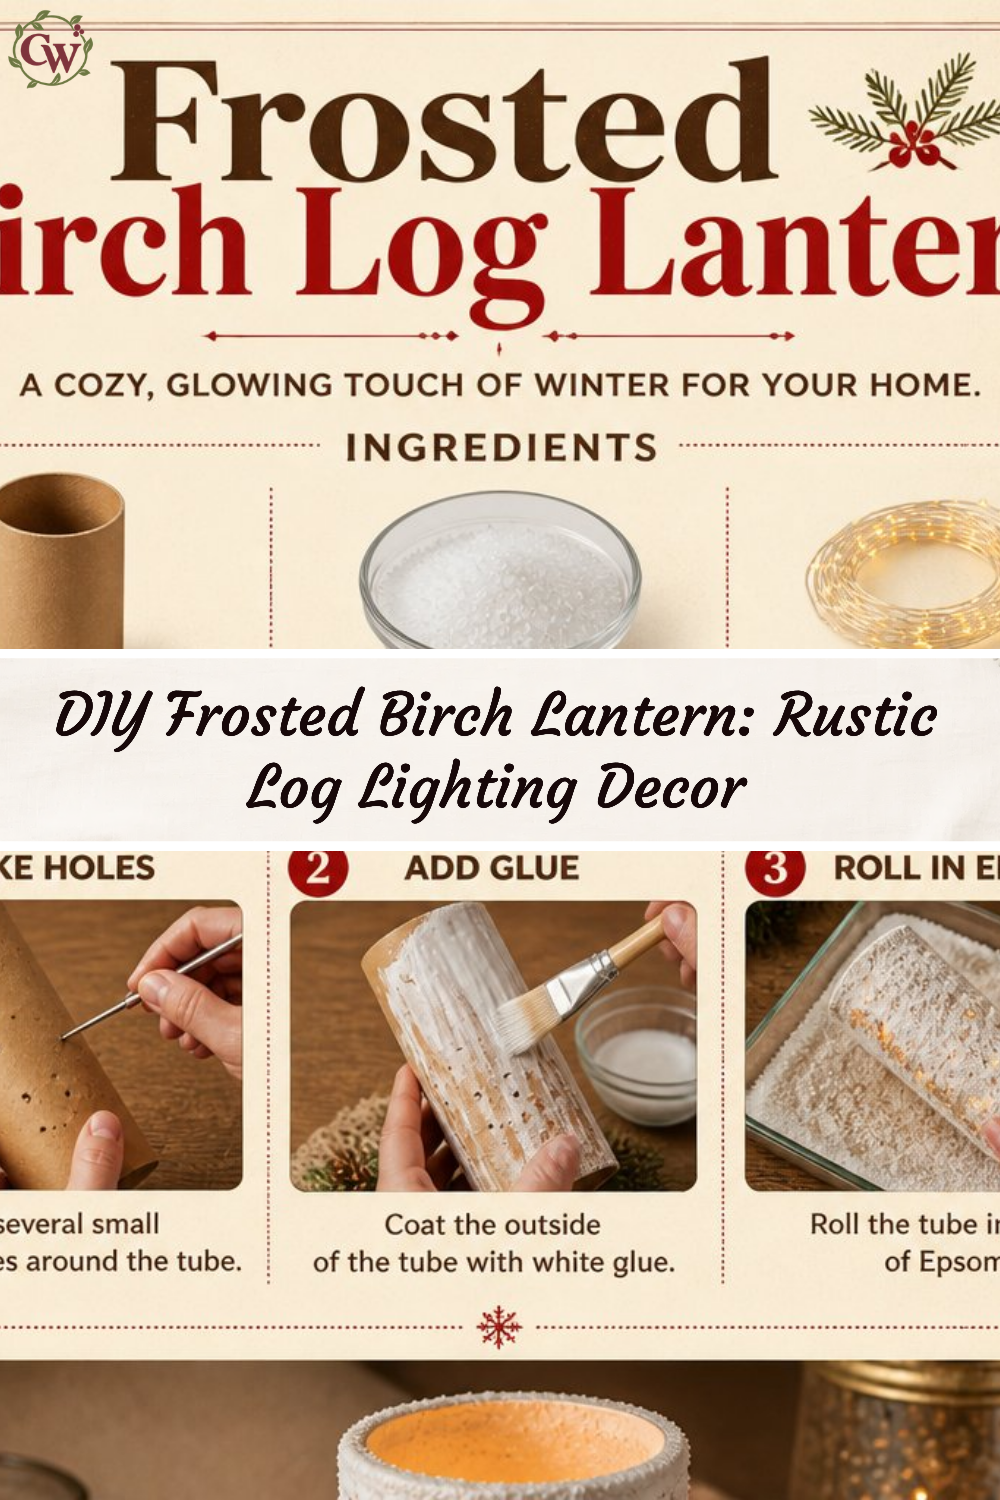
The Frosted Birch Lantern: Rustic Log Lighting Decor is a charming and versatile craft that brings warmth and a rustic touch to your home. This DIY project transforms simple materials into an enchanting piece that perfectly complements any decor style, particularly during fall and winter seasons. Once complete, it can be displayed on a mantel, entryway table, or porch, casting a soft glow that adds to your welcoming atmosphere. The approachable nature of this project makes it perfect for crafters of all skill levels, inviting everyone to enjoy the satisfaction of creating something beautiful by hand. You may also find Bottle Cap Spider Garland Halloween Decor useful.
Why You’ll Love This Rustic Log Lighting Decor
The Frosted Birch Lantern project stands out for several reasons. Firstly, the materials needed are often inexpensive and easily sourced, making it an economical endeavor. Additionally, the lantern can be customized to fit various seasons or personal preferences. Whether you choose to use natural elements or seasonal decorations, the rustic charm is undeniable. This project serves as an attractive centerpiece that can illuminate your home during cozy evenings, while also embracing a classic farmhouse style. If you need more ideas to enhance your seasonal decorating, consider exploring this DIY rainbow fall leaf garland.
You may also find Colorful Ghost Mason Jar Lanterns Halloween Decor useful.
Before You Start
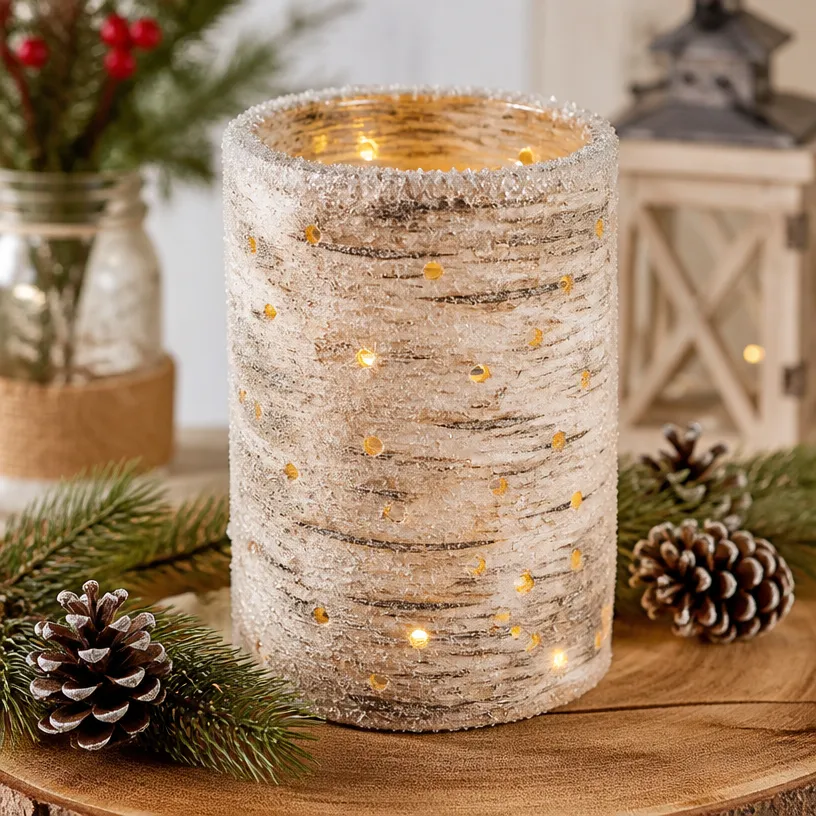
Before diving into the craft, imagine what the finished Frosted Birch Lantern will look like, glowing gently with candles inside. Preparing your workspace is crucial; ensure you have ample room and all necessary materials within reach to streamline the process. The most critical part of this project is the assembly of the lantern’s body. Focusing first on achieving a solid structure will help your lantern stand tall and look polished.
“A handmade touch makes every home feel warmer.”
Materials and Supplies
Materials and Supplies
- Birch logs (cut to desired lengths)
- Clear glass jars (two)
- Frosted glass spray paint
- Twine or ribbon (for embellishment)
- Candles (tea lights or other suitable types)
- Optional: decorative greenery or seasonal accents for enhancement
When selecting your birch logs, aim for pieces that are visually pleasing and match the rustic feel of your home. The size of the glass jars will determine how many candles you can fit, so choose accordingly. Frosted glass spray paint allows the light to shine softly, creating a warm ambiance.
How to Make Frosted Birch Lantern: Rustic Log Lighting Decor
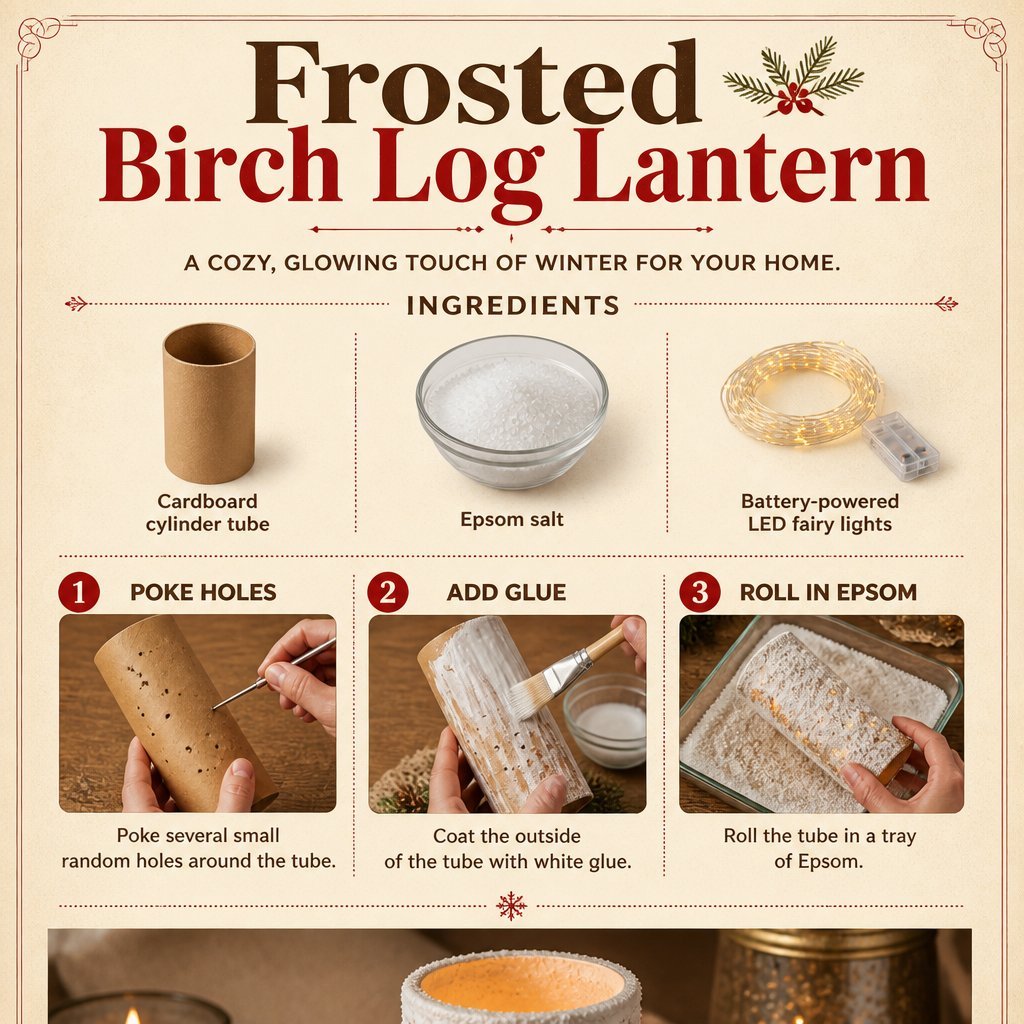
Step 1: Prepare the Birch Logs
Start by cutting the birch logs to your desired lengths. Make sure they are even, as this will create a more polished look. Use a fine-grit sandpaper to smooth any rough edges caused by cutting. This step ensures safety and a more finished appearance.
Step 2: Position the Glass Jars
Place the clear glass jars in the center of the cut birch logs to establish your lantern’s structure. The jars should be secure but also allow for easy removal for lighting the candles.
Step 3: Apply Frosted Glass Spray Paint
Next, take your frosted glass spray paint outdoors or in a well-ventilated area. Lightly coat the outside of the glass jars with the spray, following manufacturer’s instructions for drying times. This process should give the glass a soft, frosted effect, enhancing the overall look of your lantern.
Step 4: Assemble the Lantern
Once the paint has dried, place the jars firmly back in the center of the birch logs. Secure them using twine or ribbon to add that final rustic touch. Have fun with the twine – you might want to tie a bow or wrap it several times for a more textured appearance.
Step 5: Insert Candles
Finally, insert the candles into the jars. If you’re using tea lights, ensure they sit flat on the bottom of the jar and are easily reachable for lighting.
How to Style Your Finished Frosted Birch Lantern: Rustic Log Lighting Decor
Once complete, the Frosted Birch Lantern becomes an accent piece that can elevate the ambiance of your home. Consider placing it on a console table, where it can greet guests warmly as they enter. Alternatively, it might sit beautifully on your dining table, providing a soft glow during meals. You can style it with complementary elements like small pumpkins in the fall or evergreen sprigs in the winter, enhancing its seasonal appeal.
Maggie’s Tips for the Best Results
- Always dry-fit the pieces before gluing to ensure a snug fit and stability.
- Work in layers when applying paint for the best frosted look.
- Allow ample time for the paint to dry completely before assembling the lantern.
- Keep your twine or ribbon tails proportional to maintain a balanced appearance.
- Use a stable surface to prevent any shifting while you work.
- Test the placement of your candles before securing them in the jars for accessibility.
Easy Ways to Customize This Project
Customization is simple with the Frosted Birch Lantern. You can paint the birch logs in seasonal colors, use different twine shades, or even add embellishments that reflect the current holiday. Consider incorporating dried flowers or seasonal greenery such as holly or autumn leaves to personalize your lantern and make it uniquely yours.
How to Care for Your Handmade Decor
Taking care of your Frosted Birch Lantern ensures it lasts for seasons to come. Keep it dry and dust it periodically, especially if displayed in an area that gathers dust. If you notice the glass getting smudged, a gentle glass cleaner will help maintain its frosted appearance. Store the lantern in a cool, dry place if not in use.
FAQs About Frosted Birch Lantern: Rustic Log Lighting Decor
Can I use real candles in this lantern?
Yes, ensure they fit securely within the glass jars for maximum safety.
Is this project suitable for outdoor use?
It can be used outdoors if sheltered from direct rain or strong winds.
What alternative materials can I use?
Consider using reclaimed wood or other types of logs depending on availability.
How do I adjust the size of the lantern?
Adjust the lengths of the birch logs and glass jars according to your design preference.
Can I use LED candles instead of real ones?
Absolutely! LED candles are a great, safe alternative for all seasons.
A Handmade Touch for the Season
Creating the Frosted Birch Lantern: Rustic Log Lighting Decor is not just about crafting but also about instilling warmth and personal character into your home. Each hand-crafted piece carries a story, making any space feel inviting and lived in. Remember, handmade decorations do not need to be perfect; they simply need to reflect your style and warmth. If you’re interested in enhancing your seasonal decor further, you might also enjoy checking out this lovely
Birch Wood Christmas Tea Light Candle Holder that perfectly complements the rustic charm of your new lantern.
Frosted Birch Lantern: Rustic Log Lighting Decor
- Total Time: 20 minutes
- Makes: 1 lantern
Description
Create a charming and rustic Frosted Birch Lantern that brings warmth to your home during fall and winter seasons.
Materials
- Birch logs (cut to desired lengths)
- Clear glass jars (two)
- Frosted glass spray paint
- Twine or ribbon (for embellishment)
- Candles (tea lights or other suitable types)
- Optional: decorative greenery or seasonal accents for enhancement
Instructions
- Prepare the Birch Logs
- Position the Glass Jars
- Apply Frosted Glass Spray Paint
- Assemble the Lantern
- Insert Candles
Notes
Customization is simple – paint birch logs in seasonal colors and use different twine shades to reflect the current holiday.