


DIY Melted Crayon Rainbow Ghost Suncatcher You may also find Fall Leaf Suncatcher Diy Rainbow Crayon Melt useful.
Creating your own DIY Melted Crayon Rainbow Ghost Suncatcher is a delightful way to bring a splash of color and an element of whimsy into your home. This project not only serves as a beautiful decoration but also offers a fun-filled crafting experience, especially for kids and families. The suncatcher can be displayed in windows or on walls, transforming ordinary sunshine into a vibrant display of color. Enjoying the process of making something by hand is truly what makes crafting special and this project is approachable for anyone, whether you’re experienced or just starting out. You may also find Rainbow Ghost Kitten Suncatcher Garland Diy useful.
Imagine the sight as warm sunlight streams through your handmade suncatcher, casting rainbow reflections across your space. With minimal materials and a simple technique, you can create a charming piece that adds joy to your decor. This project captures the essence of seasonal crafting, making it perfect for various occasions, especially Halloween or any cheerful autumnal display.
Why You’ll Love This Project
Crafting a DIY Melted Crayon Rainbow Ghost Suncatcher is a fantastic choice for several reasons. First, the materials needed are inexpensive and often found around your home, making this an accessible project for everyone. The simple construction method allows for creativity while focusing on layering colors to create a stunning final look. The versatility of this suncatcher makes it suitable for decorating various spaces, such as a porch or a child’s room, or even as festive front door decor.
If you’re looking for more seasonal decor ideas, consider browsing related projects like the DIY Rainbow Ghost Kitten Suncatcher Garland for a broader festive theme.
Before You Start
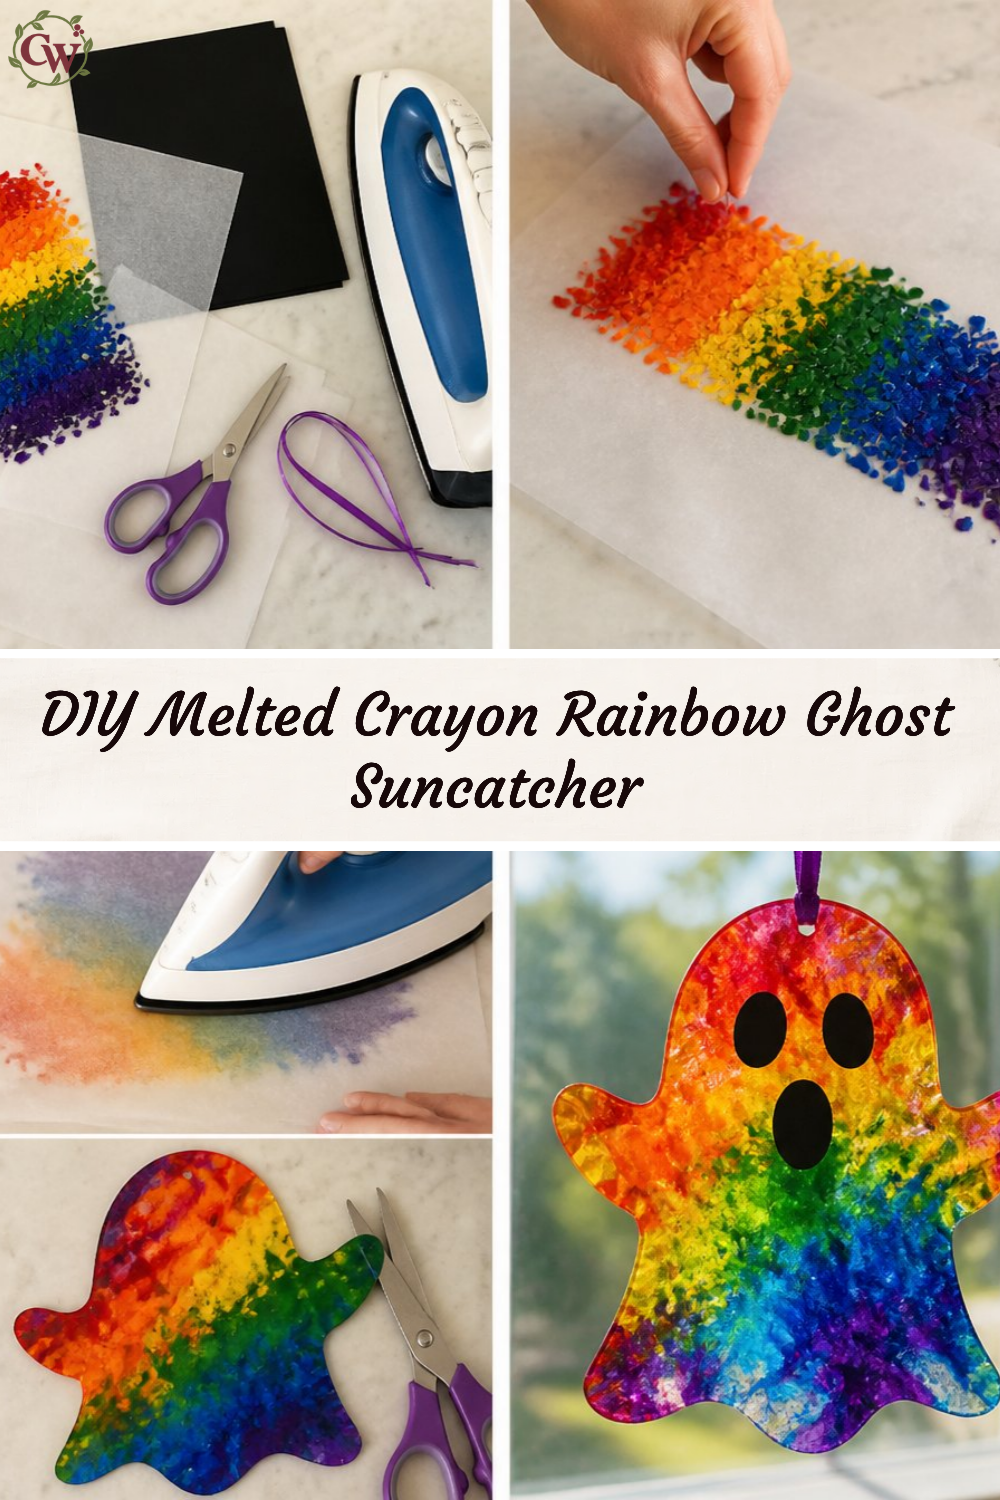
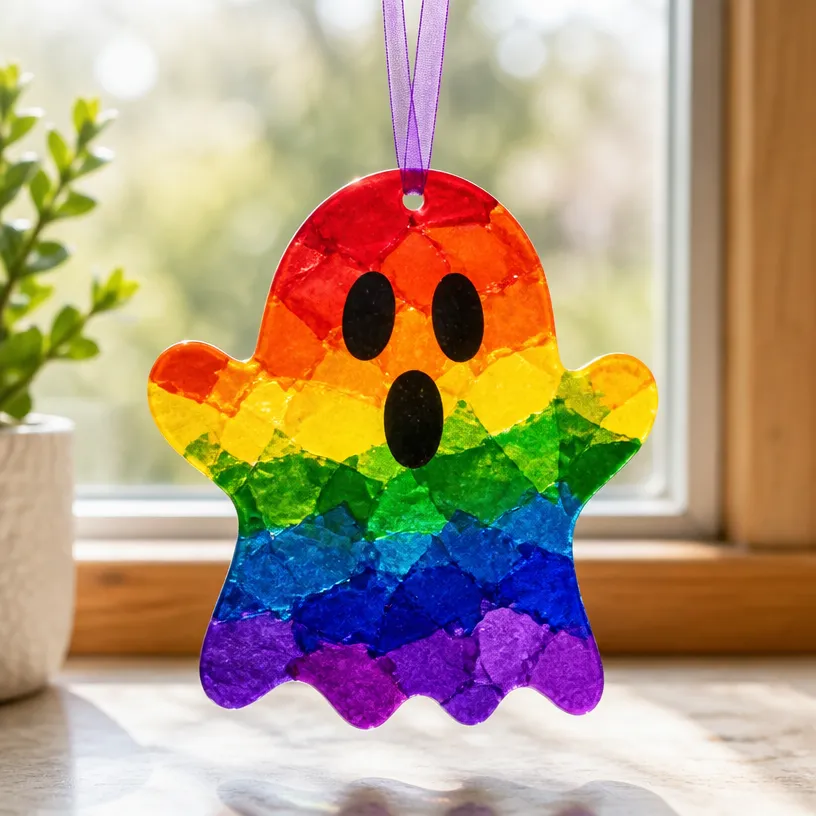
Before diving into the crafting process, it’s helpful to visualize what your finished suncatcher might look like. It will have vibrant layers of crayon colors melted into shapes that hint at playful ghosts. The piece should radiate a warm, welcoming charm that enhances any room’s ambience. Focus on the layering it’s crucial for achieving a lovely rainbow effect.
Preparing your workspace is also an important step. Make sure to cover your area to catch any melting crayon bits, and have all your materials nearby to streamline the process.
“A handmade touch makes every home feel warmer.”
Materials and Supplies
Materials and Supplies
- Crayons (variety of colors)
- Wax paper or parchment paper
- Non-stick cooking spray
- Cookie sheet or baking tray
- Scissors
- Ghost-shaped cookie cutter (optional)
- String or ribbon for hanging
- Mod Podge (optional for sealing)
Choosing vibrant colors can significantly affect the overall look. Stick to rainbow shades or autumnal hues that resonate with your decor style. It’s also essential to ensure that your wax or parchment paper is of good quality to prevent sticking.
How to Make DIY Melted Crayon Rainbow Ghost Suncatcher
Step 1: Prepare Your Workspace
Start by preheating your oven to 200°F (93°C). Cover your work area with newspaper or a plastic tablecloth to catch any crayon residue.
Step 2: Prepare the Crayons
Remove the wrappers from your crayons and break them into smaller pieces, about an inch long. Arrange the crayon pieces in a ghost shape this is where using a ghost-shaped cookie cutter can help guide your design.
Step 3: Layer the Crayon Pieces
Place a sheet of wax paper on a baking tray. Spread the crayon pieces evenly within the ghost shape and layer them according to your color preference. Remember to keep some space between the crayon pieces for better melting.
Step 4: Melt the Crayons
Pop the tray into the preheated oven and melt the crayons for about 10-15 minutes. Keep an eye on them; you’ll know they’re ready when they’re all melted into a smooth surface.
Step 5: Let It Cool
Once melted, take the tray out of the oven and let it cool for a few minutes. Carefully remove the wax paper with the melted crayons and place it on a flat surface to cool completely until hardened.
Step 6: Cut Out Your Ghosts
After the melted crayon piece has cooled and set, use your cookie cutter to shape the suncatcher. If you don’t have a cookie cutter, you can use scissors to cut out the desired ghost shape manually.
Step 7: Add Ribbon for Hanging
Punch a hole at the top of each ghost and thread string or ribbon through for hanging. For additional protection and a glossy finish, apply a layer of Mod Podge if desired.

How to Style Your Finished DIY Melted Crayon Rainbow Ghost Suncatcher
This stunning suncatcher looks wonderful hung in windows where sunlight can stream through, creating colorful shadows on your walls or floors. It also makes a playful addition to children’s rooms or as part of your autumn decorations. Pair it with materials like soft blankets or cozy pillows in warm, seasonal colors to create a welcoming atmosphere.
Your completed suncatcher can easily become part of your yearly decorating tradition, celebrating the handmade charm of the season.
Maggie’s Tips for the Best Results
- Dry-fit the pieces before gluing to visualize your final design.
- Opt for vibrant colors that work well together for a bold effect.
- Allow ample drying time or overnight for a solid shape before hanging.
- Use a combination of sharp and dull scissors for different cutting needs.
- If children are participating, supervise closely when handling the broken crayons and scissors.
Easy Ways to Customize This Project
You can easily customize your suncatcher by changing the colors of the crayon pieces to reflect different seasons. For instance, shades of orange and brown are perfect for autumn, while bright pastels would be lovely for spring. Adding metallic ribbons or spooky stickers can also elevate the seasonal effect!
Caring for Your Handmade Decor
To keep your suncatcher looking fresh, regularly dust it with a soft cloth. If you notice any fading due to sunlight exposure, consider moving it to a less sunlit area or creating a new one to refresh your decor.
FAQs About DIY Melted Crayon Rainbow Ghost Suncatcher
Can I use different types of crayons?
Yes, any wax crayon will work, but remember that cheaper brands may not melt as smoothly.
How long does the suncatcher last?
With proper care, your suncatcher can last for years. Just be cautious of extreme heat and direct sunlight.
Can I use other shapes aside from ghosts?
Absolutely! Feel free to explore other shapes like pumpkins, hearts, or stars to diversify your suncatcher collection.
What if I don’t have a cookie cutter?
No worries! You can carefully cut your desired shape using scissors freehand.
How long will the crayons take to melt?
Typically, crayons will melt in about 10-15 minutes at 200°F, but this might vary with your oven.
A Handmade Touch for the Season
Creating a DIY Melted Crayon Rainbow Ghost Suncatcher is not just about making a beautiful piece for your home. It’s about the experience of crafting together, fostering creativity, and delighting in the vibrancy of your handmade decor. Remember, a home should feel warm, welcoming, and personal, and your handmade creations are a reflection of that spirit.
As you gather materials for your next creative endeavor, consider exploring another fun project like the Puffy Paint Ghost Craft for more seasonal fun. Happy crafting!
Print
DIY Melted Crayon Rainbow Ghost Suncatcher
- Total Time: 30 minutes
- Makes: Varies based on the number of ghosts made
Description
Create a delightful and colorful DIY Melted Crayon Rainbow Ghost Suncatcher to brighten your home and engage in a fun crafting experience.
Materials
- Crayons (variety of colors)
- Wax paper or parchment paper
- Non-stick cooking spray
- Cookie sheet or baking tray
- Scissors
- Ghost-shaped cookie cutter (optional)
- String or ribbon for hanging
- Mod Podge (optional for sealing)
Instructions
- Prepare your workspace by preheating your oven to 200°F (93°C) and covering your work area.
- Remove the wrappers from your crayons and break them into smaller pieces.
- Arrange the crayon pieces in a ghost shape on a sheet of wax paper on a baking tray.
- Bake the tray in the preheated oven for about 10-15 minutes until melted.
- Take the tray out of the oven and let it cool for a few minutes.
- Use a ghost-shaped cookie cutter or scissors to cut out the desired shapes.
- Thread string or ribbon through the holes for hanging, applying Mod Podge if desired.
Notes
Customize the colors and shapes to reflect different seasons and experiment with different cutting techniques.