


As Halloween approaches, crafting projects become popular both for decoration and for family bonding time. One charming idea is to create wizard hat stars, inspired by Disney’s so-called sorcerer hat, which is perfect for adding a whimsical touch to your Halloween decor. These delightful accents can gracefully adorn your home, creating a festive atmosphere that is approachable for crafters of any skill level. You may choose to hang them from your porch, display them on your mantel, or incorporate them into a seasonal centerpiece. You may also find Diy Witch Hat Flowers From Colorful Cupcake Liners useful.
The beauty of these wizard hat stars lies in their versatility. They can easily transition from Halloween decoration to year-round whimsical home accents, especially for fans of whimsical, magical themes. Taking inspiration from classic witch hats, the addition of gleaming gold details transforms them into something truly special. You may also find Witch Hat Collages Easy Diy Halloween Craft For Kids useful.
Why You’ll Love This Project
Making wizard hat stars is not only a fun project, but also a practical one. The construction involved is straightforward, making it an excellent choice for crafters of all ages. With minimal, inexpensive materials required, you can easily create several hats to display around your home. Not only does it blend beautifully with other Halloween decorations, but it can also be customized according to your personal taste. You may also find Witch Hat Craft Collage Kids Easy Halloween Activity useful.
Adapting these pieces for various settings whether you’re decorating a porch for trick-or-treaters or styling a cozy indoor space for family gatherings makes them a fantastic seasonal DIY project. As you craft these stars, you’re encouraged to express your creativity while creating pieces that hold sentimental value.

Before You Start
Before diving into making your wizard hat stars, take a moment to visualize what you want your final piece to resemble. Consider dedicating extra attention to the finishing touches, like the gold accents or how you string them for display. Preparing your workspace is equally important; make sure you have all materials at hand and a clear area to work allows for smoother assembly.
“A handmade touch makes every home feel warmer.”
Materials and Supplies
Materials and Supplies
- Black construction paper or cardstock
- Gold foil or gold spray paint
- Scissors
- Hot glue gun & glue sticks
- String or fishing wire for hanging
- Decorative embellishments (optional)
When choosing materials, select a sturdy construction paper for the hat’s base that can hold the shape well. If you prefer a more metallic look, using gold foil can enhance the visual appeal, capturing attention from all angles.
How to Make Wizard Hat Stars | Disney Sorcerer Hat, Witch Hat Gold, Halloween
Step 1: Cut the Hat Base
Start by cutting a triangle shape from the black construction paper. The base should be several inches wide and the height should be around 12 inches to create a classic hat-shaped point.
Step 2: Create the Brim
Next, cut out a circle with a hole in the center, large enough to fit the bottom of your triangle hat. The brim will give your hat a more finished look. Use additional black paper for this part.
Step 3: Assemble the Hat
Attach the triangle to the circular brim using the hot glue gun. Ensure the triangle stands upright to form a proper hat shape.
Step 4: Add the Gold Accents
Once the shape is secure, apply gold foil or spray paint to the tip and edges of the hat. This step will provide it with that magical gleam, just like the iconic Disney sorcerer hat.
Step 5: Attach the String
To finish off your stars, cut a piece of string or fishing wire for hanging. Glue it inside the hat at the top point, ensuring it’s secure for displaying.
Step 6: Add Embellishments
Feel free to personalize with embellishments, such as stars or glitter applied with a bit of glue, to give your pieces personality that resonates with your home decor.
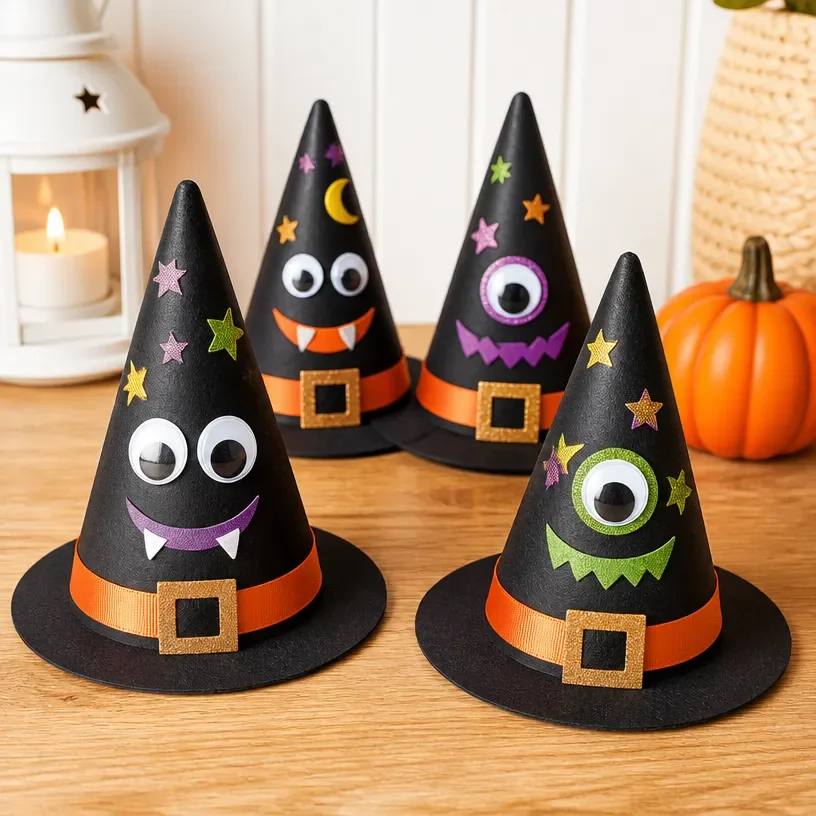
How to Style Your Finished Wizard Hat Stars | Disney Sorcerer Hat, Witch Hat Gold, Halloween
After completing your wizard hat stars, it’s time to think about how to display them. These pieces can effectively decorate various areas, such as your mantel over the fireplace, creating a cozy Halloween ambiance. They would also look charming hanging on your porch, welcoming trick-or-treaters with an enchanting vibe. Consider placing them on a dining table as part of a centerpiece during festive gatherings or even clustering a few on a shelf for added visual interest.

Maggie’s Tips for the Best Results
- Dry-fit all pieces before securing them with glue to ensure they align correctly.
- Work in layers; if using paint, allow each layer to dry before adding the next.
- When attaching embellishments, aim for balance to enhance visual appeal.
- Let your creativity shine by using leftover materials for stars or other shapes.
Easy Ways to Customize This Project
To customize your wizard hat stars, consider varying the colors based on the season. Rich burgundies or deep greens might suit a fall aesthetic, while bright pastels could lend themselves beautifully to spring themes. Adding fresh or faux greenery around the hats can enhance their charm, bringing a touch of nature indoors.
How to Pack This Project Away for Next Season
When the holiday season wraps up, carefully place your wizard hat stars in a protective box to prevent crushing the shapes. Use tissue paper between each piece to maintain their integrity. Store them in a cool, dry space to ensure they’re ready to use for future celebrations.
FAQs About Wizard Hat Stars | Disney Sorcerer Hat, Witch Hat Gold, Halloween
1. Can I use different colors for the hats?
Absolutely! Feel free to play around with colors that match your decor.
2. How long does the glue take to dry?
It typically takes hot glue just a few minutes to set, but allowing additional time can improve durability.
3. Are these hats suitable for outdoor display?
Yes, as long as they are made with weather-resistant materials and stored properly when not in use.
4. Can I use paper other than construction paper?
Of course! If you have patterned paper or cardstock, they can add personality to your hats.
5. How do I store the hats after Halloween?
Carefully pack them in a box, ideally with tissue paper to prevent damage.
A Handmade Touch for the Season
Creating these wizard hat stars is about more than just crafting; it’s about infusing your home with warmth and charm. Each piece tells a story of creativity and resourcefulness. The joy derived from making and displaying handmade decor is irreplaceable. Remember, it’s the little imperfections that add character, making every home feel vibrant and welcoming. Embrace the magic of the season through your crafting projects!
Conclusion
As you explore more delightful projects, consider adding whimsical decorations to your collection. You can find fantastic materials like adorable wizard hats online, such as these
wizard hats with starsthat can inspire your creativity and enhance your Halloween decor. Happy crafting!