


DIY Paper Plate Fish Craft for Kids – Easy Ocean-Themed Art You may also find Diy Paper Plate Fish Craft Easy Ocean Themed Activity useful.
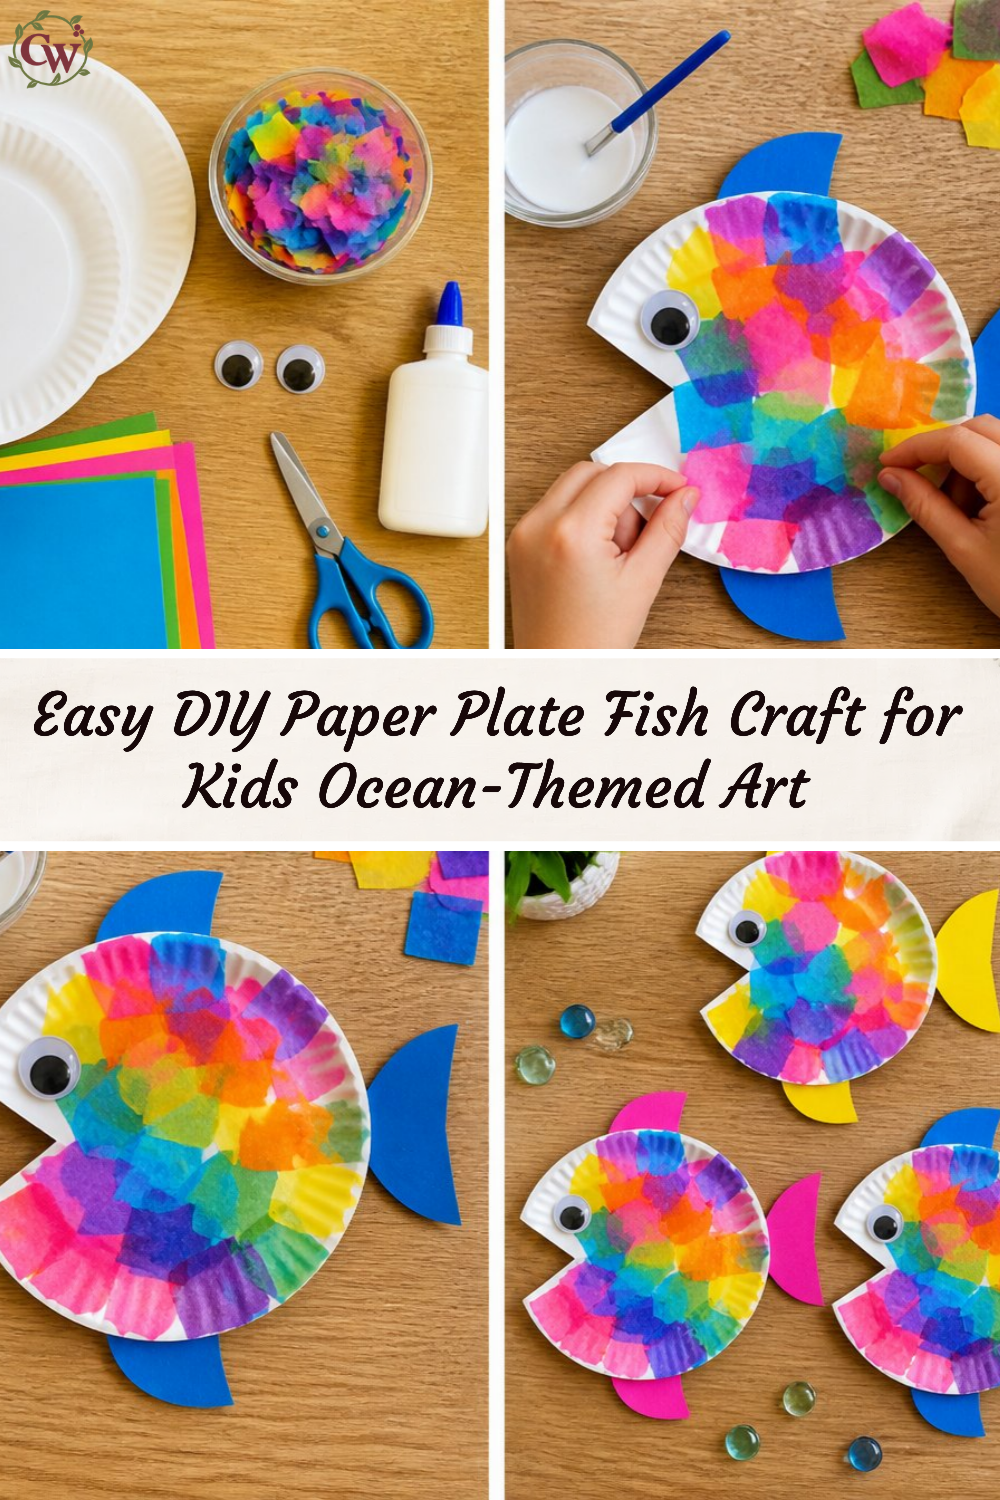
Creating art with your children can be a delightful experience, especially when using simple materials like paper plates. In this project, we’ll make a DIY Paper Plate Fish Craft that’s perfect for little artists. This ocean-themed craft not only encourages creativity but also serves as a fantastic display piece when the project is completed. Imagine these colorful fish hanging up in a playroom, or even used as decorations for a summer gathering. Best of all, the materials are affordable and easy to find, making this an approachable endeavor for any home crafter. You may also find Witch Hat Collages Easy Diy Halloween Craft For Kids useful.
In addition to being fun, this DIY Paper Plate Fish Craft can also be educational. As you create, you can discuss different fish types and ocean life, enhancing the crafting experience with a learning aspect. Whether you are aiming to add a splash of color to your décor or simply create memories with your kids, this project guarantees a good time together.
Why You’ll Love This Project
One of the key attractions of this craft is its simplicity. Using just a few materials, children can create stunning and unique fish designs. The project is engaging yet manageable, promoting hand-eye coordination and fine motor skills as children cut, glue, and paint. Plus, it allows for plenty of customization, letting each child’s creativity shine through.
The versatility of this craft means it can be enjoyed at any time of year, adding a cheerful vibe to your home décor. You can easily adapt the colors to match different seasons or themes, making it a great go-to craft for various occasions. If you’re looking for more crafty ideas that are easy and enjoyable, you might want to explore this easy DIY fall leaf suncatcher garland as well.
Before You Start
Before diving into crafting, it’s helpful to visualize what your finished piece will look like. Typically, you’ll want the fish to be colorful and vibrant, which can be achieved through a variety of paint colors and decorative materials. The fins and tails can be the most eye-catching features, so focus your attention there during the creation process. Make sure your workspace is prepared with all materials laid out, providing a smooth crafting experience.
“A handmade touch makes every home feel warmer.”
Materials and Supplies
Materials and Supplies
- Paper plates (1 per fish)
- Paints (various colors)
- Paintbrushes
- Scissors
- Glue
- Construction paper (for fins and details)
- Markers or crayons (optional for detailing)
- Googly eyes (optional for added fun)
It’s important to choose vibrant colors when selecting paints, as they will bring the fish to life. You can also opt for different textures when selecting construction paper, as this can add depth to your finished craft.
How to Make DIY Paper Plate Fish Craft for Kids – Easy Ocean-Themed Art
Step 1: Prepare Your Paper Plate
Start by selecting a paper plate to serve as the body of your fish. If you’d like, you can cut the plate into a more fish-like shape; a simple curve along one edge can mimic the tail.
Step 2: Paint the Fish
Using a paintbrush, cover your paper plate with your chosen colors. You can create patterns with swirls and dots to make your fish more interesting. Allow the paint to dry completely before moving on.
Step 3: Create Fins and Tail
While the paint dries, cut out fins and tails from construction paper. Use bright colors to enhance the aesthetic. You might try different shapes, experimenting with what looks best.
Step 4: Assemble Your Fish
Once the paint has dried, glue the fins and tail onto the paper plate. Position them so that they look natural and aesthetically pleasing.
Step 5: Add Details
For extra character, use markers or crayons to draw scales or other design elements. If desired, glue on googly eyes for a fun touch.
Step 6: Display Your Art
After everything has dried, find a special spot to display your fish. You can attach them to the wall, hang them from the ceiling, or place them in a creative arrangement on a table.

How to Style Your Finished DIY Paper Plate Fish Craft for Kids – Easy Ocean-Themed Art
The finished fish can be styled in a variety of ways throughout your home. Consider grouping several fish together as a colorful display in your child’s playroom, or hang them near a window where sunlight can catch the colors beautifully. These fish can also make lovely decorations for birthday parties or summer barbecues, adding a cheerful ocean vibe.
To complement your fish creation, you could add some natural elements like shells or sand in a nearby display. Keeping with a warm and inviting aesthetic will create a cozy environment that feels personal and lived-in.

Maggie’s Tips for the Best Results
- Try dry-fitting pieces before gluing to ensure your design works visually.
- Use a variety of paint finishes to see which looks best for your fish.
- Avoid excess glue to prevent mess; a small amount goes a long way.
- Allow each layer to dry completely, especially the paint, before adding more elements.
- Test the placement of fins on your fish before committing with glue.
Easy Ways to Customize This Project
Customization is key to making this project uniquely yours. You might consider using metallic paints for a shimmery effect or incorporating patterned paper for a more textured look. Adding lettering or names to your fish can personalize them further. During different seasons, you could change the color scheme to reflect the time of year, such as deep oranges and browns for fall, or pastels for spring.
How to Store Your Craft
If you want to keep your fish for future use, consider storing them in a protective box where they won’t get crushed. Avoid packing them tightly, and consider using tissue paper between each piece to prevent any damage.
FAQs About DIY Paper Plate Fish Craft for Kids – Easy Ocean-Themed Art
Can I use real fish colors for painting?
Absolutely! You can use natural colors to mimic real fish or go wild with colorful, imaginative designs.
What if I don’t have googly eyes?
You can draw eyes with markers or use buttons as alternatives!
How long does it take for the paint to dry?
Drying time can vary, but allowing at least an hour is usually good for acrylic paints.
Can this project be done outdoors?
Yes! This craft can be a fun outdoor activity, just set up a station where spills can easily be cleaned.
Are there alternative materials I can use?
You can incorporate other recyclable materials like cardboard or old greeting cards for additional dimension.
Conclusion
This DIY Paper Plate Fish Craft is not only an enjoyable way for children to express their creativity but also a fantastic opportunity to bond and learn. Paper plate crafts are easily adaptable, ensuring that you’ll find something new in each session. If you’re looking for another fun project to keep the creative juices flowing, consider checking out this easy paper plate fish craft for kids that draws inspiration from the beloved rainbow fish. Creating together will leave you with lasting memories and beautiful handmade decor that brings warmth to your home.
Print
DIY Paper Plate Fish Craft for Kids
- Total Time: 45 minutes
- Makes: 1 craft
Description
Create vibrant and colorful fish using paper plates in this fun and educational craft project for kids.
Materials
- Paper plates (1 per fish)
- Paints (various colors)
- Paintbrushes
- Scissors
- Glue
- Construction paper (for fins and details)
- Markers or crayons (optional for detailing)
- Googly eyes (optional for added fun)
Instructions
- Prepare Your Paper Plate
- Paint the Fish
- Create Fins and Tail
- Assemble Your Fish
- Add Details
- Display Your Art
Notes
Try using metallic paints for a shimmery effect or incorporating patterned paper for a more textured look.