

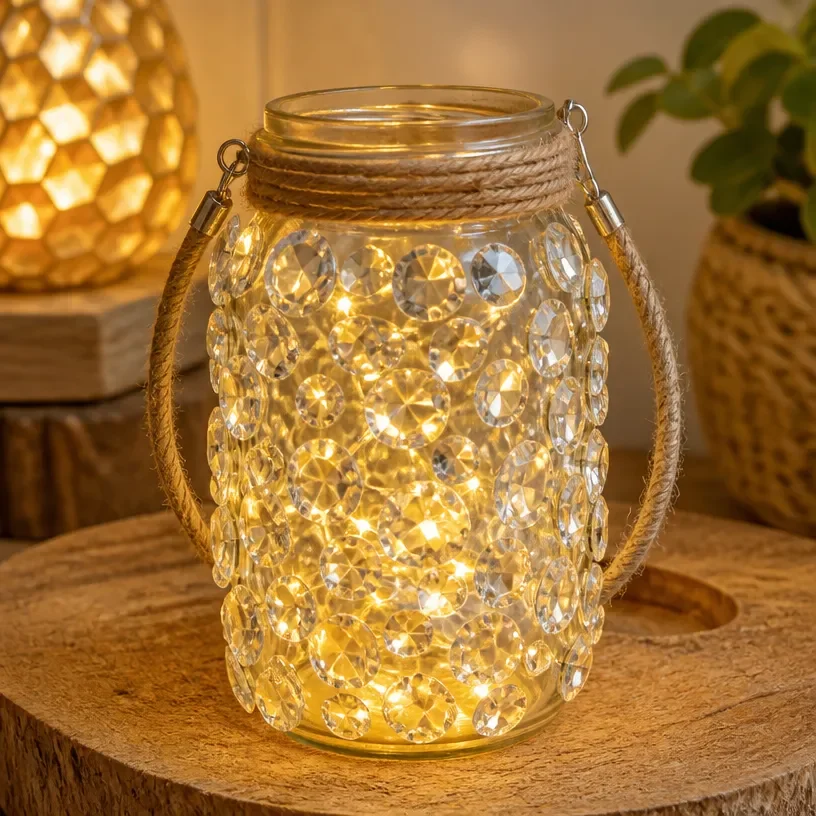
Creating a Fairy Crystal Lantern for Enchanted Garden Decor is a charming project that can add a whimsical touch to your outdoor space. This delightful lantern not only enhances the beauty of your garden, but it also serves as a cozy nightlight for warm summer evenings. With its enchanting glow and beautiful design, it can be displayed on a table, hung from tree branches, or positioned throughout your garden to create a magical atmosphere. You may also find Diy Butterfly Crystal Window Decor useful.
This project is approachable for crafters of all skill levels. You can customize it to fit your personal style and the season, whether it’s filled with flowers in spring or sparkly lights in fall. Let’s dive into why not only this project is fun but also a perfect way to incorporate a personal touch into your home decor. You may also find Diy Haunted Village Mason Jar Lanterns Halloween Decor useful.
Why You’ll Love This Project
Making a Fairy Crystal Lantern is an ideal blend of creativity and practicality. With its simple construction, it utilizes inexpensive materials commonly found at home or accessible at craft stores. You can easily customize the lantern with seasonal elements, allowing it to fit into your decor throughout the year. Plus, it adds a distinct farmhouse charm to your setting, creating a welcoming ambiance whether you use it as porch decor or a centerpiece on your dining table. You may also find Glowing Rainbow Ghost Lantern Halloween Decor useful.
Before You Start
To successfully create your fairy lantern, envision a finished piece that radiates warmth with soft, inviting light. Pay particular attention to how the lantern will be lit, as this can greatly enhance its magical appeal. Preparing your workspace ahead of time with all materials at hand will streamline the crafting process.
“A handmade touch makes every home feel warmer.”
Materials and Supplies
Materials and Supplies
To create your Fairy Crystal Lantern, you’ll need the following materials:
- Mason jar (any size you prefer)
- Fairy lights or LED tea lights
- Decorative stones or crystals
- Epsom salt (for a frosted effect)
- Twine or ribbon
- Optional: small faux flowers or greenery
Make sure to select materials that reflect the style you desire. For instance, using colored twine or crystals can add an additional flair to your lantern.
How to Make Fairy Crystal Lantern for Enchanted Garden Decor
Now let’s get into the step-by-step instructions for bringing your lantern to life!
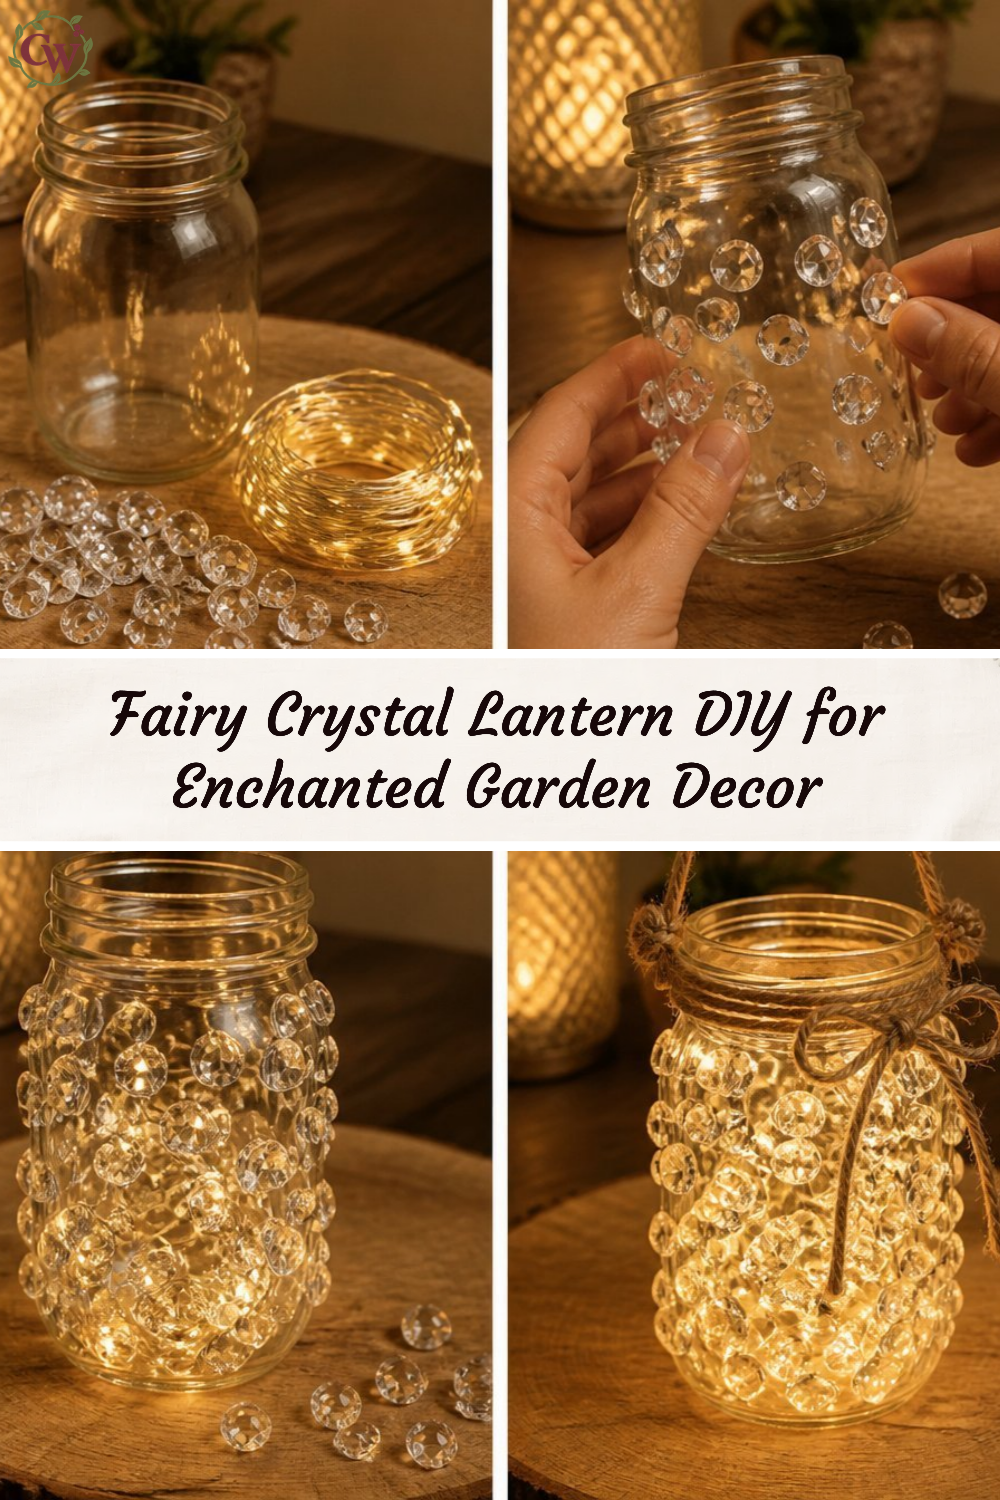
Step 1: Prepare the Mason Jar
Start by thoroughly cleaning your mason jar. Any residue or dirt can affect the overall look of your lantern. Once clean, you can choose to frost the outside of the jar with Epsom salt. To do this, mix a small amount of water with Epsom salt to create a paste, then apply it to the outside of the jar using a sponge. Allow it to dry for a few hours.
Step 2: Fill the Jar
Once the jar is dry, fill it with decorative stones or crystals to the bottom. This adds to the visual interest and provides a base for your lighting element.
Step 3: Add the Lights
Next, place your fairy lights or LED tea lights inside the jar. If you’re using fairy lights, it can be helpful to wrap them around the stones before placing them in the jar. Make sure they sit at the top, as this will illuminate the crystal stones beautifully.
Step 4: Decorate the Top
Use twine or ribbon to create a decorative embellishment on the neck of the jar. Tie it into a bow for a charming touch. You can include small faux flowers or greenery to enhance the natural feel of the lantern.
Step 5: Final Touches
After your decorative elements are in place, gently shake the jar to ensure everything is positioned well. Once satisfied, place your lantern in its desired spot in the garden or home.

How to Style Your Finished Fairy Crystal Lantern for Enchanted Garden Decor
To truly showcase your Fairy Crystal Lantern, consider where it will be displayed. It makes an eye-catching statement on a porch, or you could group several around a cozy sitting area. This lantern can also shine beautifully on a dinner table, especially during gatherings, inviting a warm and welcoming atmosphere.
To complement your lantern, you could use surrounding natural materials like fresh flowers or seasonal decor. Keeping the style simple ensures that your handmade piece remains the focal point.
Maggie’s Tips for the Best Results
- Dry-fit the elements inside the jar before securing anything with glue to ensure everything fits well.
- Layer items inside the jar for a fuller visual appeal.
- When using lights, consider their battery life for convenience.
- Test the balance of decorative elements to prevent overcrowding.
- Allow any glue or wet materials to thoroughly dry to maintain structural integrity.
Easy Ways to Customize This Project
You can easily customize your Fairy Crystal Lantern by experimenting with:
- Different colors of ribbon or twine
- Seasonal flowers or faux greenery
- Varieties of stones or crystals for different effects
- Using colored fairy lights for a unique touch
Such adaptations enable your lantern to maintain a fresh look throughout the seasons.
How to Store Your Lantern
When the seasons change, consider how you’ll store your lantern. If using real materials like flowers, those may not last long-term. Ensure to clean the jar and store it in a safe place where it won’t get crushed or damaged.
FAQs About Fairy Crystal Lantern for Enchanted Garden Decor
Can I use real flowers?
Yes, but note that they will not last long. It’s recommended to opt for faux flowers for longevity.
How do I change the light source?
Simply remove the existing lights and replace them with new ones. Ensure that your new light fits well within the jar.
Is it safe for outdoor use?
If you use LED lights, your lantern is perfectly safe for outdoor settings. Avoid using real candles if the intention is outdoor display.
What if my twine is too long?
You can easily trim the twine to your desired length after tying it around the jar.
A Handmade Touch for the Season
Creating your Fairy Crystal Lantern for Enchanted Garden Decor is more than just a craft; it’s about infusing your space with warmth and personality. A handmade item brings a unique charm that mass-produced decorations can’t replicate. Enjoy using this lantern as a stylish touch in your home, and remember that it doesn’t have to be perfect to be beautiful. Embrace the journey of crafting, and let it enhance your home with lovely memories.
Conclusion
As you continue to create enchanting decor, consider exploring the GlitZGlam Miniature Dragonfly Fairy Door for The Enchanted Garden to add another magical element to your garden decor. Combining different crafts will deepen the whimsical charm of your outdoor space, setting the perfect mood for relaxation and joy.
Print
Fairy Crystal Lantern for Enchanted Garden Decor
- Total Time: 15 minutes
- Makes: 1 lantern
Description
Create a charming Fairy Crystal Lantern that adds a whimsical touch to your outdoor space while serving as a lovely nightlight.
Materials
- Mason jar (any size)
- Fairy lights or LED tea lights
- Decorative stones or crystals
- Epsom salt (for a frosted effect)
- Twine or ribbon
- Optional: small faux flowers or greenery
Instructions
- Prepare the Mason Jar: Clean the jar and frost the outside with Epsom salt if desired.
- Fill the Jar: Add decorative stones or crystals to the bottom.
- Add the Lights: Place fairy lights or LED tea lights in the jar, wrapping them around stones if using fairy lights.
- Decorate the Top: Use twine or ribbon for embellishment, adding faux flowers if desired.
- Final Touches: Shake the jar gently to position elements and place your lantern in its desired location.
Notes
Customize your lantern with seasonal elements and ensure glue or wet materials dry thoroughly before display.