

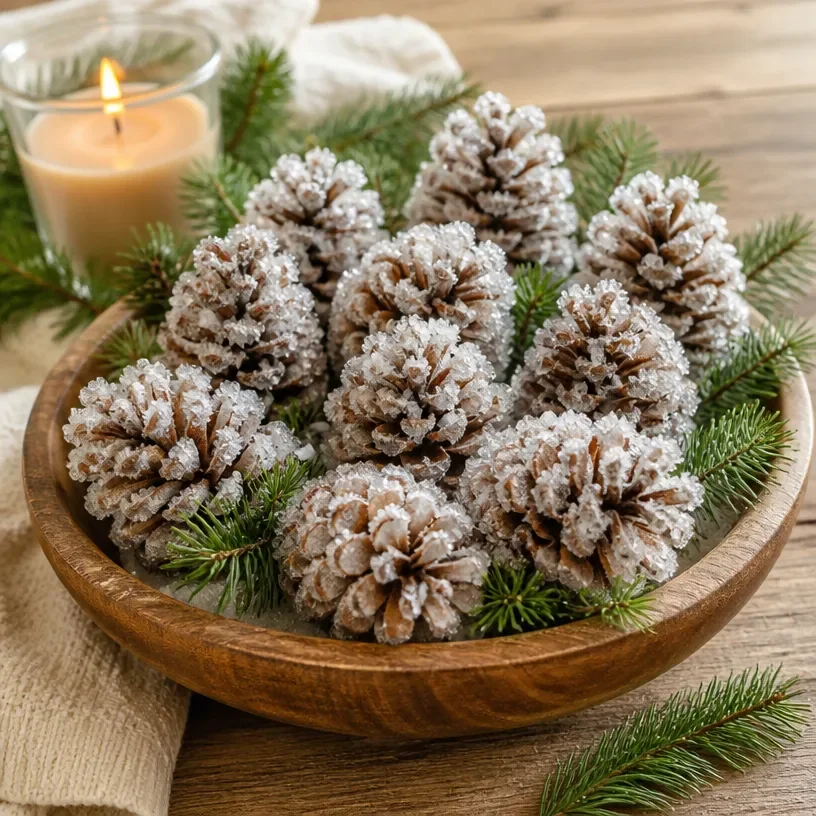
Fresh-Looking Crystal Pinecones from Winter Woods You may also find Crystal Pinecone Ornament useful.
The beauty of winter woods inspired me to create these fresh-looking crystal pinecones, a delightful craft project that brings the charm of the outdoors into your home. These shimmering ornaments are perfect for adorning your mantel, creating festive centerpieces, or adding a rustic touch to your holiday decor. What makes this project particularly attractive is its simplicity; even a novice crafter can enjoy making these pinecones with minimal materials. You may also find Crystal Star Patriotic Ornament Diy useful.
The crystal finish on these pinecones reflects light beautifully, giving a warm and inviting glow. They can be displayed year-round, making them not only a seasonal treat but also a lasting decor choice. Plus, this project allows you to create a handmade touch that will make your home feel uniquely yours. You may also find Diy Butterfly Crystal Window Decor useful.
Why You’ll Love This Project
Creating fresh-looking crystal pinecones is a wonderful way to bring seasonal charm to your home. One of the greatest benefits of this project is how approachable it is; the materials are easy to find, and the process is straightforward. You can use a variety of natural pinecones, making this project both versatile and customizable.
Whether you want to showcase these beauties on your dining table or hang them above your fireplace, their rustic character will elevate your decor. Moreover, you can easily adapt the colors and embellishments to match your interior theme. If you love expressing creativity through DIY home decor, this project is a perfect match for you.

Before You Start
Before diving into crafting, it’s essential to visualize what your finished product will look like. Aim for pinecones that appear freshly dusted with sparkling crystals, resembling a winter wonderland. Pay special attention to the application of your crystal finish, as this is what will give your pinecones that enchanting look.
Make sure to prepare your workspace by having all materials handy; this will simplify the crafting process. As you gather your supplies, you may especially appreciate the comfort of working with natural textures and materials.
“A handmade touch makes every home feel warmer.”
Materials and Supplies
Materials and Supplies
- Natural pinecones (choose various sizes for interest)
- Clear glue or Mod Podge
- Epsom salt or faux snow
- A shallow bowl or tray for mixing
- Ribbon (optional, for hanging)
- Paintbrush (for applying glue)
When selecting your materials, ensure the pinecones are clean and dry. The glue will adhere best to a smooth surface, so any dirt or debris should be removed. Epsom salt is a great choice for achieving that crystalline effect, but faux snow can offer a fluffier look if preferred.
How to Make Fresh-Looking Crystal Pinecones from Winter Woods
Step 1: Prepare the Pinecones
Start by cleaning your pinecones to remove any dirt or insects. This will ensure that the glue adheres properly and your finish looks crisp. You might want to soak them in a mixture of water and vinegar for about 30 minutes, then rinse thoroughly and allow them to dry completely.
Step 2: Mix the Crystalline Finish
In a shallow bowl, mix together the clear glue and your Epsom salt or faux snow. The ratio of glue to Epsom salt can be adjusted depending on how thick you want the layer to be. A thicker layer will give a more crystalline appearance, while thinner coats can offer a delicate touch.
Step 3: Apply the Mixture
Using a paintbrush, carefully apply your glue and salt mixture to the surfaces of the pinecones. Ensure you cover all sides to create an even look. If you’re using ribbon, you might want to attach it at this stage so that you can hang the pinecones once they’re finished.
Step 4: Let Them Dry
Allow the pinecones to sit and dry for several hours or overnight. If you’re working in a humid environment, be patient as it can take longer for the mixture to set. Once dry, they will have a beautiful, frosted look that mimics winter’s magic.
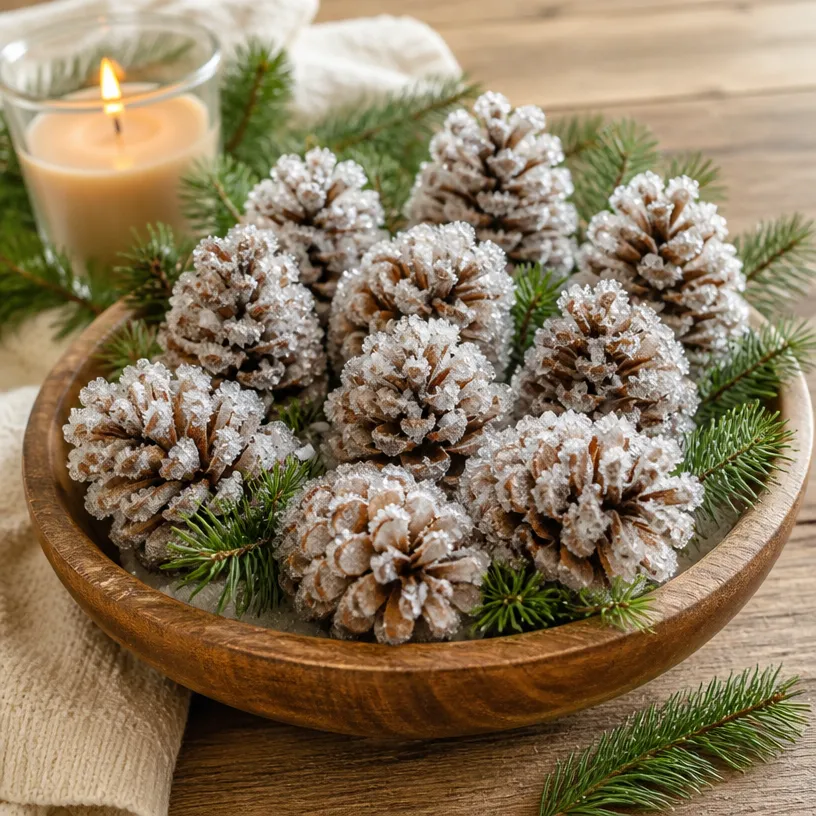
How to Style Your Finished Fresh-Looking Crystal Pinecones from Winter Woods
The finished pinecones can be styled in a variety of ways in your home. They make lovely centerpieces on dining tables when arranged in groups, perhaps nestled in a rustic wooden bowl filled with other natural elements like twigs or faux greenery.
You can also hang them on your front door as part of a cheerful welcome display. A simple ribbon can give them a more polished look if you choose to use it. Consider placing them near warm candlelight to enhance their shimmering effect, bringing a touch of warmth and sparkle to your space.

Maggie’s Tips for the Best Results
- Dry-fit your pinecones in your chosen display area before permanently placing them.
- Work in layers with the adhesive mixture to control the thickness and texture.
- Allow adequate drying time for the best finish.
- Balance the arrangement with the sizes of the pinecones for visual interest.
- Be gentle while handling; some salt may flake off during the process.
Easy Ways to Customize This Project
To personalize your pinecones, consider using different colors for the ribbon or adding other decorative elements, such as painted accents or sparkly glitter. You can also experiment with various sizes of pinecones to create dynamic collections, ranging from dainty ones to larger standout pieces that catch the eye.
How to Pack This Project Away for Next Season
These crafted pinecones are sturdy yet delicate, so care should be taken when storing them. Keep them in an airtight container to prevent dust accumulation. If the space allows, try packing them with a soft material like tissue paper to maintain their shape and avoid crushing any delicate elements.
FAQs About Fresh-Looking Crystal Pinecones from Winter Woods
Can I use artificial pinecones for this project?
Absolutely! Artificial pinecones can provide a more uniform look and are a great choice if you’re aiming for durability.
How can I clean the pinecones after they are made?
To clean, a soft brush or a gentle cloth will help remove dust without damaging the finish.
What if I want to change the color of the pinecones?
You can spray paint them before applying the adhesive and salt mixture. This allows for a variety of base colors.
How long does the crystal finish last?
With proper care, the finish should remain intact and beautiful for multiple seasons.
Is it suitable for outdoor use?
While they can handle some exposure, this project is best for indoor use to keep the crystal finish intact.
Conclusion
Making fresh-looking crystal pinecones from winter woods is a wonderful way to add a personal touch to your seasonal decor. The craft not only allows for creativity but also results in decor pieces that are both beautiful and meaningful in your home. To learn more about the natural beauty of pinecones, explore The Pine Cones | Deborah Silver & Co. for additional insights. Each crafted piece tells a story and transforms your home into a warm, inviting space. Remember, it’s not about perfection, but the joy of creating something uniquely yours.
Print
Fresh-Looking Crystal Pinecones from Winter Woods
- Total Time: 15 minutes
- Makes: 4-6 pinecones
Description
Create beautiful crystal pinecones that add a delightful touch to your holiday decor and can be displayed year-round.
Materials
- Natural pinecones (various sizes)
- Clear glue or Mod Podge
- Epsom salt or faux snow
- A shallow bowl or tray for mixing
- Ribbon (optional, for hanging)
- Paintbrush (for applying glue)
Instructions
- Prepare the pinecones by cleaning them to remove any dirt or insects.
- Mix the clear glue and Epsom salt or faux snow in a shallow bowl.
- Apply the mixture carefully to the surfaces of the pinecones using a paintbrush.
- Let the pinecones dry for several hours or overnight before displaying.
Notes
Dry-fit your pinecones in your chosen display area before placing them permanently. Work in layers with the adhesive mixture to control thickness and texture.