

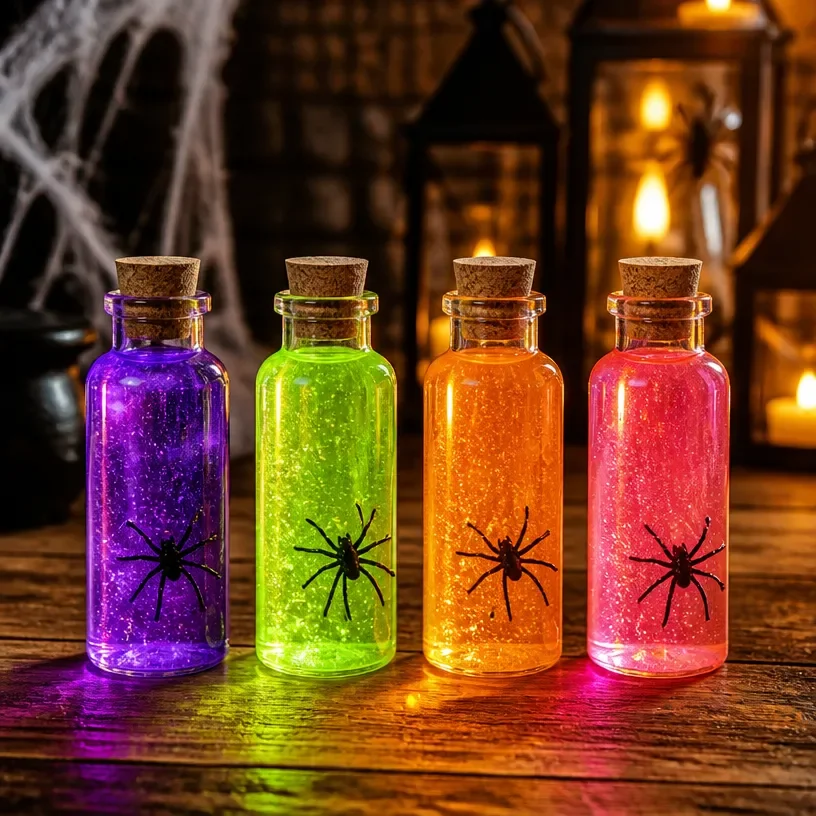
Creating enchanting decorations can transform your home for the Halloween season, and one wonderful way to achieve this is through Halloween Rainbow Potion Crafts: Spooky Bottle Decor and DIY Ideas. This project allows you to repurpose ordinary glass bottles into colorful potion holders that will delight trick-or-treaters and party guests alike. They can be displayed on your mantel, front porch, or dining table, adding a whimsical touch to your Halloween festivities. Most importantly, this DIY project is approachable for crafters of all skill levels. You may also find Diy Rainbow Ghost Cupcake Liner Garland Halloween Decor useful.
With a blend of vibrant colors and creative styling, these potion bottles offer a unique way to celebrate the season while also incorporating a fun crafting experience. You can customize them to suit your own style, using materials you might already have at home. Let’s dive into why this project is so wonderful! You may also find Diy Colorful Rainbow Acorn Garland Fall Decor useful.
Why You’ll Love This Project
Creating your own Halloween potion bottles is not only fun but also practical. This project features accessible materials, allowing you to create colorful decor without breaking the bank. The versatility of this craft means you can choose different colors and styles to match your Halloween theme, making them ideal for decorating various areas of your home, such as the porch or a spooky centerpiece.
If you loved this idea, you might also appreciate making a Halloween-themed wreath to complement your potion decor!

Before You Start
In this project, you will learn how to transform simple glass bottles into eye-catching potion displays. Each bottle will reflect your artistic choices, from color schemes to embellishments. Preparing your workspace by gathering materials in advance can make the crafting process smoother.
“A handmade touch makes every home feel warmer.”
Preparing for Crafting
Before starting, ensure you have a clean, well-lit workspace. Choose a surface that can get messy, as paint and glue may spill. Additionally, make sure you have all your materials ready for a seamless crafting session.
Materials and Supplies
To create your Halloween Rainbow Potion Crafts, gather the following items:
- Glass bottles (various shapes and sizes)
- Acrylic paints (in vibrant colors)
- Paintbrushes (varied sizes for detail work)
- Colorful ribbons or twine
- Labels or stickers (for potion names)
- Optional: glitter, faux leaves, or other embellishments
- Sealer (clear spray or Mod Podge, if desired)
When selecting glass bottles, consider different shapes to add character to your display. For example, wider bottles can hold more glitter or decorative elements, while narrower ones can be ideal for small details.
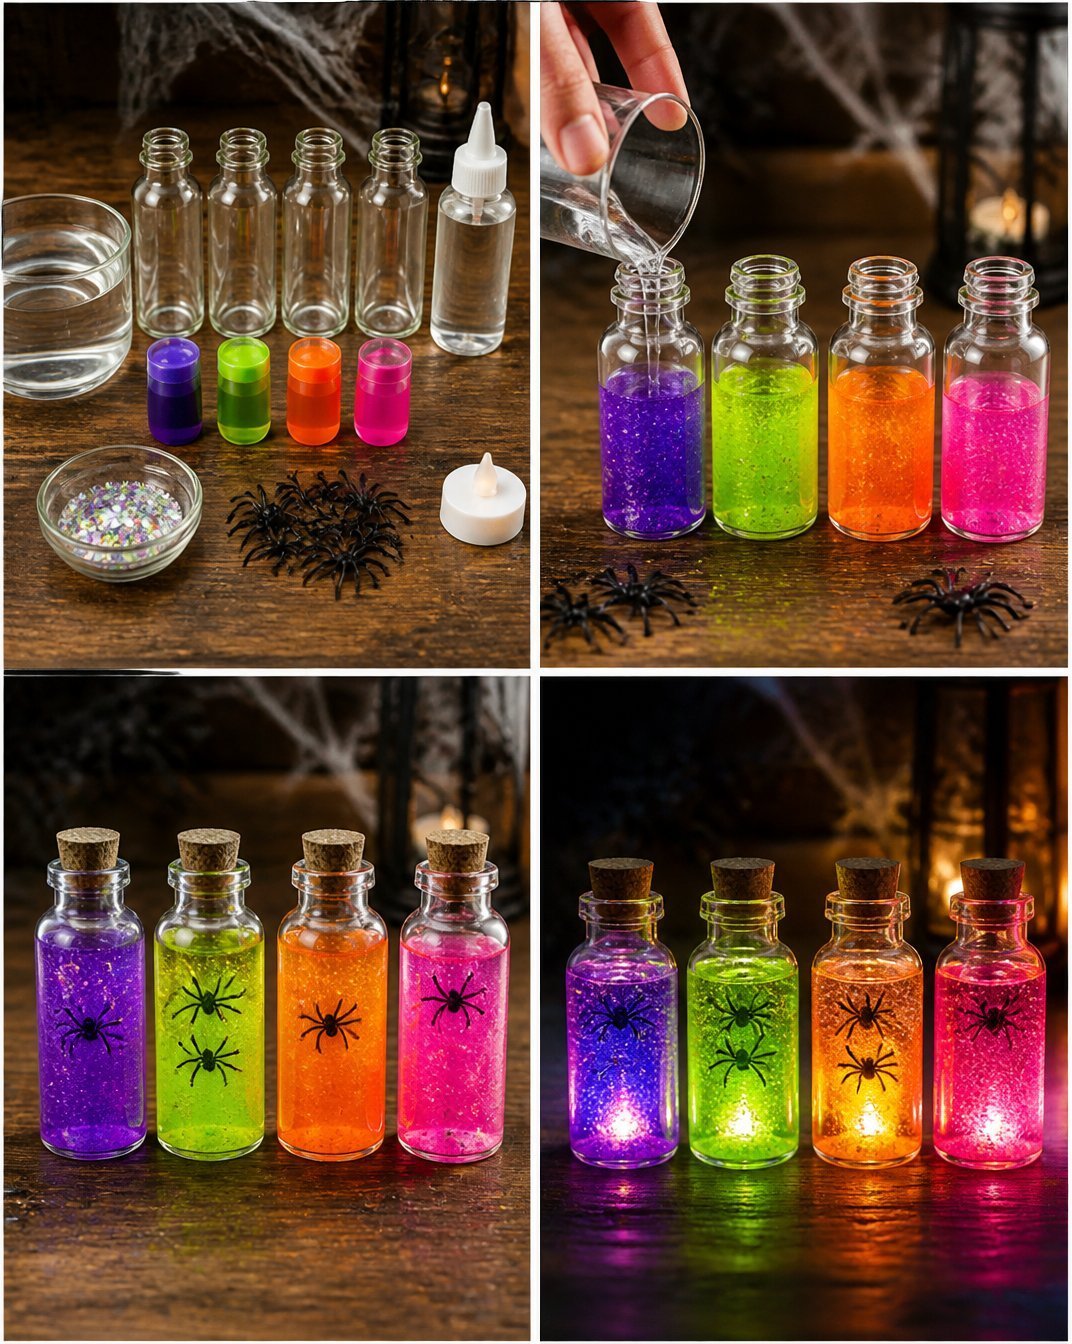
How to Make Halloween Rainbow Potion Crafts: Spooky Bottle Decor and DIY Ideas
Clean the Bottles: Ensure all bottles are free from labels and residue. Wash and dry them thoroughly.
Choose Your Paint Colors: Determine the color palette for your potions. You might want a mix of warm and cool colors to create a rainbow effect.
Paint the Bottles: Using your paintbrush, apply acrylic paint to the outside of each bottle. Consider using a sponge for a stippled look or a brush for bold strokes. Let each layer dry completely before applying additional coats, if needed.
Embellish the Bottles: Once the paint dries, add ribbons or twine around the bottlenecks. You can also attach labels with spooky names like “Witch’s Brew” or “Zombie Elixir” for fun.
Add Details: Use optional embellishments like glitter or faux leaves to enhance the potions’ appearance. Just a sprinkle can add a mystical touch.
Seal (If Desired): If you want to give a finished look, spray a clear sealant over the bottles once everything has dried.
Display Your Creations: Find a perfect place to showcase your potion bottles, whether it’s on the mantel, a table centerpiece, or your front porch.
How to Style Your Finished Halloween Rainbow Potion Crafts: Spooky Bottle Decor and DIY Ideas
The best part about your Halloween potion bottles is how effortlessly they can fit into your home decor. Set them against a backdrop of autumn leaves or place them on a Halloween-themed tablecloth for a cohesive look. You can even group them with other decorations, like little pumpkins or spooky candles, to enhance the seasonal ambiance.
Maggie’s Tips for the Best Results
- Dry Fit Elements: Always dry-fit your ribbons or labels before securing them with glue to ensure they look balanced.
- Work in Layers: If you’re going for a multi-colored look, allow one color to dry before applying the next to avoid muddying.
- Experiment with Textures: Don’t be afraid to combine materials like fabric, paper, and paint for added depth.
- Use Focal Colors: Pick a focal color for multiple bottles to create a unified look while still allowing for individuality.
Easy Ways to Customize This Project
You can modify this project to fit the season or your decor. Consider using:
- Seasonal colors for each holiday: reds and greens for Christmas, pastels for spring.
- Switching out ribbons for themed fabrics, like burlap for a rustic feel or sheer materials for elegance.
- Adding illuminated elements: use battery-operated tealights inside the jars for a glowing effect at night.
Caring for Your Handmade Decor
To keep your potion bottles in good condition, dust them regularly to avoid buildup. If stored away, place them in a padded container to prevent breakage. Avoid direct sunlight if made with paint, as prolonged exposure can dull colors.
FAQs About Halloween Rainbow Potion Crafts: Spooky Bottle Decor and DIY Ideas
Can I use plastic bottles?
Yes! Plastic bottles can be just as effective for this project if you’re concerned about breakage.
How long does the paint need to dry?
Typically, acrylic paint dries quickly, often within 30 minutes, but it’s best to wait a few hours before sealing.
What if I want to change the colors later?
You can easily repaint your bottles by using a primer before applying new paint.
Can I use real potion ingredients?
If you enjoy experimenting, you can add colored liquids like juices or sodas for a fun touch (just be careful with clean-up).
How can I make this a family craft?
Involve family members by letting them choose their colors and embellishments, making this a cherished family tradition!
A Handmade Touch for the Season
Creating your own Halloween decorations is a beautiful way to express your creativity and instill warmth into your home environment. These handmade potion bottles contribute not just to the aesthetic but also to the spirit of togetherness and celebration. Remember, the beauty of handmade crafts lies in their imperfections, and each piece will reflect your unique style and creativity. As you enjoy your Halloween Rainbow Potion Crafts, take pride in the care and effort you’ve put into making your home feel welcoming and festive.
For more inspiration on similar spooky decor, you might want to check out Magic Potion Bottles for Halloween – Sadie Seasongoods, which offers more creative ideas to enchant your Halloween setup.
Print
Halloween Rainbow Potion Crafts: Spooky Bottle Decor
- Total Time: 15 minutes
- Makes: Varies based on number of bottles decorated
Description
Transform ordinary glass bottles into vibrant potion displays for Halloween with this fun DIY project.
Materials
- Glass bottles (various shapes and sizes)
- Acrylic paints (in vibrant colors)
- Paintbrushes (varied sizes for detail work)
- Colorful ribbons or twine
- Labels or stickers (for potion names)
- Optional: glitter, faux leaves, or other embellishments
- Sealer (clear spray or Mod Podge, if desired)
Instructions
- Clean the bottles: Ensure all bottles are free from labels and residue.
- Choose your paint colors: Determine the color palette for your potions.
- Paint the bottles: Apply acrylic paint to the outside of each bottle.
- Embellish the bottles: Add ribbons or twine around the bottlenecks.
- Add details: Use optional embellishments like glitter or faux leaves.
- Seal (if desired): Spray a clear sealant over the bottles.
- Display your creations: Find a perfect place to showcase your potion bottles.
Notes
Dust regularly to keep your potion bottles in good condition. Avoid direct sunlight to maintain color vibrancy.