

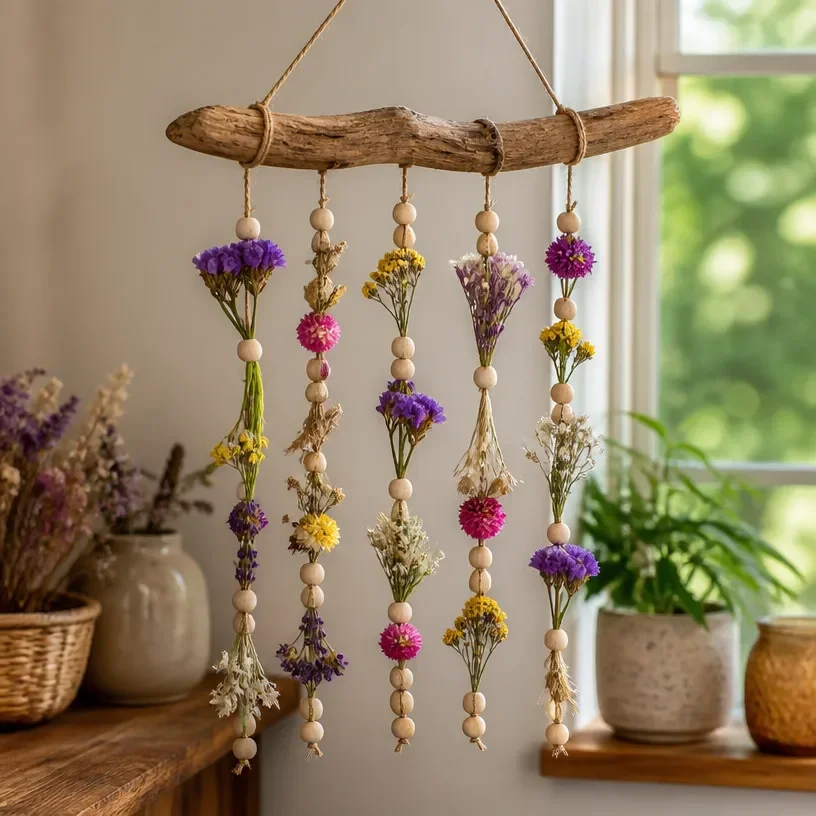
The gentle sound of wind chimes ringing softly in the breeze can create a serene atmosphere in your home or garden. The Rustic Driftwood Wind Chime with Botanical Design is not only a beautiful addition to your decor but also a delightful DIY project that brings you closer to nature. This charming wind chime captures the warmth of the outdoors, making it perfect to hang on a porch, balcony, or near a window where soft light can dance through the natural materials.
Making this driftwood wind chime is approachable for crafters of all skill levels. It allows you to combine rustic aesthetics with your personal touch, whether that’s incorporating favorite natural elements or adding your desired color palette. The grace of the wind chime flowing in the breeze can add both visual and auditory warmth to your seasonal decor.
Why You’ll Love This Rustic Driftwood Wind Chime
This Rustic Driftwood Wind Chime with Botanical Design offers so many reasons to love it. First, its construction is straightforward and doesn’t require expensive materials or tools. You can find driftwood, twine, and other supplies at local craft stores or even in your backyard. The result is an inexpensive yet stunning piece that fits perfectly with farmhouse decor.
Not only does this project lend itself to seasonal versatility, but the natural materials align beautifully with both indoor and outdoor settings. Plus, if you enjoy the process of crafting, this wind chime allows for creativity as you decide how to arrange and embellish your pieces. Don’t forget to check out other creative ideas for similar projects, such as this beautiful butterfly crystal window decor, which can complement your rustic charm.
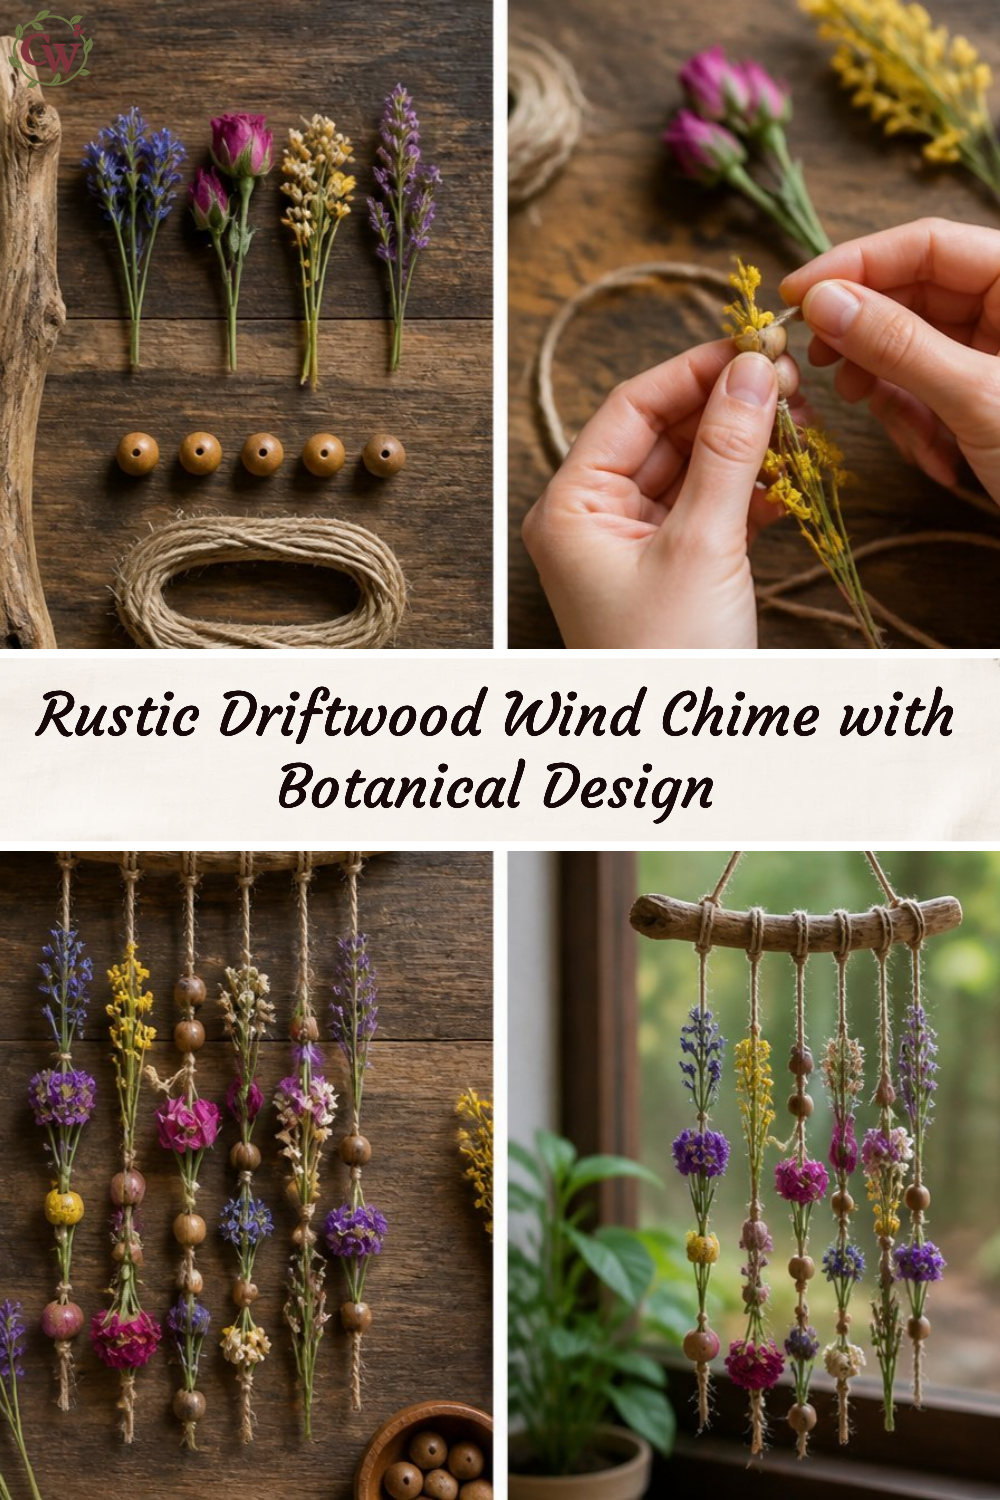
Before You Start
Preparing for Your Wind Chime Project
Before diving into the construction of your wind chime, it’s essential to have an overview of the project. The finished piece should evoke the tranquility and beauty of nature, combining rustic driftwood with delicate botanical accents. The most attention should be paid to the arrangement and spacing of the driftwood and any decorative elements you plan to include.
Make sure to prepare your workspace as well by clearing a flat area and gathering all your materials. Setting out everything you need beforehand helps streamline the crafting process and makes it more enjoyable.
“A handmade touch makes every home feel warmer.”
Materials and Supplies
Materials and Supplies
Gather the following materials to create your Rustic Driftwood Wind Chime:
- Various pieces of driftwood (varying lengths)
- Twine or strong string
- Decorative elements like dried flowers or leaves
- A small metal or wooden ring (for hanging)
- Scissors
- Hot glue gun (optional for securing elements)
It’s important to choose driftwood that is lightweight yet sturdy enough to withstand the elements if you’re planning to hang it outdoors. When selecting decorative elements, consider opting for dried flowers, which add a lovely touch while ensuring durability. Fresh elements may wilt, altering the look of your wind chime over time.
How to Make Rustic Driftwood Wind Chime with Botanical Design
Step 1: Prepare Your Driftwood
Begin by sorting through your driftwood pieces to find those that will create a visually appealing chime. Arrange them in different formations on a flat surface to see how they interact with one another. Pay attention to the lengths and shapes as this will impact how they hang and look once completed. Don’t hesitate to mix varieties to give your chime unique character.
Step 2: Cut Your Twine
Once you settle on your arrangement, cut lengths of twine allowing enough extra for tying knots. Ideally, these should be around 4-6 feet long, but this will vary depending on how high you want your wind chime to hang.
Step 3: Secure the Driftwood
Starting from the bottom driftwood piece, use twine to secure it with a knot, allowing a bit of space between each piece as you move up. If any driftwood is particularly heavy, consider reinforcing it with hot glue for added stability. Keep layering the pieces of wood, making sure to vary the lengths to create a natural, staggered appearance.
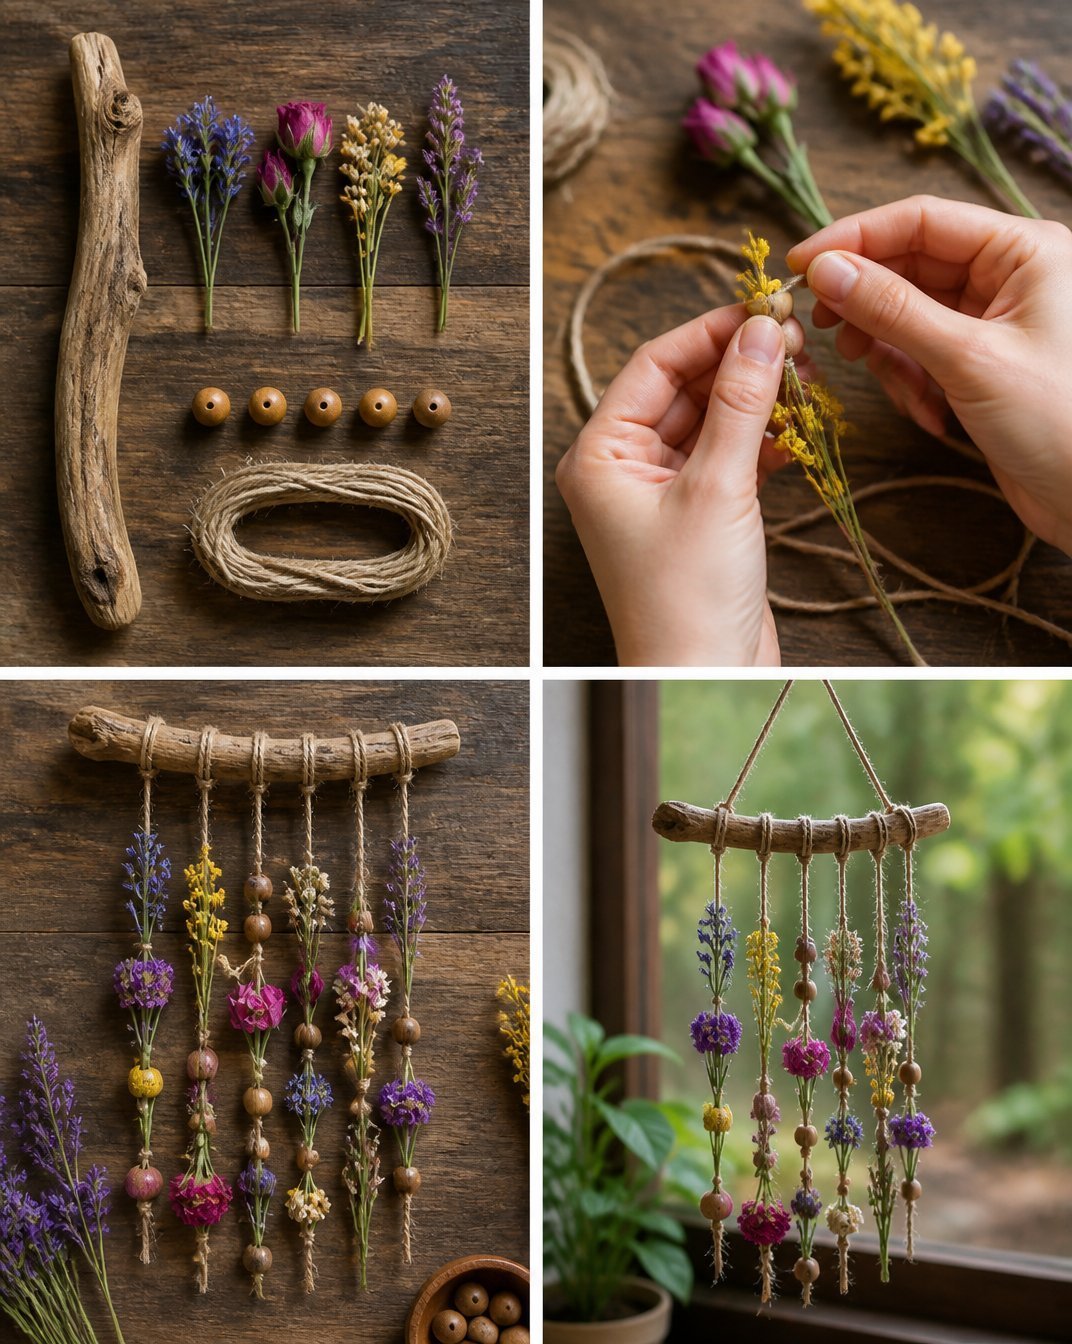
Step 4: Attach the Hanging Element
Once all driftwood pieces are secured, attach a metal or wooden ring at the top of the assembly using additional twine. This ring will function as the hanging point. Make sure it’s tied securely to prevent the chime from falling.
Step 5: Add Botanical Design
Now it’s time to bring in the botanical elements. If you’re using dried flowers or leaves, use your hot glue gun to attach them attractively to the driftwood. These decorative accents can enhance the natural look and feel of your wind chime.
Step 6: Hang Your Wind Chime
Finally, find a suitable spot to hang your wind chime. Ideally, it should be in a location where a gentle breeze can cause it to sway, allowing you to hear the soothing musical notes as it catches the wind.
How to Style Your Finished Rustic Driftwood Wind Chime with Botanical Design
Once you complete your wind chime, it’s time to consider where it will be best displayed. This charming piece is perfect for hanging on a porch or in a garden area, adding an inviting touch to outdoor gatherings or quiet moments enjoyed with a cup of tea. You can even consider placing it near the entrance of your home to greet guests with a melodic welcome.
Complement your wind chime with other natural decor items, such as potted plants or rustic furniture, to create a cohesive and warm atmosphere that’s welcoming and homey.
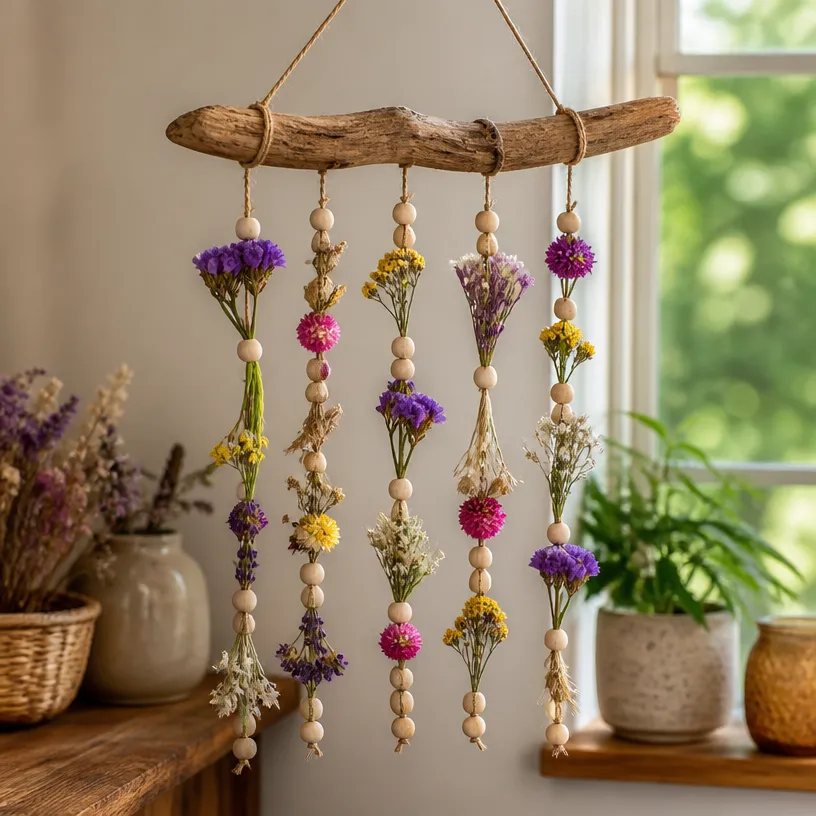
Maggie’s Tips for the Best Results
- Dry-fit all elements before gluing or tying to ensure a harmonious layout.
- Work in layers, starting with the largest driftwood and adding smaller pieces for a balanced look.
- Allow hot glue to set properly to maintain the integrity of your assembly.
- Consider varying textures in your decorative elements to enhance visual interest.
- Keep the tails of the twine proportional for an aesthetically pleasing chime.
Easy Ways to Customize This Project
Getting creative with your wind chime can lead to unique versions that resonate with your style. Consider using seasonal colors or flowers that reflect the time of year. For instance, incorporate soft pastels for spring or deep reds and golds for fall. Wood stain or paint can also be applied to the driftwood for a more personalized touch.
Adding beads or small metallic accents can further enhance the visual appeal and create a more dynamic sound when the chime moves in the wind.
How to Store Your Wind Chime
To keep your Rustic Driftwood Wind Chime looking its best, store it in a cool, dry location during the off-season. Avoid damp areas that could affect the integrity of the wood or decorative elements. You can wrap it in a soft cloth to protect the materials from dust while in storage.
FAQs About Rustic Driftwood Wind Chime with Botanical Design
Can I use fresh flowers instead of dried ones?
While fresh flowers can look stunning, they may not last as long and will require regular replacement to maintain the look. Dried flowers are more durable and ideal for this project.
How do I know if my wind chime is suitable for outdoor use?
Ensure that your materials are weather-resistant. Driftwood is typically fine, but decorative elements may require a sealant if exposed to the elements.
What type of twine should I use?
A sturdy, outdoor-rated twine is best, as it can better withstand the elements. Hemp or jute twine offers great durability for this type of craft.
Can I paint the driftwood?
Yes, painting or staining the driftwood can add a unique touch. Just be sure to allow sufficient drying time before assembly.
A Handmade Touch for the Season
Creating your Rustic Driftwood Wind Chime with Botanical Design is not just a craft; it’s an invitation to embrace the beauty of nature in your home. The calm sounds of your handmade wind chime can enrich your living space and bring a sense of peace. Remember to take joy in the process and appreciate the unique quirks that make your project special.
Should you wish to explore more charming decor ideas, consider browsing for items that complement your style, such as ceramic leaf chimes, which can beautifully enhance your outdoor experiences. Enjoy crafting and showcasing your unique handmade creations!
Print
Rustic Driftwood Wind Chime with Botanical Design
- Total Time: 45 minutes
- Makes: 1 wind chime
Description
Create a beautiful Rustic Driftwood Wind Chime that adds serenity and charm to your home or garden.
Materials
- Various pieces of driftwood (varying lengths)
- Twine or strong string
- Decorative elements like dried flowers or leaves
- A small metal or wooden ring (for hanging)
- Scissors
- Hot glue gun (optional for securing elements)
Instructions
- Prepare Your Driftwood
- Cut Your Twine
- Secure the Driftwood
- Attach the Hanging Element
- Add Botanical Design
- Hang Your Wind Chime
Notes
Consider varying textures and colors in your design to enhance visual interest.