


Vintage Herb Drying Rack for Rustic Kitchen Decor You may also find Diy Rainbow Fall Leaf Garland Rustic Porch Decor useful.
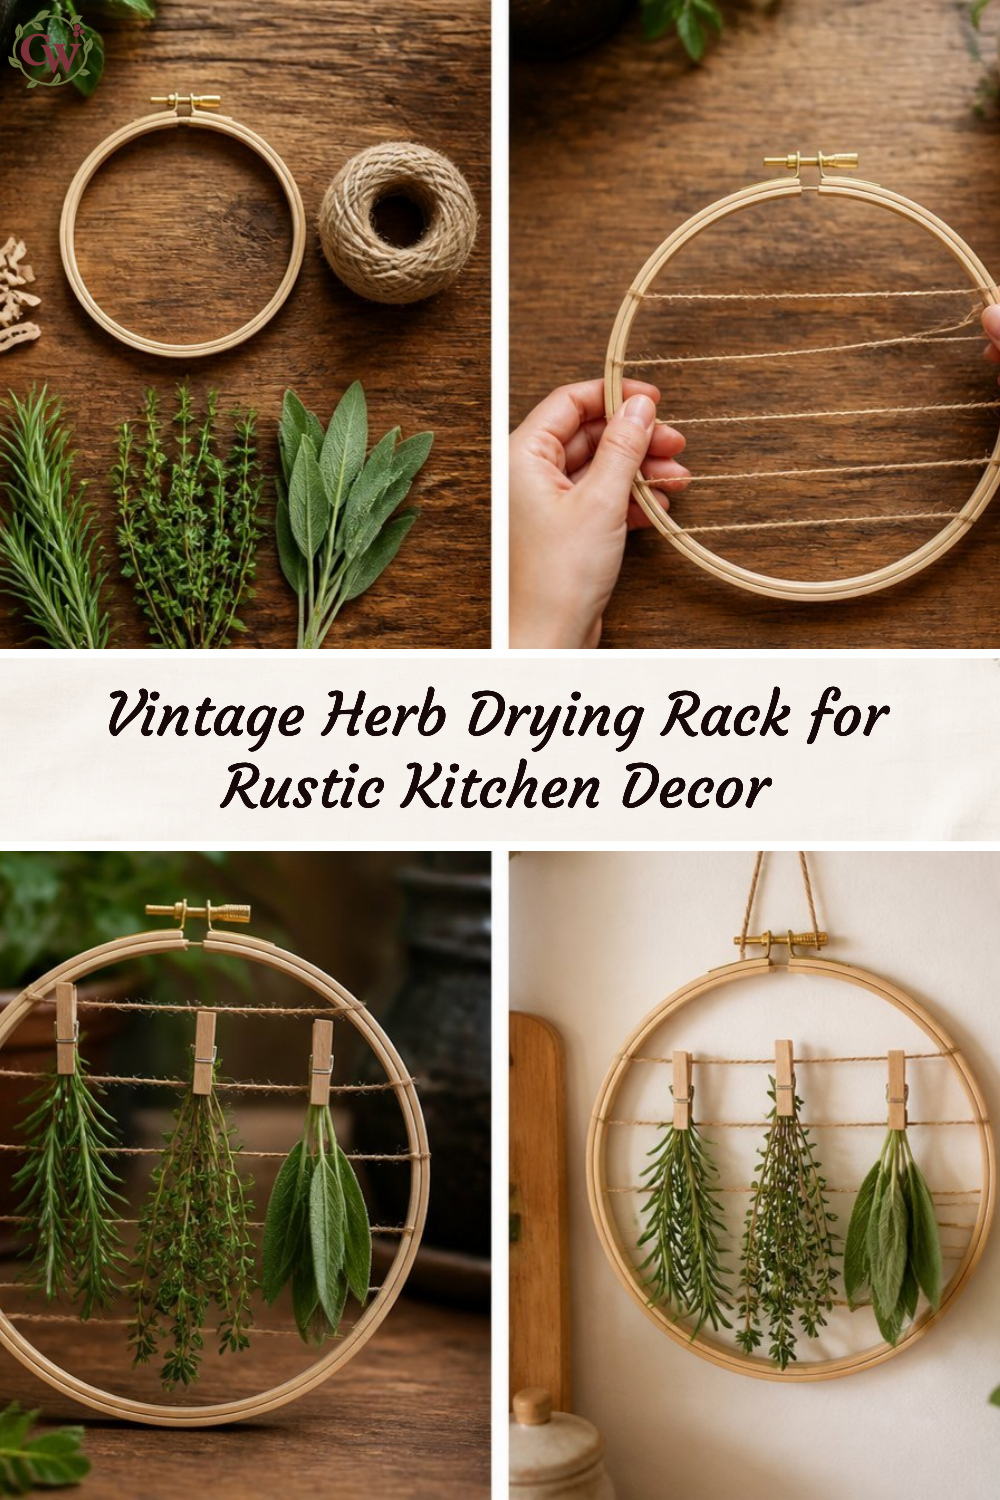
Creating a Vintage Herb Drying Rack for Rustic Kitchen Decor is a fantastic way to infuse your kitchen with warmth and charm. This project allows you to display beautiful herbs while adding a stylish decor element to your home. The soft, natural textures and rustic materials used in this drying rack make it not only functional but also visually appealing. You can hang it in your kitchen, on a porch, or even in a dining area to showcase your herbs. You may also find Vintage Rainbow Pencil Wreath Home Decor useful.
The beauty of this project lies in its approachability; even a beginner can create this charming piece with just a few materials and simple steps. Not only does it serve as a practical storage solution, but it also brings a touch of handmade artistry into your home.
Why You’ll Love This Project
Creating your own herb drying rack is an enjoyable experience, especially with the rustic charm that it adds to any kitchen space. You’ll appreciate the opportunity to personalize the design with your choice of herbs and decorative accents. This project makes excellent use of inexpensive materials, making it accessible for those on a budget.
You can display the rack in various seasons, allowing it to transition beautifully from spring to fall. The versatility of this piece means it can easily adapt to suit your decorating style, and its functionality is perfect for those who love gardening or cooking with fresh herbs. If you’re looking for more kitchen decor inspiration, you might also enjoy projects like the vintage lace mason jar lantern decor.
Before You Start
Before diving into the project, take a moment to visualize the finished drying rack. It should feel rustic and inviting, with space to showcase fresh herbs such as basil, thyme, or rosemary. Pay special attention to the drying mechanism, as this will dictate how well the herbs maintain their scent and flavor. Preparing your workspace with plenty of room and good lighting will make assembly a lot easier.
“A handmade touch makes every home feel warmer.”
Materials and Supplies
Materials and Supplies
- Vintage wood frame or an old window frame
- Twine or jute string
- Scissors
- Small metal hooks (optional, for added durability)
- Fresh herbs for drying (basil, rosemary, thyme, etc.)
- Decorative ribbons (optional)
When selecting your wooden frame, ensure it has a rustic finish that complements your kitchen’s style. Twine provides a natural, earthy texture that enhances the overall aesthetic. If you decide to use ribbons, choose colors that match your seasonal decor for an added touch of personality.
How to Make Vintage Herb Drying Rack for Rustic Kitchen Decor
Step 1: Prepare Your Frame
Start by cleaning your vintage frame thoroughly to remove any dust or dirt. If you’re using a window frame, make sure the glass is clean to let in light. You can leave the frame as-is for a more rustic feel or lightly sand it for a smoother finish.
Step 2: Cut Your Twine
Measure out lengths of twine to create rows for drying your herbs. The lengths should be long enough to stretch across the frame, allowing some extra for tying knots. Cut several pieces of twine based on how many rows you’d like.
Step 3: Attach Twine to the Frame
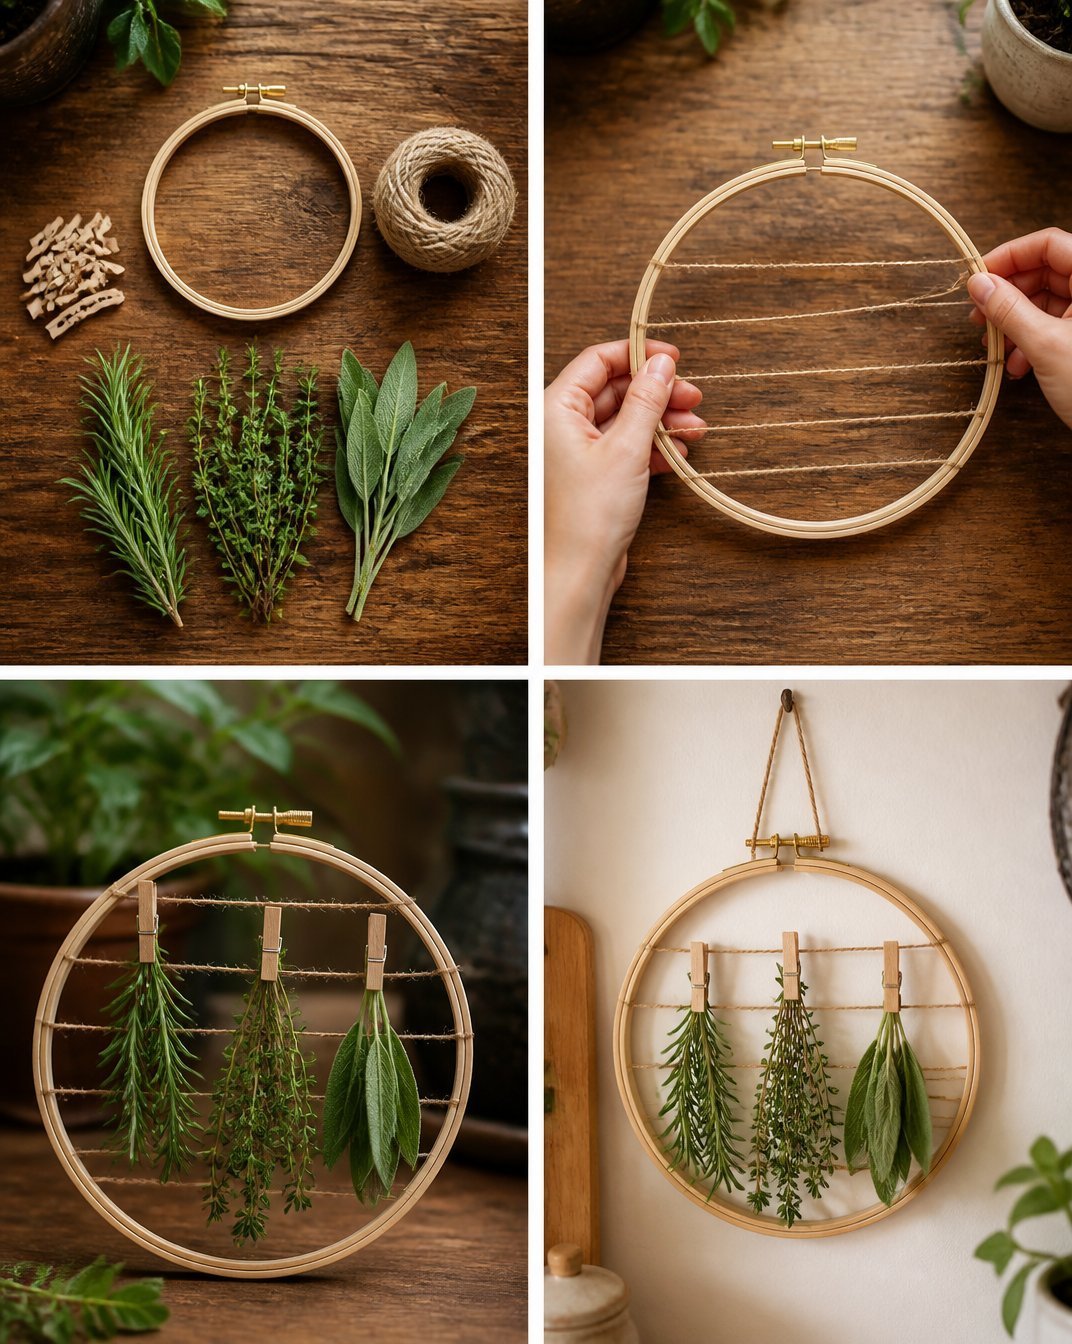
Begin attaching the twine by wrapping one end securely around the frame and tying a tight knot. Space each row evenly; they should have enough distance between them for the herbs to hang without overcrowding. Make sure to keep your knots secure.
Step 4: Hang Your Herbs
Gather your freshly picked herbs and trim the stems to a uniform length. Tie each bundle with a small piece of twine, making a loop at the top so it can hang easily. If desired, you can also use small metal hooks to attach the herbs directly to the twine.
Step 5: Display Your Rack
Choose a location to hang your drying rack that receives good air circulation but is sheltered from direct sunlight. This will help preserve the flavor and color of your herbs. Your drying rack is now ready to be enjoyed!
How to Style Your Finished Vintage Herb Drying Rack for Rustic Kitchen Decor
The finished vintage herb drying rack can enhance various areas of your home whether it’s a cozy kitchen wall or a rustic dining area. It can also be an attractive feature on a porch or beside a window where it can catch a gentle breeze. Pair it with complementary decor, such as a wooden cutting board or vintage kitchen tools, to maintain a cohesive rustic theme.
Consider seasonal decor accents that can enhance the appearance of your drying rack. Dried flowers or seasonal greens can be added for a personal touch.

Maggie’s Tips for the Best Results
- Dry-fit your twine before cutting to ensure proper spacing.
- When you tie the herbs, allow some extra twine length for looping before securing tightly.
- Take care to balance the weight of herbs across the drying rack for stability.
- Make sure to allow sufficient air circulation around the herbs to dry properly without mold.
- To prolong the life of your herbs, avoid placing them in direct sunlight.
Easy Ways to Customize This Project
You can easily customize your herb drying rack by choosing different types of herbs based on the season. Try using pastel colors for spring or warmer tones like amber and gold for fall. Additionally, consider incorporating various twine textures or ribbons in seasonal patterns to enhance the visual appeal.
For a more rustic ambiance, experiment with wood stains or finishes that complement your kitchen decor. Adding small charms or decorative items can also provide a unique flair.
How to Care for Your Handmade Decor
Caring for your vintage herb drying rack is essential to ensure it remains a beautiful addition to your kitchen. Dust the frame occasionally to keep it looking clean and fresh. If you’ve used real herbs, remember that they will eventually lose their potency; feel free to replace them with new ones as needed. For years to come, your rack will remind you of the beauty of handmade decor.
FAQs About Vintage Herb Drying Rack for Rustic Kitchen Decor
What herbs work best for drying?
Most culinary herbs such as basil, rosemary, thyme, and sage are excellent choices for drying.
Can I use faux herbs instead?
While real herbs have a wonderful scent and flavor, faux herbs can be used for decorative purposes without the drying process.
How long does it take for herbs to dry completely?
Typically, herbs can take anywhere from 1-2 weeks to dry completely, depending on the humidity in your area.
Can this project be used outdoors?
Yes, your herb drying rack can be hung outdoors, but ensure it’s in a shaded area to protect the herbs from direct sunlight.
How should I store the dried herbs once they’re finished?
Once dried, store your herbs in airtight containers away from light and moisture to preserve their flavor.
Conclusion
Creating a vintage herb drying rack for rustic kitchen decor not only adds to your home’s charm but also serves practical purposes. Each handmade project brings warmth and personality to your living space. If you’re considering expanding your rustic kitchen collection, check out this Herb Drying Rack Vintage that could inspire you further.
Print
Vintage Herb Drying Rack for Rustic Kitchen Decor
- Total Time: 15 minutes
- Makes: N/A
Description
Create a charming vintage herb drying rack that adds warmth and functionality to your kitchen decor.
Materials
- Vintage wood frame or an old window frame
- Twine or jute string
- Scissors
- Small metal hooks (optional)
- Fresh herbs for drying (basil, rosemary, thyme, etc.)
- Decorative ribbons (optional)
Instructions
- Prepare your frame by cleaning it thoroughly.
- Cut lengths of twine for drying your herbs.
- Attach the twine to the frame, tying knots securely.
- Hang your herbs by tying them with twine loops.
- Display your rack in a location with good air circulation away from direct sunlight.
Notes
Customize the drying rack by choosing herbs based on the season and incorporating decorative accents.