

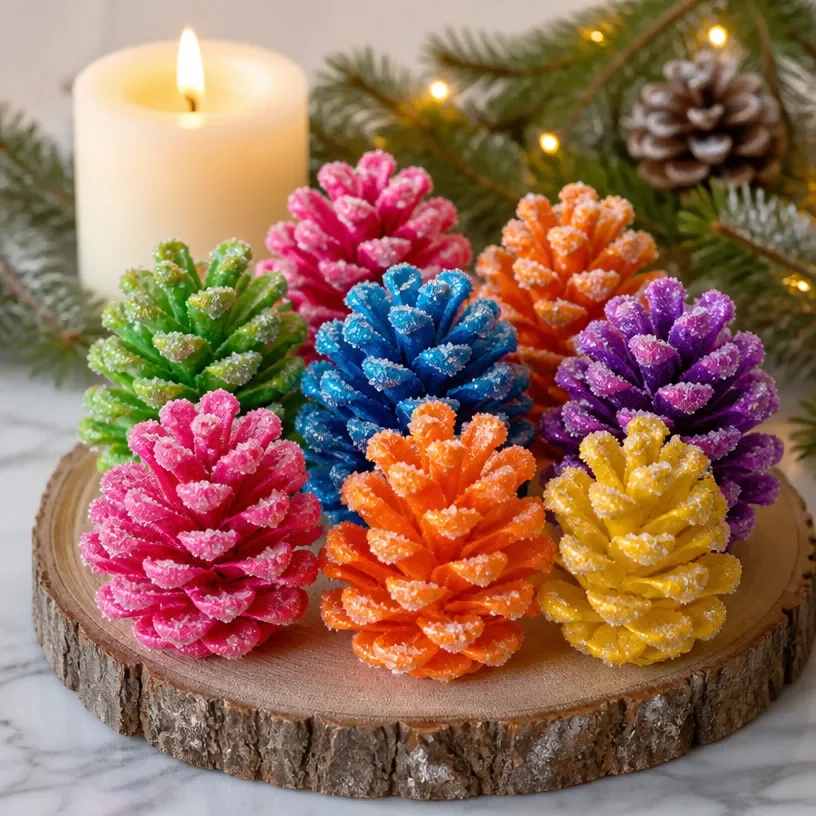
To create beautiful holiday memories, nothing beats a fun craft project like decorating pine cones for Christmas with kids. This enjoyable and hands-on activity not only fosters creativity but also brings warmth and rustic charm to your home. Pine cones can be transformed into delightful ornaments or table decorations, making them perfect for hanging on a tree, adorning a mantel, or even decorating the dining table during festive gatherings. The best part is that it’s a simple process that kids will love. You may also find Diy Pinecones Crystal Fresh Looking Winter Woods useful.
Imagine soft ribbons, glittering paints, and the earthy scent of pine cones filling your workspace. It’s a project that brings the magic of the season right into your home, and it’s approachable for crafters of all ages. Whether you’re looking to create some handmade gifts for loved ones or simply add a personalized touch to your holiday décor, this project provides the perfect opportunity to bond with your little ones. You may also find Fresh Crystal Pinecones Diy Winter Woods useful.
Why You’ll Love This Project
Decorating pine cones for Christmas is a wonderful way to engage kids in crafting and celebrate the holiday spirit. One of the most appealing aspects is that it uses inexpensive materials you likely have on hand. Pine cones are often plentiful in your backyard or local park, and the additional supplies, like paint and ribbons, can be sourced from craft stores or even recycled items around the house. You may also find How To Hang Mason Jars Diy Hanging Decorations useful.
This project is versatile and can be customized to fit different themes or personal styles. From bright colors and sparkles to natural earthy tones, the final result can truly represent your family’s unique holiday spirit. Plus, decorated pine cones can be showcased in various spots in your home whether you want to create a charming centerpiece for your dining table or hang them on the tree, they will add a warm, handmade feel wherever they’re displayed.

Before You Start
Before diving into the crafting, it’s essential to have a clear idea of how you want your pine cones to look once they’re decorated. Aim for a festive style that shines but also feels cozy. The most crucial part of this project is to ensure that kids feel included and have fun throughout the process. Set up a dedicated crafting space, perhaps on a kitchen table covered with newspaper or a tablecloth for easy clean-up.
“A handmade touch makes every home feel warmer.”
Organize your supplies in a way that makes it easy for the children to choose and use them. Preparing your workspace in advance will not only make crafting easier but will also keep kids engaged and excited about the project.
Materials and Supplies
Materials and Supplies
- Pine cones (collect a variety of sizes if possible)
- Acrylic paints (choose festive colors like red, green, gold, and silver)
- Paintbrushes
- Glitter (optional for added sparkle)
- Ribbons or twine (for hanging)
- Glue (hot glue is preferable, but kids can also use school glue for lighter elements)
- Optional decorations (stickers, sequins, small pom-poms)
Important Material Choices: Opt for non-toxic acrylic paints, especially when crafting with kids. Glitter can create a magical effect but does tend to end up all over, so ensure it’s something you’re comfortable with!
How to Make How to decorate pine cones christmas kids
Prepare Your Pine Cones: Start by cleaning the pine cones. Remove any dirt or debris and let them dry completely.
Paint the Pine Cones: Use a paintbrush to apply acrylic paint to the scales of the pine cones. Encourage kids to be creative mix colors or create patterns, as there’s no right or wrong way to do this.
Add Glitter: If using glitter, sprinkle it over wet paint to create a sparkly effect. Shake off any excess glitter before it dries.
Attach Ribbon: Once the paint has dried, cut lengths of ribbon or twine. Tie it at the top of the pine cone to create a loop for hanging. You can secure the ribbon with a dab of glue for extra hold.
Decorate Further: Get creative! Kids can glue on additional decorations like sequins, pom-poms, or stickers to make each piece unique.
Let Dry: Place the finished pine cones on a tray or worksheet to allow everything to dry completely before using them.

How to Style Your Finished How to decorate pine cones christmas kids
Incorporating your beautifully decorated pine cones into your home is an excellent way to show off the kids’ hard work. They can be displayed on the mantel, used as centerpieces on the dining table, or even hung on the tree. You might place them in decorative bowls or baskets to create a welcoming holiday atmosphere.
Combining them with other natural elements like evergreen sprigs or dried orange slices can enhance their rustic charm. Remember to keep arrangements simple to highlight the handmade elements, emphasizing warmth without clutter.

Maggie’s Tips for the Best Results
- Dry-fit your adornments before using glue to ensure a pleasing arrangement.
- Layer paint colors for a more textured look and to add depth.
- Be mindful of drying times between steps to avoid smudges and mixes.
- Encourage balance in decorations to create visually appealing designs.
- Keep ribbons proportional to the size of the pine cones to maintain harmony.
- Allow for natural imperfections; handmade projects are uniquely beautiful.
Easy Ways to Customize This Project
To personalize the project even further, consider varying color themes based on your holiday decor. For a more rustic look, use browns and greens, or if your style is more modern, opt for metallic paints. You can also incorporate family traditions by adding initials or specific symbols to each pine cone with paint or stickers.
Creating themed pine cones for different seasons can be another fun variation you could transition from Christmas designs to spring florals effortlessly.
Caring for Your Handmade Decor
Once the holidays pass, ensure your pine cones are stored safely. Keep them in a cool, dry place away from direct sunlight to prevent warping or fading. If you’ve used delicate elements like glitter, take care to protect them during storage to maintain their charm for future seasons.
FAQs About How to decorate pine cones christmas kids
Can we use real or faux pine cones?
Both types work well; real pine cones often have a more rustic look while faux ones can be reused each year.
What’s the best way to clean the pine cones?
A gentle rinse with water followed by drying allows for easy cleaning of debris and dirt.
How do I ensure the painted designs last?
Seal the painted pine cones with a clear, non-toxic spray sealer to protect the artwork.
Can we use other decorations besides glitter?
Absolutely! Be creative and include other items like beads, fabric scraps, or even painting patterns with markers.
What’s the drying time for the paint?
Acrylic paint typically dries within 30 minutes, but it’s best to let them air dry completely for a few hours before handling.
A Handmade Touch for the Season
Decorating pine cones together is more than just creating holiday décor; it’s about building memories through a shared experience. As you see each unique piece come to life, it reminds us that the beauty of handmade projects is found in their imperfections. Let your home reflect the love, creativity, and joy of the season with these charming decorations.
For more inspiration to create delightful holiday crafts, check out this fantastic resource on easy kids’ pinecone Christmas ornaments.
Print
Decorating Pine Cones for Christmas with Kids
- Total Time: 10 minutes
- Makes: Multiple decorations
Description
A fun and creative crafting project that transforms simple pine cones into beautiful Christmas decorations with kids.
Materials
- Pine cones (collect a variety of sizes if possible)
- Acrylic paints (festive colors like red, green, gold, and silver)
- Paintbrushes
- Glitter (optional for added sparkle)
- Ribbons or twine (for hanging)
- Glue (hot glue preferred, but school glue works for lighter elements)
- Optional decorations (stickers, sequins, small pom-poms)
Instructions
- Prepare your pine cones by cleaning them and letting them dry completely.
- Paint the pine cones with acrylic paint, encouraging creativity.
- Add glitter over wet paint for a sparkly effect, shaking off excess.
- Attach ribbon or twine at the top for hanging, securing with glue.
- Decorate further with sequins, pom-poms, or stickers for uniqueness.
- Let the finished pine cones dry completely before using them.
Notes
Customize the project by varying color themes and incorporating family traditions. Store finished decor in a cool, dry place after the holidays.