

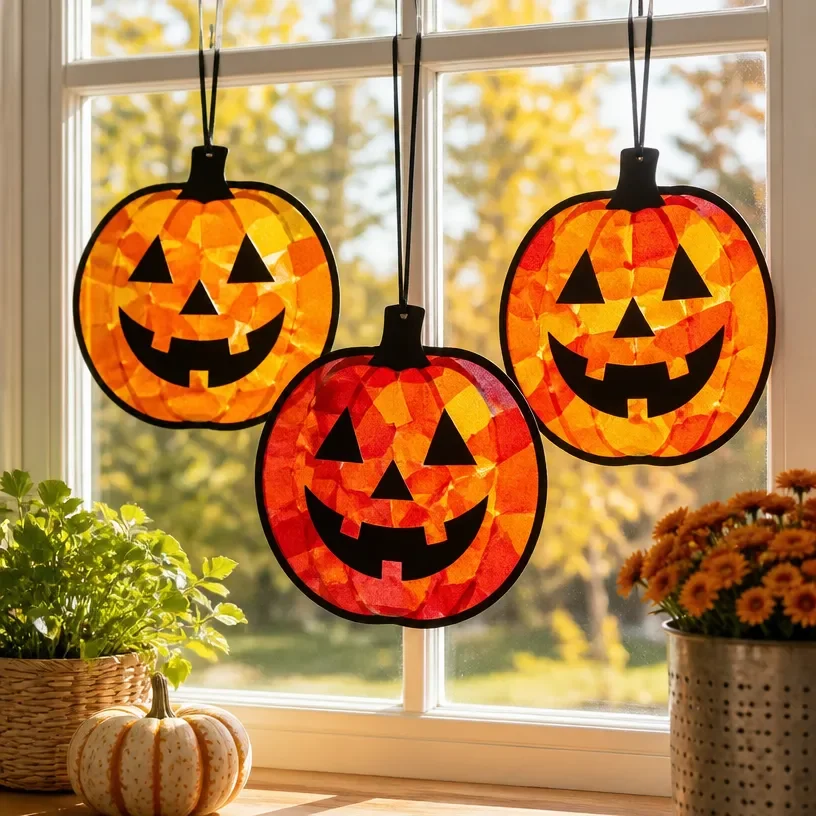
Creating festive decor is one of the highlights of the fall season, especially when it comes to Halloween. Free Halloween stained glass patterns not only brighten up your windows but also add a touch of warmth and charm to your home. These colorful decorations let in natural light while showcasing spooky motifs or fall-themed designs, making them perfect for any window. Plus, they are easy to craft, even for beginners and kids, making them an ideal activity for families looking to bond over creativity during the holiday season. You may also find Rainbow Stained Glass Ghost Window Garland Halloween Decor useful.
The DIY stained glass projects can be displayed in various settings from your living room windows to classroom decorations for preschoolers. The vibrant colors and playful designs make them an inviting addition to any room, enveloping your space in a cozy yet whimsical atmosphere. All you need are some simple materials and a little bit of time, and you’ll have beautiful window crafts that sing of the season. You may also find Diy Stained Glass Rainbow Window Decor Autumn Leaves useful.
Why You’ll Love This Project
The appeal of creating your own stained glass decorations lies in their simplicity and versatility. With free Halloween stained glass patterns, you can customize your decor to fit your home’s unique style. These projects typically require inexpensive materials that you might already have on hand, making them a budget-friendly option.
You can switch them up each year based on seasonal themes, colors, or styles that suit your tastes. They’re not just for Halloween; you can adapt these designs for other occasions or even create a stunning collection of stained glass windows for every season. For example, the warm hues of fall leave designs can transform your windows beautifully, much like with a stained glass window project featuring autumn leaves.
Before You Start
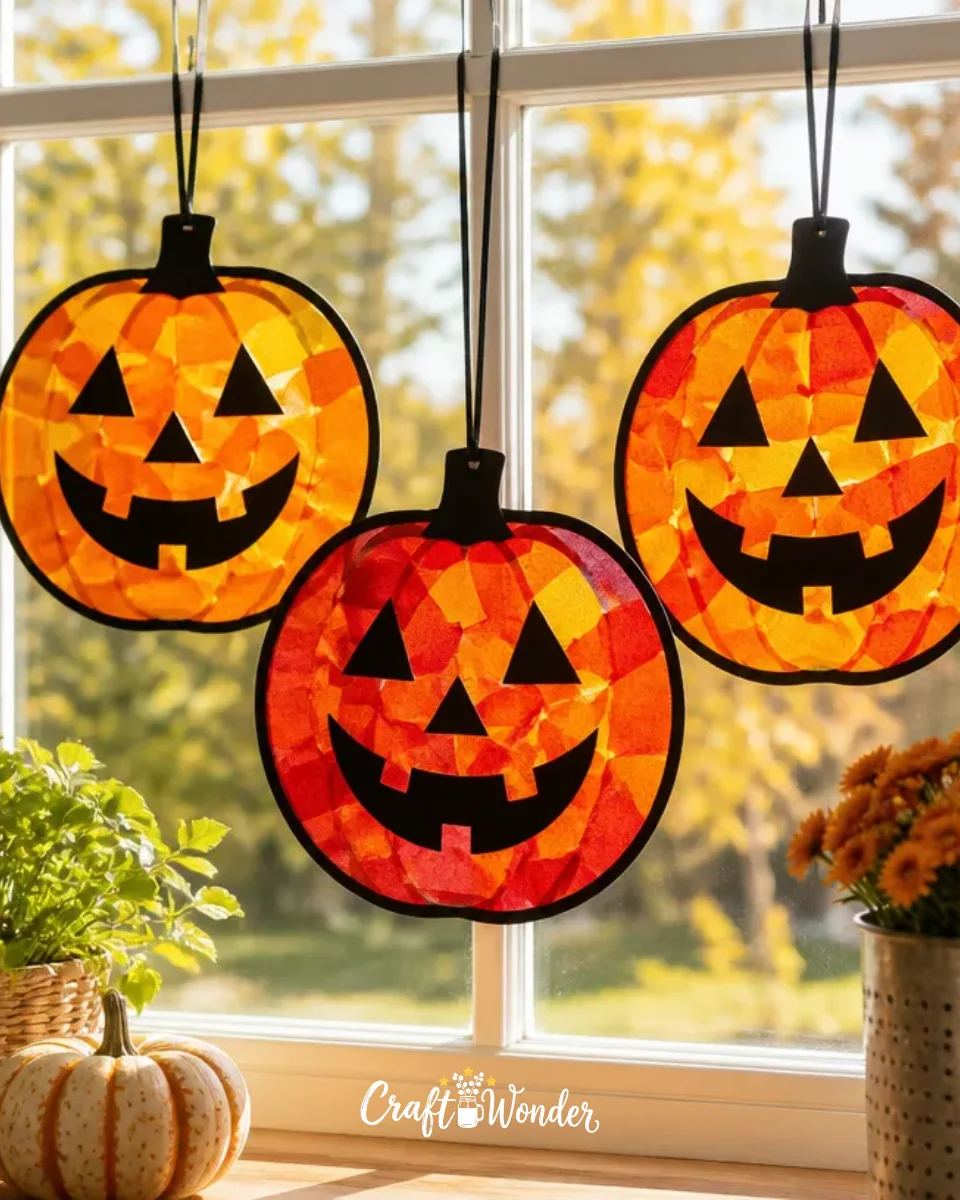
Before diving into your crafty adventure, it’s helpful to visualize the end product. The stained glass designs you create should evoke a warm glow when sunlight streams through, filling your space with color. Pay specific attention to the layout and color selection, as these will define the overall look of your project.
Prepare your workspace to ensure everything is within reach. This will make for a smoother crafting experience. Also, don’t forget to have your glass-safe adhesive and other supplies ready before you begin.
“A handmade touch makes every home feel warmer.”
Materials and Supplies
Materials and Supplies
- Colored tissue paper or cellophane
- Black construction paper or cardstock
- Clear contact paper
- Scissors
- Craft glue (if needed)
- A pencil or marker
- Patterns printed on paper
When choosing colored papers, make sure to opt for hues that will reflect light effectively. The quality of your materials plays a significant role in how effective the finished piece will be; for instance, using high-quality contact paper ensures that your creations last longer.
How to Make Free Halloween Stained Glass Patterns | Stained Glass Fall Patterns, Halloween Crafts Preschool, Window Crafts
Step 1: Prepare Your Pattern
Start by selecting a pattern you’ll enjoy. You might draw or print one out with your desired Halloween motif, such as pumpkins, ghosts, or fall leaves. Cut out the shapes carefully, making sure they will fit nicely on your glass surface.
Step 2: Cut Your Colored Paper
Using your pattern, cut out the shapes from your colored tissue or cellophane. You’ll need enough pieces so that they fill the design completely, allowing minimal gaps.
Step 3: Apply Your Contact Paper
Take a piece of clear contact paper and place it sticky side up on your work surface. Once you’ve done that, arrange your colored pieces onto the contact paper according to your pattern. Ensure that they are placed closely but not overlapping.
Step 4: Seal Your Creation
Once you’re satisfied with the arrangement, lay another piece of contact paper over the top to seal everything in place. Make sure to press down firmly to eliminate air bubbles.
Step 5: Cut the Final Shape
Now, use your scissors to cut around the edges of the design, creating a clean border. If you want, use black construction paper to create an outline for an additional rustic touch.
Step 6: Display Your Stained Glass
Peel off the backing from the contact paper and stick your creation on a window where light will shine through it best. Enjoy the beautiful colors it adds to your space!

How to Style Your Finished Free Halloween Stained Glass Patterns | Stained Glass Fall Patterns, Halloween Crafts Preschool, Window Crafts
To enhance your home’s seasonal decor, consider displaying your stained glass pieces in several focal areas. They work wonderfully on the mantel, where they can catch the eye amidst pumpkins and foliage. Another great spot is your front door; imagine a staggeringly beautiful piece greeting your guests as they arrive.
These decorations can also adorn your dining table or coffee table, bringing a festive cheer to your dining experience. Surround them with simple complementary accents, like gourds or small fall bouquets, to create a cohesive seasonal look.

Maggie’s Tips for the Best Results
- Dry-fit your pieces before gluing, allowing you to visualize the look.
- Work in layers for a more vibrant stained glass effect.
- Allow sufficient drying time for each step to avoid any mishaps.
- Keep the edges of your paper neat for a cleaner finish.
- Always test a small area with the glue to ensure it bonds well without wrinkling.
Easy Ways to Customize This Project
There are numerous ways to personalize your stained glass crafts:
- Use a variety of colors to match different holidays beyond Halloween.
- Incorporate different patterns, from simple shapes to intricate designs.
- Add welcoming messages or quotes using paint or ink for an extra layer of charm.
- Experiment with varying sizes for a dynamic display that draws the eye.
Caring for Your Handmade Decor
To ensure that your stained glass pieces remain beautiful throughout the season, avoid placing them in direct sunlight for extended periods, as this may fade the colors. When cleaning, simply wipe them gently with a damp cloth to avoid any damage. If you do decide to store them post-holiday season, wrap each piece carefully in soft cloth and store them in a cool, dry place.
FAQs About Free Halloween Stained Glass Patterns | Stained Glass Fall Patterns, Halloween Crafts Preschool, Window Crafts
Can I use other types of paper instead of tissue paper?
Absolutely! You can use colored cellophane or even wax paper to create similar effects.
How do I make sure my pieces stick well?
Make sure to press firmly and allow adequate time for the adhesive to bond completely.
Are these stained glass crafts weatherproof?
While they are ok for indoor use, they are not suitable for outdoor display unless specifically treated.
How can I adapt these for other seasons?
Simply choose patterns and colors that represent the corresponding holiday or season, such as snowflakes for winter.
A Handmade Touch for the Season
As you craft your own stained glass pieces, remember that the true beauty lies in the time spent creating and the shared experiences along the way. Each project reflects your unique style, and your home will feel even more inviting with these handmade accents.
Embrace the joy of crafting this season. You may find that these small, colorful decorations become cherished family traditions, leaving lasting memories for years to come.
Conclusion
If you’re looking for more seasonal crafting ideas, consider checking out this Cute and EASY Pumpkin Suncatcher for a delightful addition to your decor!
Print
Free Halloween Stained Glass Patterns
- Total Time: 10 minutes
- Makes: Multiple decorations
Description
Create beautiful and festive stained glass decorations for Halloween with simple, budget-friendly materials that add warmth to your home.
Materials
- Colored tissue paper or cellophane
- Black construction paper or cardstock
- Clear contact paper
- Scissors
- Craft glue (if needed)
- A pencil or marker
- Patterns printed on paper
Instructions
- Prepare Your Pattern: Select a pattern and cut out the shapes carefully.
- Cut Your Colored Paper: Cut shapes from colored tissue or cellophane to fill the design.
- Apply Your Contact Paper: Place clear contact paper sticky side up and arrange colored pieces according to the pattern.
- Seal Your Creation: Lay another piece of contact paper over the top and press down firmly.
- Cut the Final Shape: Use scissors to cut around the edges of the design.
- Display Your Stained Glass: Peel off the backing and stick your creation on a window.
Notes
Dry-fit your pieces before gluing and work in layers for more vibrancy. Clean gently with a damp cloth for maintenance.