

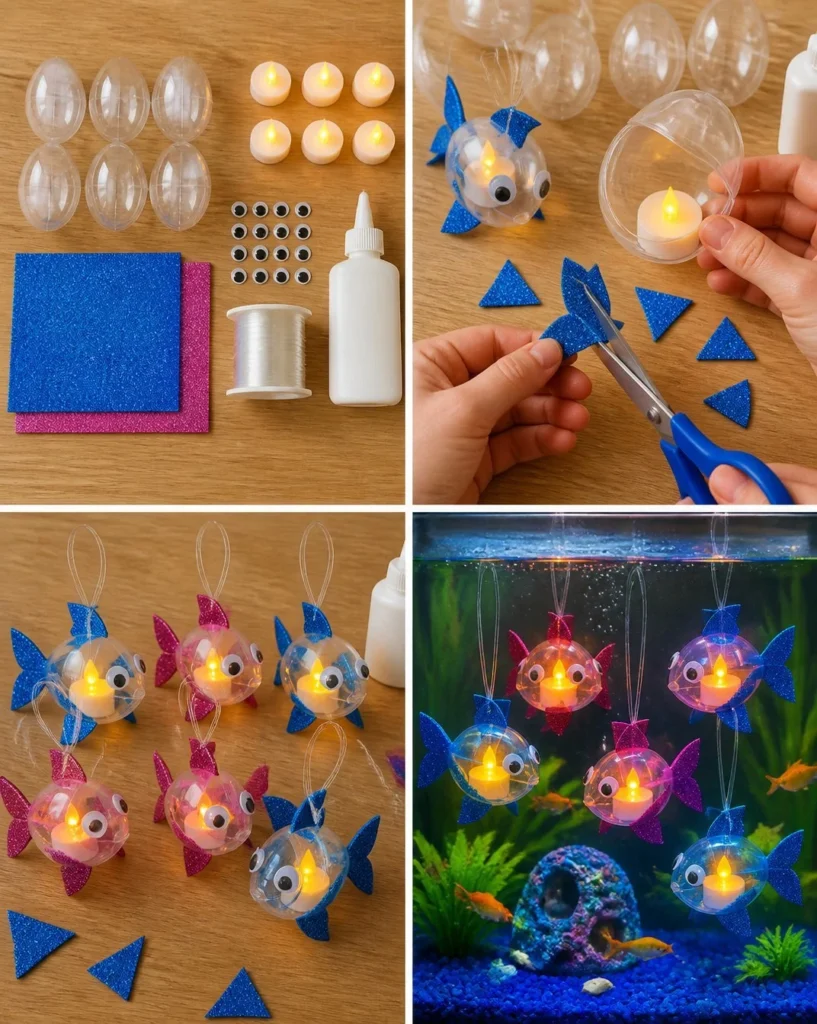
Glowing Fish Lanterns are a whimsical and enchanting addition to your home decor, making them perfect for brightening up any space with a warm, inviting glow. With their playful design and simple construction, these lanterns can be displayed indoors or outdoors during various seasons, especially during spring and summer evenings. This DIY project is approachable for crafters at any skill level, as it utilizes easy-to-find materials and straightforward techniques.
Crafting Glowing Fish Lanterns not only provides a fun creative outlet but also adds a personal touch to your home. The combination of glitter craft foam and LED lights creates an eye-catching decor piece that can serve as a unique centerpiece or a charming night light. Moreover, making these lanterns together with family can foster a sense of connection and shared accomplishment.
Why You’ll Love This Project
Creating Glowing Fish Lanterns is not only enjoyable but also results in a delightful project that you can proudly display. One of the key appeals is its simple construction; even beginners can easily achieve beautiful results. The materials are inexpensive, allowing you to craft without breaking the bank. Given that you can customize your lanterns by choosing different colors and designs, they fit seamlessly into any seasonal decor scheme.
These lanterns can be placed anywhere in your home from your porch to your dining table providing cheerful illumination wherever they are displayed. Their farmhouse charm complements various settings, adding a layer of warmth and nostalgia that feels welcoming. Out on the porch they pair nicely with a rainbow bottle spinner, which does much the same job in daylight.
Before You Start
Before diving into crafting, it’s important to envision your finished Glowing Fish Lanterns. They should embody a playful yet charming design, featuring bright colors and a soft glow from within. Pay special attention to the placement of the fins and googly eyes, as these details will bring your fish to life.
To make the assembly process smoother, organize your workspace by laying out all materials within reach. This will help you focus on the creative aspects without getting bogged down by searching for items. Also, consider dry-fitting the components to see how they look before gluing.
“A handmade touch makes every home feel warmer.”
Materials and Supplies
Materials:
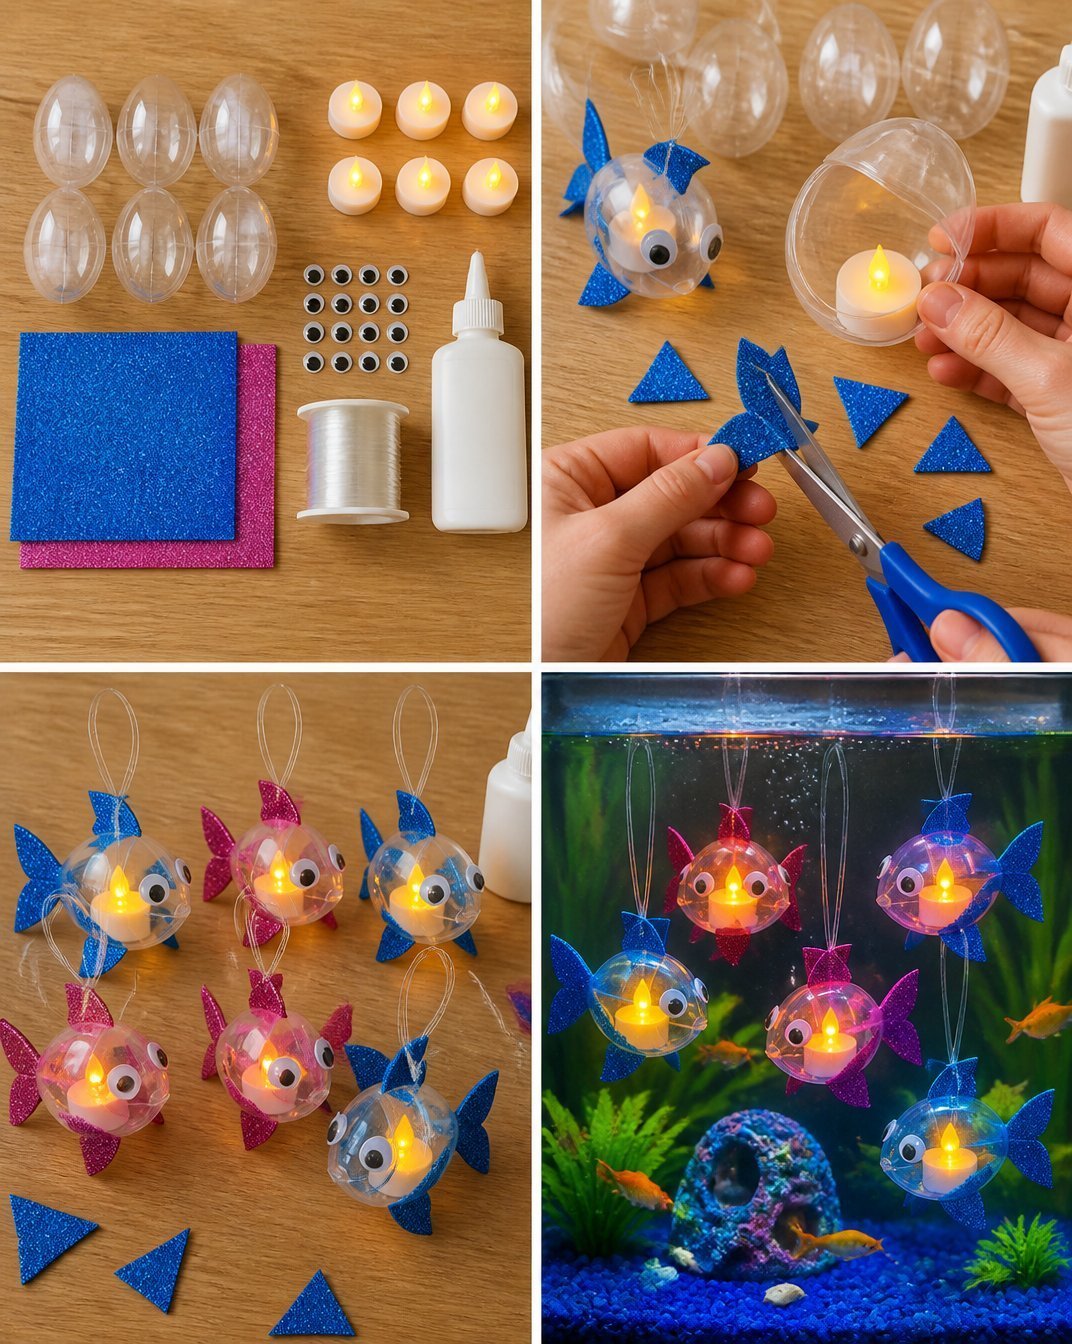
- 6 large plastic eggs
- 6 mini battery-operated LED tea lights
- 2 sheets of 8.5×11 inch glitter craft foam
- 12 small 0.5-inch googly eyes
- 1 spool of 10-yard clear craft string
- 1 bottle of 4-ounce craft glue
Take care when choosing the colors for your glitter craft foam. Bright hues can add life to the lanterns, while more muted tones can create a soft, gentle ambiance.
How to Make Glowing Fish Lanterns
Creating your own Glowing Fish Lanterns is as simple as following these few steps:
Step 1: Cut the Fins and Tail
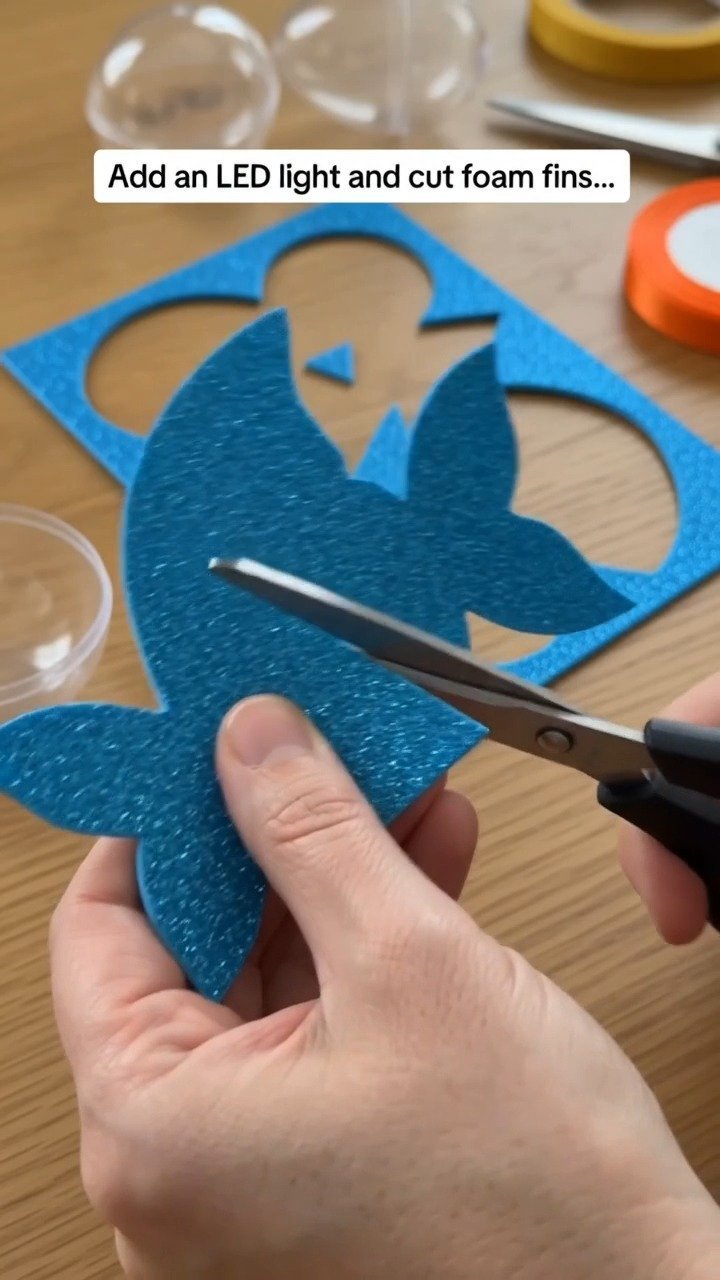
Begin by cutting small triangle fins and a fish tail from the glitter craft foam using your scissors. Keep the cuts simple to maintain elegance and ensure that the shapes are symmetrical for a more polished look.
Step 2: Prepare the LED Lights
Turn on each LED tea light and place one inside each plastic egg before shutting it. This step is fundamental, as the light creates the unique glow that brings your lantern to life.
Step 3: Apply the Fins and Eyes
Carefully glue the foam fins, tail, and two googly eyes onto the outer shell of each plastic egg. Take your time to position everything just right; small details can make a significant difference in the overall aesthetic.
Step 4: Finish with Clear String
Finally, tie a piece of clear craft string around the top section of the egg to create a suspension point for your lantern. A gentle knot will add a refined touch, completing your beautiful creation.
How to Style Your Finished Glowing Fish Lanterns
When it comes to displaying your finished Glowing Fish Lanterns, consider various settings. They can be wonderful for brightening up a mantle, adding charm to an entryway, or creating a welcoming atmosphere on your porch. Pair them with other rustic elements, such as wooden accents or greenery, to enhance their farmhouse character.
Maggie’s Tips for the Best Results
Dry-Fit Pieces: Before gluing, lay out your fins and eyes on the eggs to find the perfect placement without the risk of permanent mistakes.
Work in Layers: Allow the glue to set for a moment between steps to avoid any misalignments.
Allow Adequate Drying Time: Make sure all glue is thoroughly dried before moving your lanterns to avoid any accidental detachment.
Play with Color Combinations: Experiment with various glitter foam colors to create a unique look tailored to your decor.
Easy Ways to Customize This Project
Consider experimenting with different seasonal colors or themes! You might add fun embellishments like beads, ribbons, or even seasonal motifs like leaves for fall or flowers for spring. Metallic accents like gold or silver can give your lanterns an elegant flair, while a rustic wood grain could enhance the farmhouse feel. If you like the way colored light behaves, the glue butterfly suncatcher is a good next project.
Caring for Your Handmade Decor
When it comes to caring for your Glowing Fish Lanterns, it’s essential to keep them away from excessive moisture, which can warp the foam. For seasonal decor, store them in a cool, dry place, ideally wrapped in tissue paper to prevent scratching or damage. Since they’re made of plastic, they’re relatively durable, but handle them with care to maintain their charming appearance. Store them alongside your fireworks sensory bottles, which keep well in the same cool, dry spot.
FAQs About Glowing Fish Lanterns
Can I use real candles instead of LED lights?
It’s safer to use LED lights, especially if the lanterns will be placed in areas with flammable materials.
What if I don’t have all the materials?
You can substitute similar materials, like using different types of foam or shapes for fins.
How can I change the colors for different seasons?
Simply switch out the glitter craft foam for seasonal colors to freshen up your lanterns!
Are these lanterns suitable for outdoor use?
They work great outdoors, just ensure that the LED lights are adequately protected from rain.
What drying time should I expect for the glue?
Generally, allow at least 30 minutes for substantial drying, but check the glue’s instructions for specific guidance.
A Handmade Touch for the Season
Crafting Glowing Fish Lanterns is an exciting way to add warmth and personality to your home decor. As you enjoy the beautiful glow they provide, remember that the true value lies in the process of creating something with your own hands. Each piece tells a story, reflecting your dedication and love for handmade touches.
If you’re looking to explore more creative lighting options, consider checking out Hydroglow Marine Lights for unique ideas and inspirations.
Print
Glowing Fish Lanterns
- Total Time: 15 minutes
- Makes: 6 lanterns
Description
Create whimsical Glowing Fish Lanterns that brighten up your home decor, perfect for any season.
Materials
- 6 large plastic eggs
- 6 mini battery-operated LED tea lights
- 2 sheets of 8.5×11 inch glitter craft foam
- 12 small 0.5-inch googly eyes
- 1 spool of 10-yard clear craft string
- 1 bottle of 4-ounce craft glue
Instructions
- Cut the fins and tail from the glitter craft foam using scissors.
- Turn on each LED tea light and place one inside each plastic egg before shutting it.
- Glue the foam fins, tail, and two googly eyes onto the outer shell of each plastic egg.
- Tie a piece of clear craft string around the top section of the egg to create a suspension point for your lantern.
Notes
Feel free to customize your lanterns with different colors and designs for a seasonal touch.