

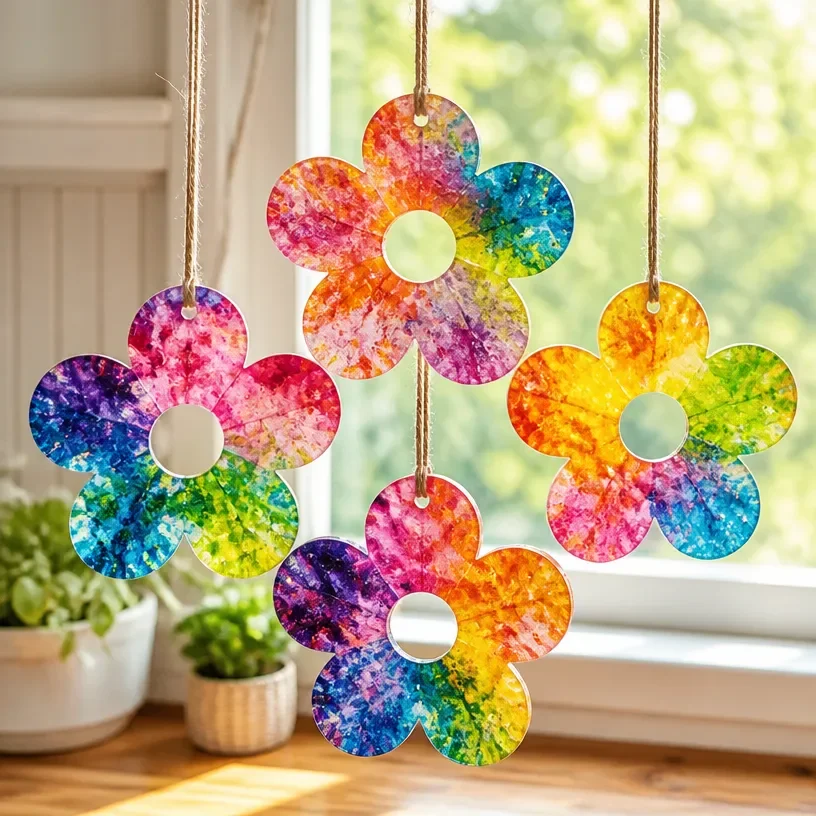
Melted Crayon Flower Easy Spring Art for Kids is a delightful and vibrant project perfect for welcoming the spring season. With just a few supplies, children can create beautiful artwork using melted crayon shavings that replicate the look of colorful flower petals. This easy DIY project not only sparks creativity but also allows kids to explore colors and shapes while having fun. You may also find Easy Diy Fall Leaf Suncatcher Garland For Kids useful.
Displaying this art piece can brighten up any room in the house, whether it’s hung in a child’s bedroom, showcased in a living room, or used as seasonal decoration. The vibrant hues and unique texture of the melted crayons make it a standout decor that can be enjoyed throughout the spring months. Overall, this project is approachable for home crafters, offering a rewarding experience without requiring extensive crafting skills. You may also find Easy Diy Paper Plate Fish Craft For Kids useful.
Why You’ll Love This Project
Making Melted Crayon Flower Easy Spring Art for Kids is a rewarding activity for both children and adults. The project requires minimal supplies, which can often be found around the house, making it cost-effective. It’s a versatile craft that allows kids to express their creativity freely, as they can choose any colors they like. You may also find Witch Hat Collages Easy Diy Halloween Craft For Kids useful.
This project shines in its simplicity. The melted crayon technique is forgiving, meaning that even if a child’s creation doesn’t come out perfectly, it will still look lovely. Additionally, the final piece can serve as a lovely addition to seasonal displays, such as a spring-themed mantel or kitchen decor.

Before You Start
Before diving into crafting, it’s important to envision what your finished piece should look like. The goal is to create a colorful flower design that stands out on paper. Pay special attention to the melting process, as it can yield various textures; thicker layers will result in a more striking look.
Prepare your workspace by covering surfaces with newspaper or a drop cloth to catch any crayon bits or wax. Ensure that the area is well-ventilated during the melting process, as heat can produce a faint smell.
“A handmade touch makes every home feel warmer.”
Materials and Supplies
Materials and Supplies
- Crayons (various colors)
- Wax paper
- A baking sheet
- Parchment paper
- Scissors
- An iron (for melting)
- A flower template (optional)
- Cardstock paper (to mount the flowers)
With the crayons, opt for vibrant colors to achieve that lively spring feel. Using a flower template can help guide shapes if desired. Be cautious with the iron and handle it safely, maintaining a clear workspace to prevent accidents.
How to Make Melted Crayon Flower Easy Spring Art for Kids
Step 1: Prepare the Crayons
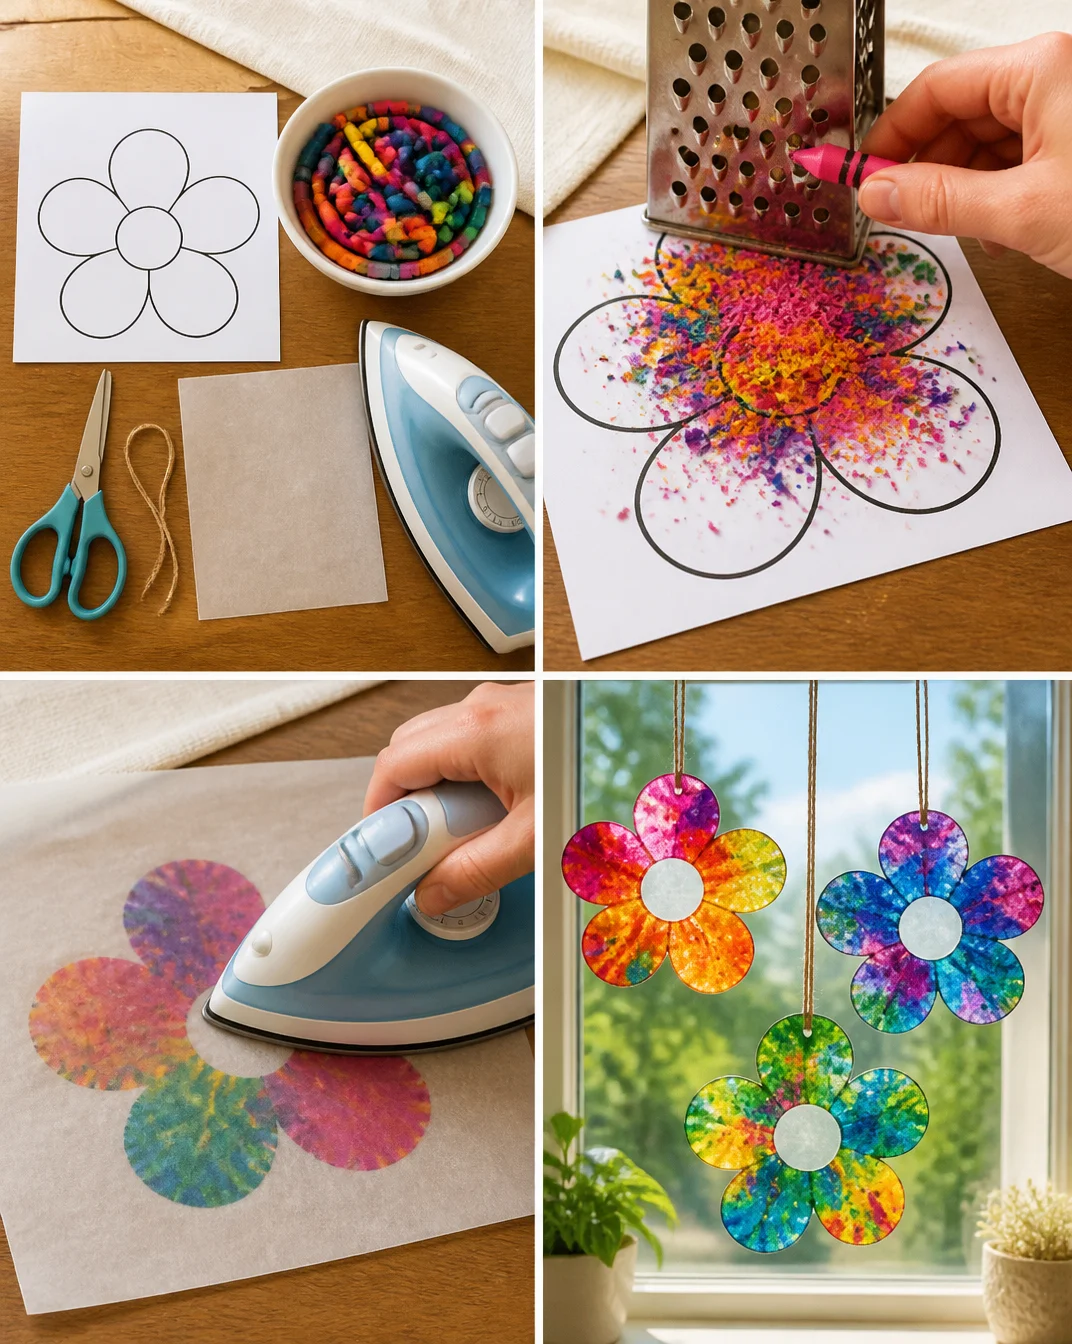
Begin by peeling the paper off the crayons. You can mix and match colors or stick to a specific palette. Once peeled, break the crayons into smaller pieces, roughly 1 inch long.
Step 2: Arrange the Crayon Pieces
On a baking sheet lined with parchment paper, arrange the crayon pieces in the shape of flowers. Feel free to explore various designs no two flowers have to be the same!
Step 3: Cover with Wax Paper
Once you are satisfied with the arrangement of the crayon pieces, cover them with wax paper. Make sure it is smooth and flat atop the crayons to avoid any lumps when melting.
Step 4: Melt the Crayons
Preheat your iron to a low setting. Carefully press the iron over the wax paper, moving it gently to melt the crayons. Keep checking to see when the crayons begin to blend together beautifully. The melting should only take a few minutes; too much heat can burn the crayon wax.
Step 5: Let It Cool
After achieving your desired melting effect, remove the iron and let the wax cool completely. This may take several minutes, so be patient. Once cooled, carefully peel back the wax paper to reveal your melted crayon art.
Step 6: Mount on Cardstock
Cut out the melted crayon shapes if you used a template, and then glue them onto a piece of cardstock paper to create a sturdy base. This step helps your melted flowers hold their shape and adds to the overall design.
How to Style Your Finished Melted Crayon Flower Easy Spring Art for Kids
Finding the right place to showcase your finished melted crayon art can enhance its beauty. Consider displaying it on a mantel or entryway table, where it can greet guests. It also looks lovely in a child’s bedroom or a playroom, adding a personal touch to the decor. You can even rotate these seasonal crafts on a gallery wall, allowing for creativity to shine through as the seasons change.
To complement the artwork, add natural elements like fresh or faux flowers in nearby vases. This adds a lovely touch of spring to your space, creating a warm and inviting atmosphere.

Maggie’s Tips for the Best Results
Dry-Fit Your Arrangement: Before melting, fit the crayons into your flower design to get a visual idea of how they will look.
Work in Layers: For a more textured look, consider layering different colors of crayons.
Monitor Melting: Keep a close eye while melting the crayon to avoid overdoing it and losing shape.
Patience is Key: Let the crayon flowers cool completely to maintain their integrity.
Easy Ways to Customize This Project
You can easily customize your melted crayon art by choosing specific color schemes that align with your home’s decor. Consider seasonal colors like pastels for spring or warmer tones for autumn. Adding embellishments like glitter, small beads, or painterly strokes after the crayon has cooled can also bring in personal touches.
Switch out the flower shapes by creating different templates think butterflies or simple geometric designs for variety in your crafting routine.
Caring for Your Handmade Decor
To keep your melted crayon artwork looking fresh, avoid placing it in direct sunlight, as prolonged exposure can fade the colors. If dust accumulates, gently wipe it with a soft cloth. You might also consider framing your artwork to protect it from damage while adding an elegant touch to its display.
FAQs About Melted Crayon Flower Easy Spring Art for Kids
1. Can I use broken crayons for this project?
Absolutely! Broken crayons work perfectly for this melted art project.
2. What alternatives can I use for the wax paper?
If you don’t have wax paper, parchment paper also works fine for covering the crayons.
3. How long does the melted crayon take to dry?
It typically cools within a few minutes, but it’s best to let it sit for around 15 minutes to ensure everything is set.
4. Can I take this project outside?
While the process is best done indoors for safety, the finished art can be displayed outside in shaded areas.
5. What should I do if I overheat the crayons?
If the wax burns, it may change colors. Adjust your iron’s heat or reduce the melting time for the next attempt.
Conclusion
Crafting the Melted Crayon Flower Easy Spring Art for Kids is not only enjoyable but also fosters creativity while being an accessible project for home crafters. Remember that the beauty of handmade art lies in its imperfections, as each piece tells its own story. To explore further inspiring projects, you might want to check out 11 Beautiful Spring Crafts for Kids, which offers a variety of creative ideas to brighten your home this season. Enjoy the process, and let each flower bloom in its unique way!
Print
Melted Crayon Flower Easy Spring Art for Kids
- Total Time: 15 minutes
- Makes: 1 art piece
Description
A delightful and vibrant project for kids to create beautiful flower art using melted crayon shavings.
Materials
- Crayons (various colors)
- Wax paper
- A baking sheet
- Parchment paper
- Scissors
- An iron (for melting)
- A flower template (optional)
- Cardstock paper (to mount the flowers)
Instructions
- Prepare the crayons by peeling off the paper and breaking them into smaller pieces.
- Arrange the crayon pieces on a baking sheet lined with parchment paper in the shape of flowers.
- Cover the arrangement with wax paper, ensuring it is smooth and flat.
- Melt the crayons by gently pressing an iron over the wax paper at a low setting.
- Let the melted crayon art cool completely before removing the wax paper.
- Mount the melted crayon shapes onto a piece of cardstock paper to create a sturdy base.
Notes
Use vibrant crayon colors for a lively spring feel. Layering colors can add texture.