

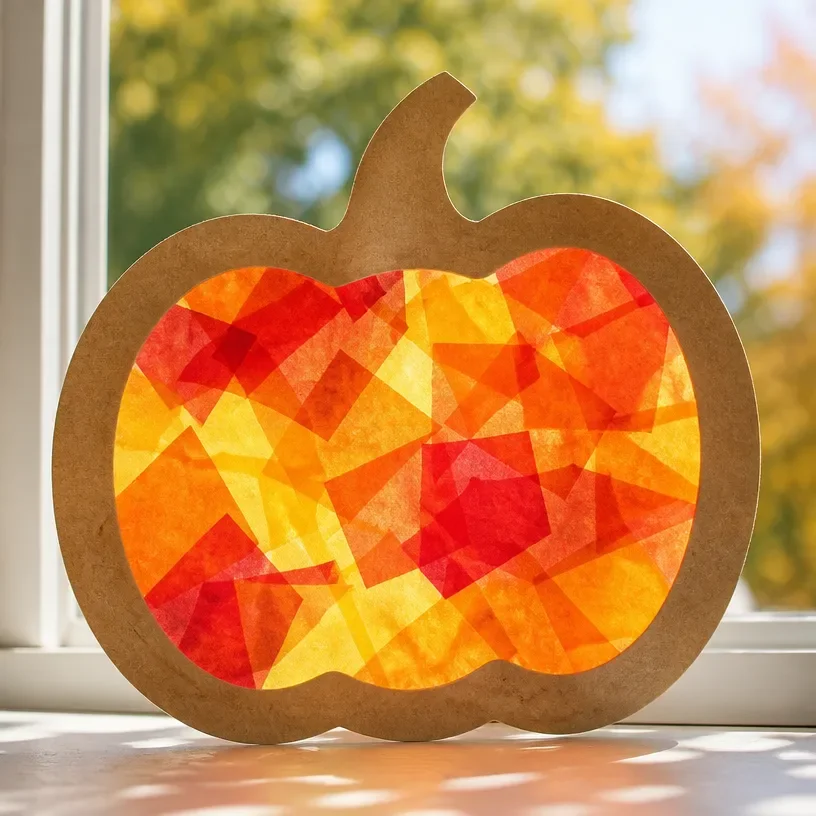
Fall DIY Translucent Tissue Paper Pumpkin Window Decor You may also find Diy Fall Window Suncatchers Colorful Pumpkin Theme useful.
Creating a warm and inviting atmosphere in your home during the fall season can be as simple as adding a few handmade touches. One delightful project to consider is making Fall DIY Translucent Tissue Paper Pumpkin Window Decor. This craft not only adds a pop of color to your windows but also allows sunlight to create a beautiful warm glow in your space. It’s an approachable project that even beginners can enjoy, transforming common materials into something special. You may also find Diy Sparkly Rainbow Pumpkin Decor Fall Halloween useful.
These translucent pumpkins are perfect for hanging in windows, displaying on shelves, or even using as a festive centerpiece. They bring a touch of seasonal charm to your home without requiring extensive crafting skills or expensive supplies. Plus, the colors and shapes can be customized to fit your unique style!
Why You’ll Love This Project
There are many reasons to enjoy making these cheerful paper pumpkins. First, they are lightweight and easy to assemble, making them a fantastic option for crafters of all skill levels. The materials required are inexpensive and often already found in your home, which makes this project both budget-friendly and sustainable.
These pumpkins can be displayed in a variety of places, whether in your front windows, on a fall-themed mantel, or as part of your dining table decor. They can easily complement other decorations you may have, such as a rustic wreath or seasonal floral arrangements. If you’re looking for more inspiration, consider checking out vibrant autumn pumpkin suncatchers to expand your crafting ideas.

Before You Start
Before diving into the crafting process, it’s important to visualize what your finished pumpkins will look like. The translucent tissue paper allows light to filter through, giving your decorations an ethereal effect. Take a moment to determine how large you want your pumpkins to be and what colors you’ll be using for your paper. This planning stage will make the assembly process smoother and more enjoyable.
Make sure to prepare your workspace by laying down a protective cover and organizing your materials. You may also consider having a few extra sheets of tissue paper in case of mistakes.
“A handmade touch makes every home feel warmer.”
Materials and Supplies
Materials and Supplies
- Colored tissue paper (orange, green, yellow)
- Scissors
- Water-based glue or Mod Podge
- A paintbrush (for applying glue)
- String or fishing line (for hanging)
- Black marker (for facial features)
- Pencil
- Bowl of water (for wetting the tissue)
It’s important to choose good-quality tissue paper to ensure your pumpkins look vibrant and hold up over time. The colors can be as bright or muted as you prefer, giving you the freedom to customize according to your decor style.
How to Make Fall DIY Translucent Tissue Paper Pumpkin Window Decor
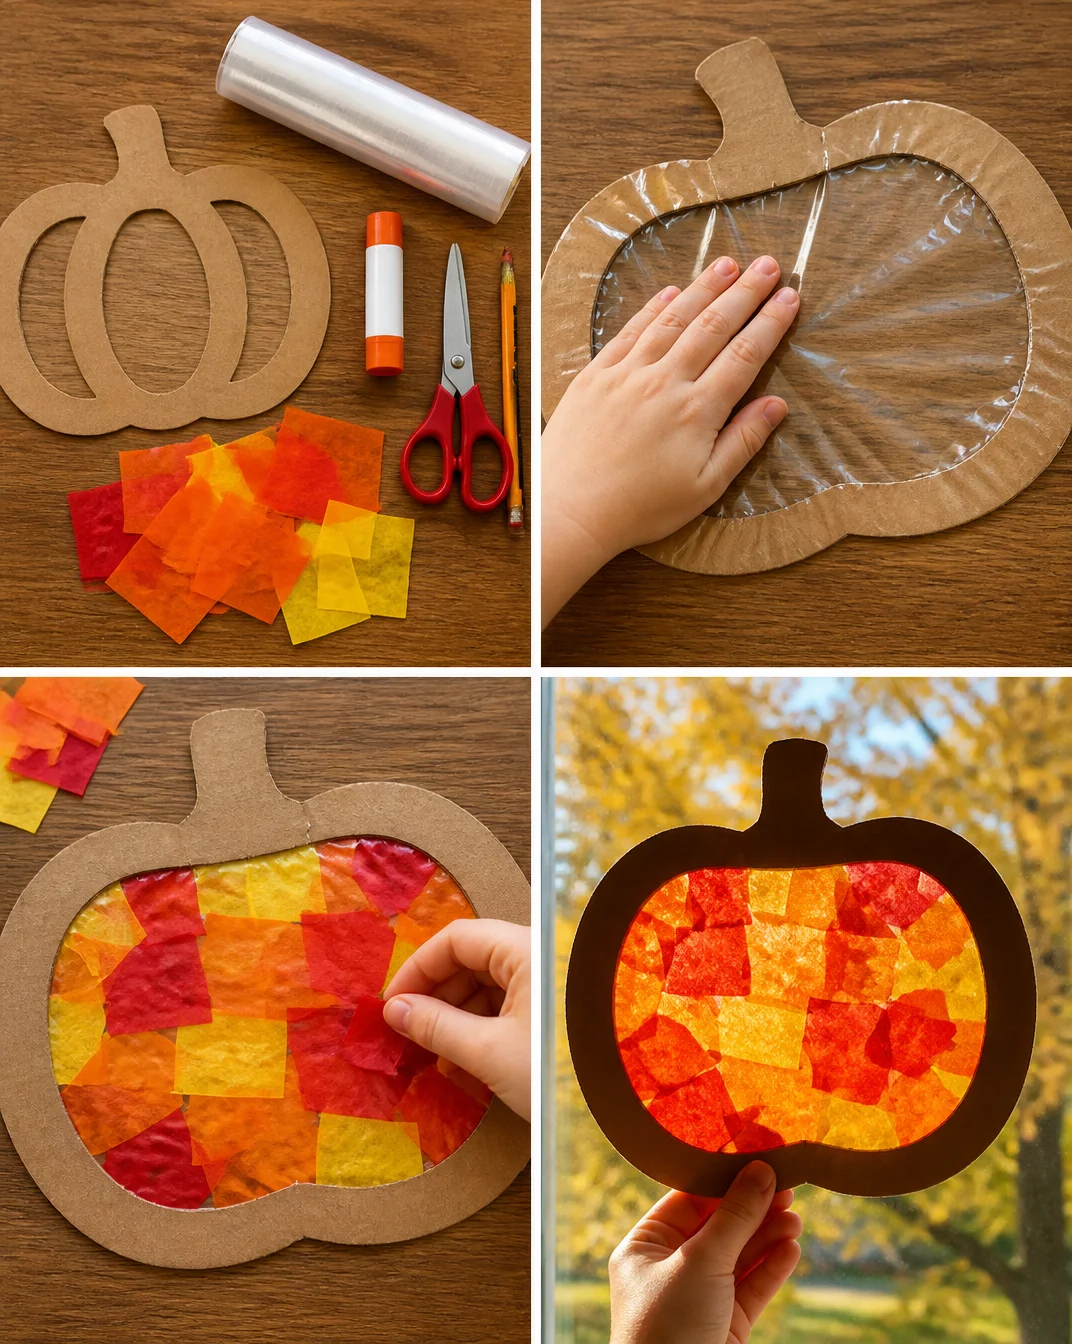
Cut the Tissue Paper: Start by cutting your tissue paper into squares that are approximately 5×5 inches. You can mix colors to add depth and interest to your pumpkins. Aim for about 20-30 squares per pumpkin.
Prepare the Pumpkin Shape: Create a simple pumpkin shape using a pencil by drawing a rounded form on a piece of sturdy paper (like cardstock). This will serve as the base to adhere your tissue paper pieces.
Apply Glue: With your paintbrush, apply a thin layer of glue onto a small section of your pumpkin shape.
Place the Tissue Paper: Carefully place a tissue paper square on top of the glue, pressing it down gently. Continue this process, overlapping the edges of the tissue as you move around the pumpkin until the whole surface is covered.
Layer and Dry: Repeat the gluing process by adding additional layers of tissue, allowing each layer to dry as you go. This will strengthen the final product and enhance the color.
Add Facial Features: Once the pumpkin is dry, use a black marker to draw a face or any design you like!
Create a Hanging Mechanism: Cut a length of string or fishing line, and glue one end to the top of your pumpkin. Allow it to dry completely before hanging.
Display: Hang your completed pumpkins in your windows or display them in your home!
How to Style Your Finished Fall DIY Translucent Tissue Paper Pumpkin Window Decor
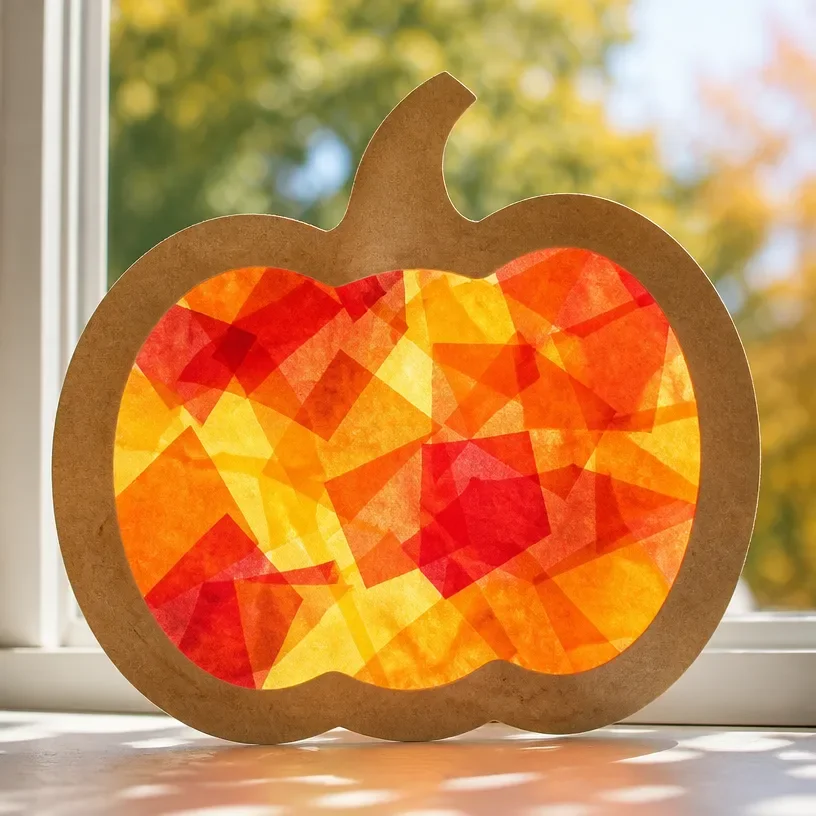
Now that you’ve created your translucent pumpkins, it’s time to think about styling them in your home. These pumpkins look beautiful when placed in front of windows where light can shine through them, casting colorful reflections around the room. You can also group several pumpkins of varying sizes and colors on a mantel or as a stunning centerpiece on your dining table.
For a touch of added charm, consider pairing your pumpkins with other seasonal decorations, such as small bales of hay, faux leaves, or rustic candle holders. This approach creates a warm and inviting display that welcomes autumn into your home.
Maggie’s Tips for the Best Results
- Dry-Fit Pieces: Before applying glue, lay out your tissue squares on the pumpkin shape to plan your design.
- Use Layers: Multiple layers of tissue create a more vibrant and durable pumpkin.
- Test Glue: If unsure, do a test on a scrap piece to see how the tissue reacts to glue.
- Plan Your String: Make sure your hanging method is secure enough to hold the weight of the tissue paper.
- Practice Placement: Consider where the completed pumpkin will hang to ensure the string is at the right length.
Easy Ways to Customize This Project
You can easily customize your pumpkins by altering colors or adding different embellishments. Choose richer shades of green or burgundy for a more sophisticated look, or you could go for pastel colors for a sweet, lighthearted feel. Adding glitter to the glue can give your pumpkins a sparkling effect that catches the light just right. You could also incorporate small wooden stems or faux greenery on top for added detail.
How to Pack This Project Away for Next Season
At the end of the season, carefully pack your pumpkins in a sturdy box or container. It’s best to separate them with tissue paper or fabric to avoid crushing any shapes. Store them in a cool, dry space until next autumn, so they remain ready to fill your home with festive cheer once again.
FAQs About Fall DIY Translucent Tissue Paper Pumpkin Window Decor
Can I use thicker paper instead of tissue?
Using thicker paper may not give the same translucent effect but could work if you cut it finely and plan the design well.
What if I don’t have colored glue?
Clear glue works just as well, just be sure to let the colors shine through.
How long does it take for the glue to dry?
Generally, it will take about 20-30 minutes for the glue to dry, but allow for longer if using multiple layers.
Is it okay to display these pumpkins outdoors?
While they are suitable for indoor displays, it’s best to keep them out of rainy conditions as wetness can damage the tissue.
Can I use real pumpkin stems?
Yes, real stems can add a lovely natural touch. Just ensure they are securely attached.
A Handmade Touch for the Season
Creating your own Fall DIY Translucent Tissue Paper Pumpkin Window Decor is a wonderful way to bring the beauty of the season into your home. Each pumpkin serves as a warm reminder of the fall and the joy of crafting. Embrace the creative process, and let the imperfections be part of the charm.
If you’re looking for more fun fall crafts, check out this resource for pumpkin stained glass ideas that kids and adults alike can enjoy!
Print
Fall DIY Translucent Tissue Paper Pumpkin Window Decor
- Total Time: 45 minutes
- Makes: 4 pumpkins
Description
A delightful and simple craft project to create colorful translucent pumpkin decorations for your windows this fall.
Materials
- Colored tissue paper (orange, green, yellow)
- Scissors
- Water-based glue or Mod Podge
- A paintbrush (for applying glue)
- String or fishing line (for hanging)
- Black marker (for facial features)
- Pencil
- Bowl of water (for wetting the tissue)
Instructions
- Cut the tissue paper into squares that are approximately 5×5 inches.
- Prepare the pumpkin shape using a pencil by drawing a rounded form on a piece of sturdy paper.
- Apply glue onto a small section of your pumpkin shape with your paintbrush.
- Place a tissue paper square on top of the glue and press it down gently.
- Layer additional pieces of tissue, overlapping edges until covered.
- Add facial features with a black marker once dry.
- Create a hanging mechanism by cutting a length of string and gluing it to the top of the pumpkin.
- Display your pumpkins in windows or around your home.
Notes
Use good-quality tissue paper for vibrant colors and durability. Consider adding embellishments for customization.