


DIY Flower Globe Ornament: Easy Hanging Decor Tutorial You may also find Diy Color Changing Butterfly Jar Home Decor useful.
Creating your very own DIY Flower Globe Ornament is a delightful way to add charm and personality to your seasonal decor. This easy hanging ornament combines the beauty of floral accents with the whimsical qualities of a globe, making it perfect for any occasion. Whether you’re dressing up your home for the holidays or providing a bright touch to your summer decorations, this project is both approachable and satisfying for any home crafter. You may also find Easy Diy Glass Bead Suncatchers Window Decor useful.
Imagine a lovely glass globe filled with colorful faux flowers, gently swaying from a ribbon in your living room or on your porch. This ornament offers a rustic yet modern farmhouse appeal, bringing warmth to any space. Plus, it’s a fantastic way to express creativity without the need for expensive materials. If you’re interested in similar decorative projects, you might also enjoy making flower magnets that complement this globe beautifully.
Why You’ll Love This Project
The DIY Flower Globe Ornament is a lovely project for several reasons. For one, it emphasizes the joy of crafting with simple and reusable materials. You can often find these supplies around your home or purchase them inexpensively, making it budget-friendly. Its seasonal versatility allows it to transition beautifully from spring to winter by merely changing the flowers or colors used.
This project also invites customization; you can choose your favorite blooms, ribbon, and finishing touches to create a unique piece. Whether placed on your mantel, hung in your entryway, or gracing your dining table, it becomes a cheerful focal point in any room.

Before You Start
Before diving into the crafting, envision how your finished Flower Globe Ornament will look. It should encapsulate the vibrancy of fresh blooms and the charm of handcrafted decor. Pay special attention to the balance of flowers and any decorative elements you wish to include. Preparing your workspace helps streamline the process and minimizes mess.
“A handmade touch makes every home feel warmer.”
Materials and Supplies
Materials and Supplies
- A clear glass globe or jar
- Faux flowers (your choice of colors)
- Decorative ribbon (color or texture of your choice)
- Hot glue gun and glue sticks
- Scissors
- Optional: floral foam to anchor the flowers
When selecting flowers, consider their flexibility and how well they fit into your chosen globe size. A clear glass globe showcases the blooms beautifully, while a colored glass version can add a unique twist.
How to Make DIY Flower Globe Ornament: Easy Hanging Decor Tutorial
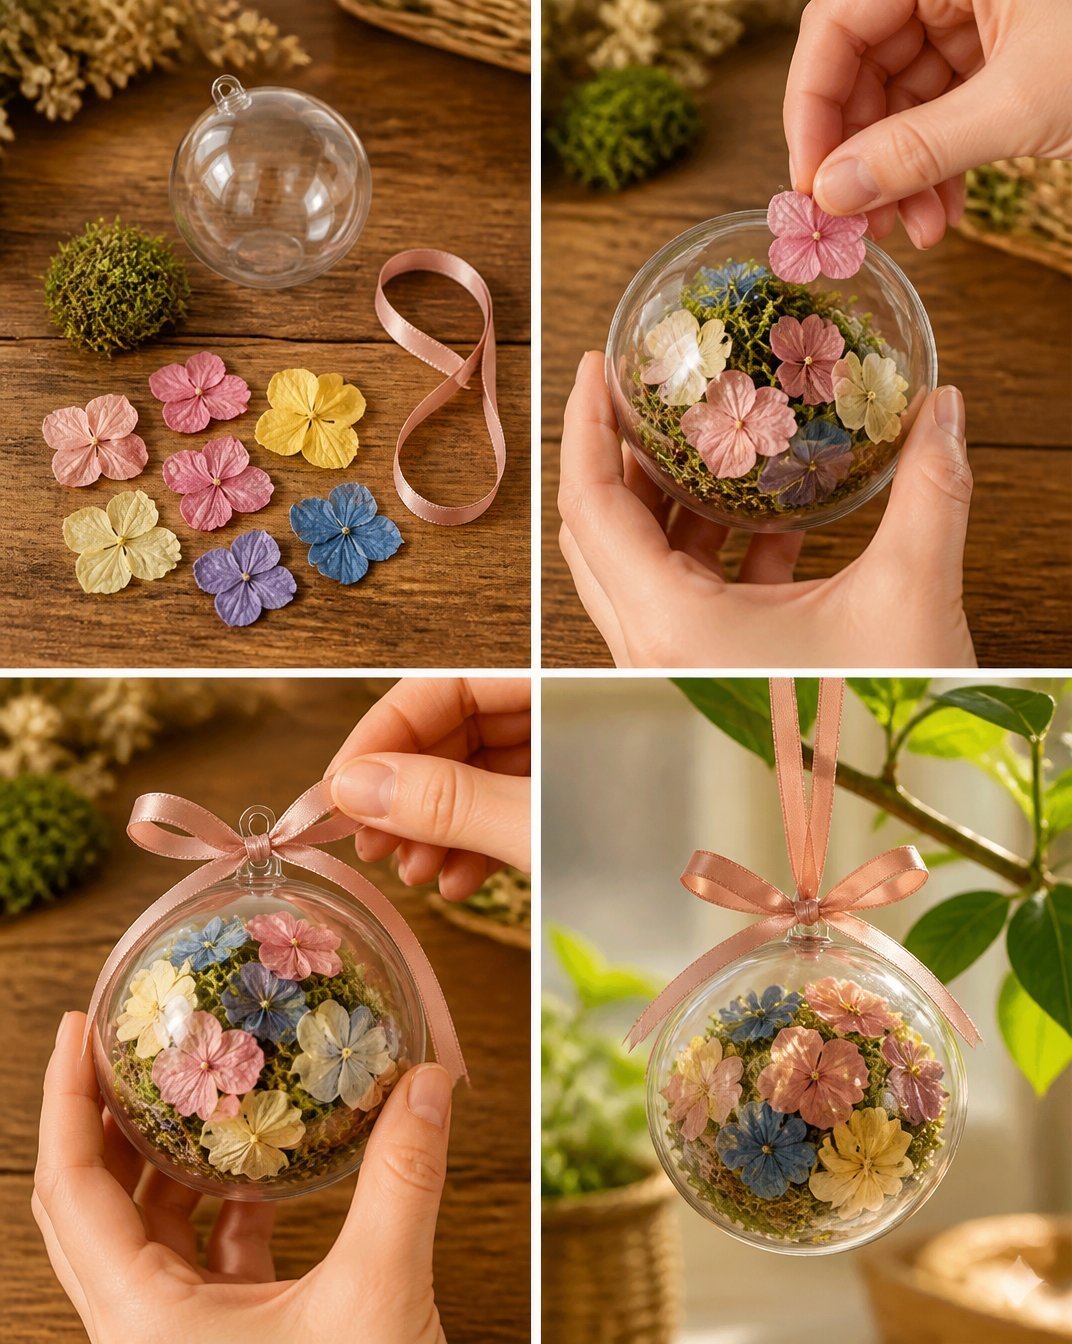
Step 1: Prepare the Globe
Begin by ensuring your glass globe is clean and dry. If you’re using a jar, remove any labels. This clean slate will allow the flowers to shine and the ornament to appear polished.
Step 2: Arrange the Flowers
Before gluing anything down, dry-fit your faux flowers inside the globe. Play with the arrangement until you achieve your desired look. Keep in mind the balance of colors and shapes as you fill the space. Once you’re happy, secure the flowers with hot glue.
Step 3: Add Glue and Secure Flowers
After achieving your ideal arrangement, carefully glue the flowers into place. Start with the larger blooms, then fill in gaps with smaller flowers. Work gradually to ensure stability and an organic look. Remember to let the glue cool and set.
Step 4: Attach the Ribbon
Once the flowers are secure, take your decorative ribbon and cut a length suitable for hanging. Attach one end of the ribbon to the top of the globe with hot glue or by threading it through a top opening, if available. Create a loop for hanging that’s strong enough to support the weight of the globe.
Step 5: Display Your Ornament
Finally, hang your Flower Globe Ornament in your chosen location. Consider placing it in a spot with good lighting to highlight the colors and textures, such as a window or entryway.
How to Style Your Finished DIY Flower Globe Ornament
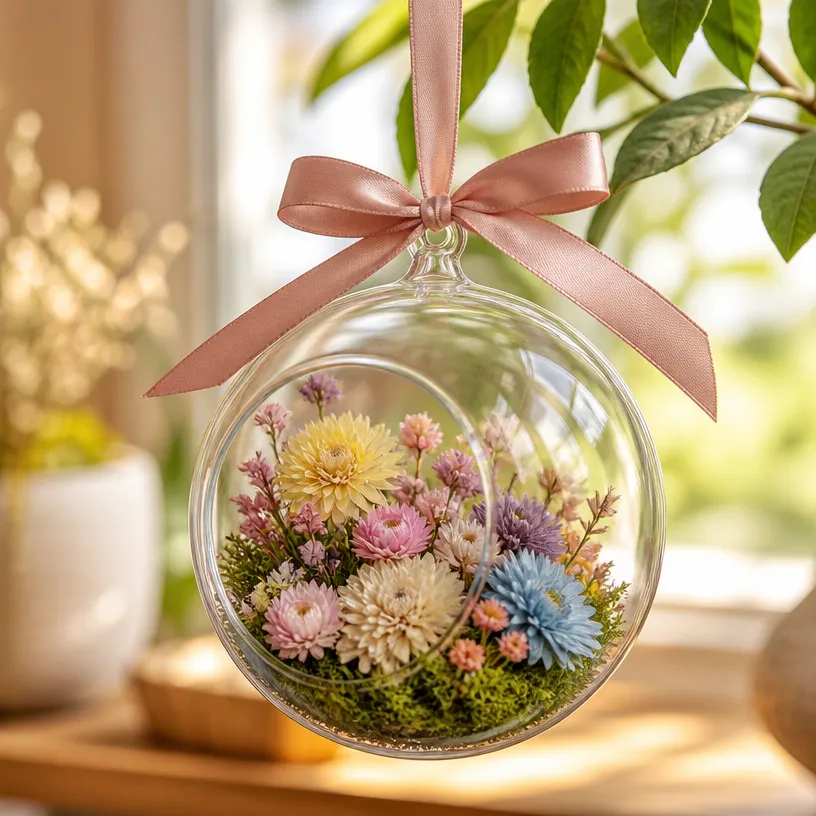
A finished DIY Flower Globe Ornament adds a delightful touch to various settings. Consider hanging it from the ceiling in your kitchen or placing it on a console table. It can also look lovely when grouped with other seasonal decorations on a shelf or mantel.
Keep the surrounding decor simple to let your ornament stand out. For example, pairing it with natural wood accents or white candles can create a cozy, inviting atmosphere that feels like home.
Maggie’s Tips for the Best Results
- Dry-Fit Pieces Before Gluing: Always arrange flowers before committing to glue. This step ensures you’re happy with the look.
- Work in Layers: Aim for depth by using flowers of varying heights and shapes, building from larger pieces to smaller ones.
- Allow Glue to Cool: Give ample time for the glue to set; this prevents accidental shifts in your arrangement.
- Keep Ribbon Proportional: Ensure your ribbon length complements your globe size, creating an appealing visual balance.
- Preserve Natural Texture: Use a mix of smooth and textured elements to keep the design interesting.
Easy Ways to Customize This Project
One of the joys of making your Flower Globe Ornament is the ability to customize it. Consider varying the colors of flowers based on the season think warm hues for fall, pastel tones for spring, or rich reds and greens for holiday decor. You could also use beads or natural twine to wrap around the ribbon for an added rustic touch. Experiment with different styles by adding personalized touches like handwritten tags or family names for a unique holiday gift.
How to Store Your Wreath
To keep your Flower Globe Ornament looking its best, store it in a cool, dry place away from direct sunlight. If it contains real greenery or fragile components, wrap it carefully in bubble wrap or tissue paper before storing. This precaution will help maintain its form and beauty for years to come.
FAQs About DIY Flower Globe Ornament: Easy Hanging Decor Tutorial
1. Can I use real flowers instead of faux?
Yes, you can use real flowers, but they will need regular care, and the ornament might not last as long.
2. What size globe works best for this project?
Smaller globes (4-6 inches) work best for this project.
3. How long will the flowers last?
Faux flowers will last indefinitely, while real ones will require ongoing maintenance.
4. Can I hang this ornament outside?
It is best to hang your ornament indoors to protect it from the elements unless the materials used are specifically designed for outdoor use.
A Handmade Touch for the Season
Crafting your own Flower Globe Ornament is an enjoyable way to express your style while adding a handmade touch to your decor. Each ornament not only beautifies your space but also serves as a reminder of the joy that comes from creating with your hands. Embrace the notion that decor doesn’t need to be perfect; it’s the love and care put into handmade projects that create a home full of warmth and character.
For a charming winter project that will elevate your holiday celebrations, check out this delightful DIY Snow Globe Ornament with Vintage Cars & Bottlebrush Trees.
Print
DIY Flower Globe Ornament
- Total Time: 15 minutes
- Makes: 1 ornament
Description
Create a beautiful and customizable DIY Flower Globe Ornament to enhance your seasonal decor with ease.
Materials
- A clear glass globe or jar
- Faux flowers (your choice of colors)
- Decorative ribbon (color or texture of your choice)
- Hot glue gun and glue sticks
- Scissors
- Optional: floral foam to anchor the flowers
Instructions
- Prepare the globe by ensuring it is clean and dry.
- Arrange the faux flowers inside the globe before gluing.
- Add glue and secure the flowers into place, starting with larger blooms.
- Attach the decorative ribbon to the top of the globe for hanging.
- Display your ornament in a well-lit location to highlight its beauty.
Notes
Use a mix of colors based on the season for a personalized touch. Store in a cool, dry place to maintain its beauty.