

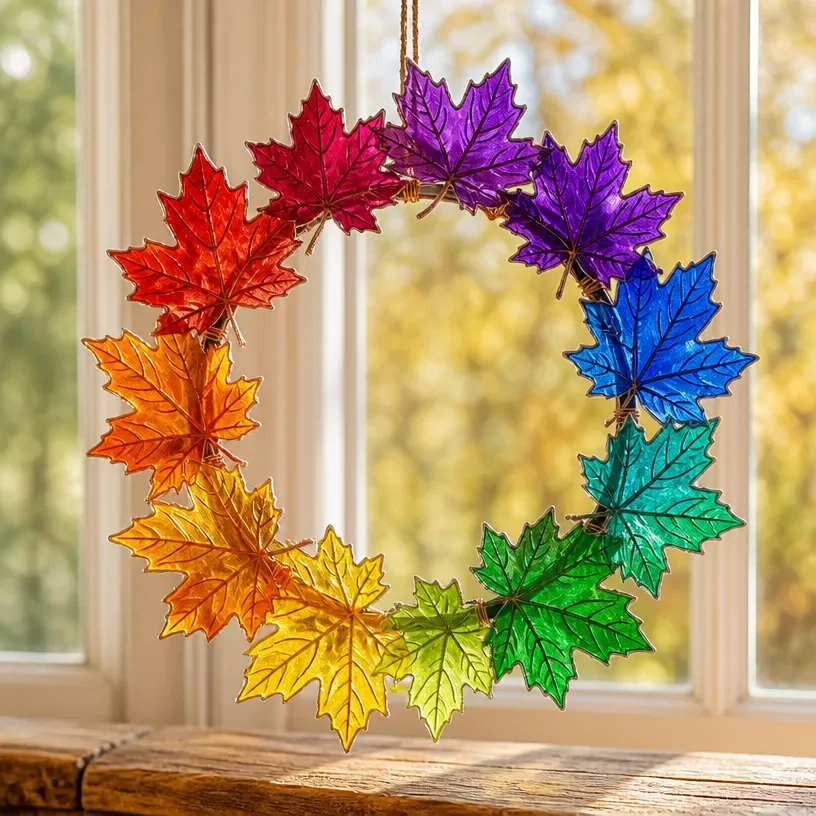
Rainbow Stained-Glass Fall Wreath How to Make You may also find Wreath Rainbow Spiderweb Paper Plate Tutorial useful.
Creating a Rainbow Stained-Glass Fall Wreath is an expressive way to celebrate the beauty of autumn and add a unique touch to your home decor. This DIY project incorporates vibrant colors reminiscent of stained glass, capturing the warm, cozy spirit of the season. Display it on your front door, or hang it in an entryway to greet friends and family with a burst of cheerful color. It’s an approachable craft for anyone keen on bringing a handmade element into their home. You may also find Autumn Leaf Wreath Diy Rainbow Puppy Paw Prints useful.
As you embark on this project, you’ll find that the process not only allows for creativity but also creates a stunning decoration that can last through the season. With just a few materials and steps, you can make something truly special. For a related crafting idea, consider trying out this stained glass window DIY project.
Why You’ll Love This Project
There are many reasons to love making a Rainbow Stained-Glass Fall Wreath. The construction is straightforward, making it accessible even for those who might be new to crafting. Using inexpensive or reusable materials helps keep costs low, while the seasonal versatility allows the wreath to be displayed throughout autumn.
This project has a charm that reflects farmhouse character and can be customized to fit your style just perfectly. Imagine it brightening up your mantel, enhancing your porch decor, or welcoming guests as they arrive at your door. You’ll appreciate the satisfaction of creating something unique and beautiful that truly enhances your home.

Before You Start
Before you dive into the fun of assembling your wreath, take a moment to visualize the finished piece. Picture the colorful stained-glass effect harmoniously blending with the warm hues of fall. The most critical part to pay attention to is the placement of the colors and shapes this will give your wreath its stunning look.
Prepare your workspace by gathering all your materials within reach. This will make assembly smoother, allowing you to focus on making your creation come to life.
“A handmade touch makes every home feel warmer.”
Materials and Supplies
Materials and Supplies
- A grapevine wreath form (14 inches)
- Colored tissue paper in autumn shades (red, orange, yellow, green)
- Clear craft glue
- A sponge brush
- Mod Podge (matte finish)
- Scissors
- Ribbon for hanging (burlap or any preferred style)
- Additional decorative elements (mini pumpkins, faux leaves, etc.)
When selecting tissue paper, look for vibrant colors that evoke the essence of autumn. The glue needs to be strong enough to adhere the paper securely; a good quality craft glue will do the trick. The choice of ribbon can also reflect your personal style opt for something that complements the colors of your wreath.
How to Make Rainbow Stained-Glass Fall Wreath
Step 1: Prepare the Wreath Form
Start by prepping your grapevine wreath form. If desired, you can soak it in water for a few minutes to make it easier to work with and more flexible. This step is optional but can help if your wreath is particularly dry.
Step 2: Cut the Tissue Paper
Next, cut your colored tissue paper into various shapes squares, triangles, or even leaves. The shapes can be uniform or random; this project is all about what speaks to your creativity.
Step 3: Apply Glue and Tissue Paper
Take your sponge brush and apply a thin layer of clear craft glue onto a section of your wreath form. Place your first piece of tissue paper over the glue, gently smoothing it down. Repeat this process, overlapping pieces slightly as you go, until the entire surface of the wreath is covered.
Step 4: Seal with Mod Podge
Once all your tissue paper is applied, use the sponge brush to cover the entire wreath with a layer of Mod Podge. This will help seal the pieces and give your wreath a cohesive look while enhancing the stained-glass effect. Let it dry completely.
Step 5: Add Decorative Elements
After your wreath is dry, you can enhance it with mini pumpkins, faux leaves, or any other decorative pieces you’ve chosen. Use a hot glue gun for a secure attachment. Feel free to arrange them to create a balanced look.
Step 6: Attach the Ribbon
Finally, cut a piece of ribbon and tie it to a section of the wreath, creating a loop for hanging. Position the ribbon so that it complements the overall design of the wreath.
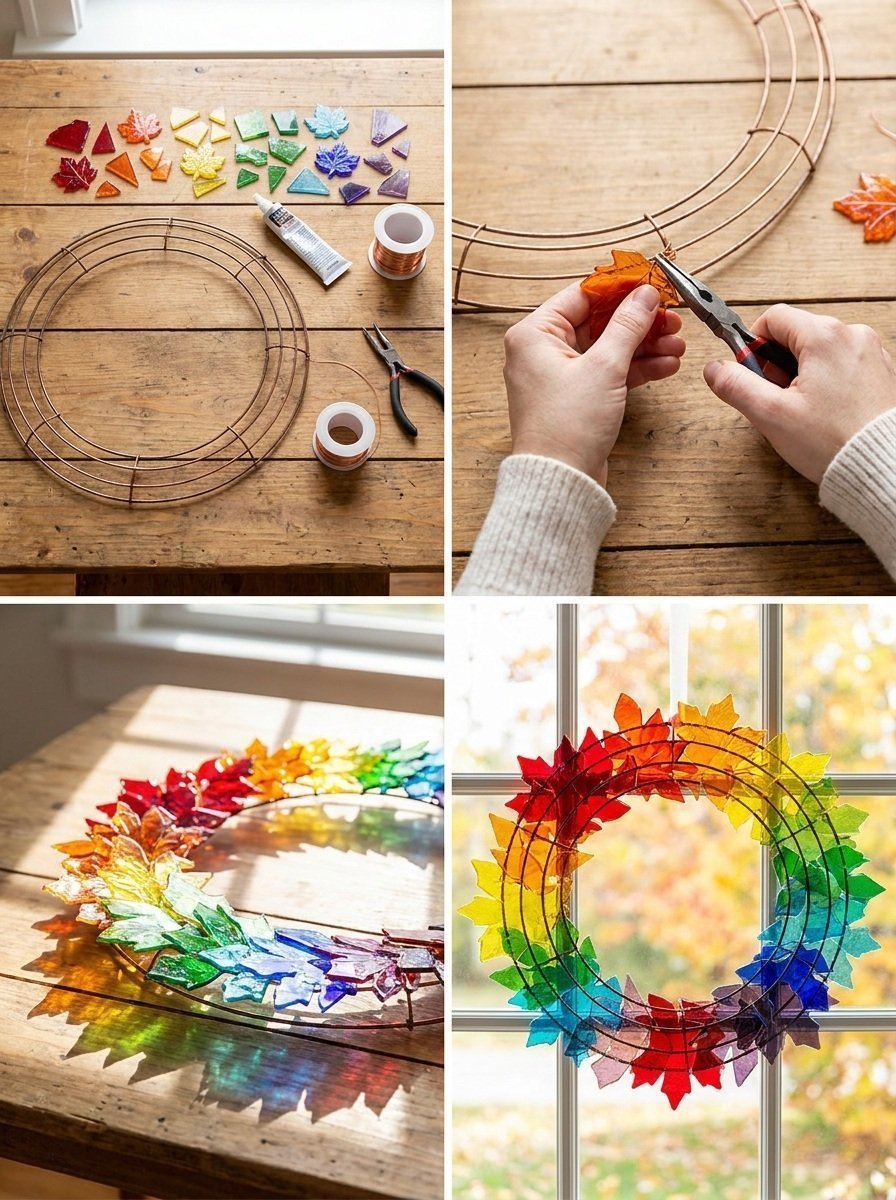
How to Style Your Finished Rainbow Stained-Glass Fall Wreath
Now that you’ve crafted your Rainbow Stained-Glass Fall Wreath, it’s time to display it! This decorative piece can enhance various areas in your home, such as the front door or your entryway, serving as a welcoming element for visitors. You could also place it on your mantel to celebrate the season or use it as part of your dining table centerpiece.
Keep your styling simple. Consider pairing it with other autumn decorations such as candles, small bowls of seasonal fruits, or other natural elements that resonate with the warm hues of fall. Emphasizing a warm and welcoming feel is key.
Maggie’s Tips for the Best Results
- Dry-fit all pieces before gluing to ensure a pleasing arrangement.
- Work in layers with your tissue paper to create depth in color.
- Allow each layer of glue or Mod Podge to dry fully before adding the next for a smooth finish.
- Balance any additional decorative elements with the main design to avoid clutter.
- Keep ribbon tails proportional to the size of your wreath for an aesthetically pleasing look.
Easy Ways to Customize This Project
There are many delightful ways to customize your Rainbow Stained-Glass Fall Wreath! You can experiment with seasonal colors inviting deep burgundies or forest greens as alternative options. Try different types of ribbons, or incorporate various types of faux greenery.
If you’d like to add a personal touch, consider including embellishments like beads or small wooden signs that display seasonal sentiments. The beauty of this project is that it can reflect your unique style through simple adjustments.
How to Store Your Wreath
At the end of the season, storing your wreath properly will help it maintain its beautiful appearance. Avoid exposing it to direct sunlight and moisture. If possible, tuck it into a box that allows it to maintain its shape without being crushed. Keep it in a temperature-controlled area to prevent damage.
FAQs About Rainbow Stained-Glass Fall Wreath How to Make
Can I use real leaves instead of tissue paper?
Real leaves would not provide the same stained-glass effect and may wilt, but they can be used creatively as embellishments.
What if I want a smaller wreath?
You can adjust the size of your grapevine wreath form, simply by selecting a smaller diameter.
Is this wreath suitable for outdoor use?
As it is made with tissue paper, it is best for indoor displays. If you want the same concept outdoors, consider using painted glass or outdoor-safe materials.
What other colors work for this project?
Feel free to experiment with any autumn shades that resonate with you! Deep oranges, burnt sienna, and even metallics could work beautifully.
A Handmade Touch for the Season
Bringing the Rainbow Stained-Glass Fall Wreath into your home is not just about decorating it’s about creating joy and warmth through the beauty of handmade crafts. The process allows you to express your individuality and bring family traditions to life. Remember, a handmade project celebrates its imperfections, making every wreath unique and meaningful.
Whether it adorns your door or enhances your entryway, this wreath will remind everyone that home is where the heart is and where creativity flourishes.
Conclusion
To find those remarkable elements that can elevate your fall decorations further, check out this charming autumn-themed bear wreath available online. Happy crafting!
Print
Rainbow Stained-Glass Fall Wreath
- Total Time: 45 minutes
- Makes: 1 wreath
Description
Create a vibrant and unique Rainbow Stained-Glass Fall Wreath to celebrate the beauty of autumn and enhance your home decor.
Materials
- 1 grapevine wreath form (14 inches)
- Colored tissue paper in autumn shades (red, orange, yellow, green)
- Clear craft glue
- 1 sponge brush
- Mod Podge (matte finish)
- Scissors
- Ribbon for hanging (burlap or preferred style)
- Additional decorative elements (mini pumpkins, faux leaves, etc.)
Instructions
- Prepare your grapevine wreath form, optionally soaking it in water for flexibility.
- Cut colored tissue paper into shapes like squares and triangles.
- Apply a thin layer of clear craft glue onto a section of the wreath form and place the tissue paper over it, smoothing it down.
- Seal the entire wreath with a layer of Mod Podge and let it dry completely.
- Add decorative elements like mini pumpkins or faux leaves using a hot glue gun.
- Attach a piece of ribbon to create a loop for hanging.
Notes
Consider dry-fitting pieces before gluing and work in layers for depth. Customize your wreath with additional colors and embellishments.